The right software allows you to easily distinguish between metallic and nonmetallic particles.
Many international standards including ISO 16232 and ISO 4407, as well as internal company standards, require the differentiation of wear debris particles according to a variety of parameters. Of particular importance is distinguishing between metallic and nonmetallic particles. Using a microscope and a cleanliness inspection software package, technicians can effectively use polarized light to identify metallic and nonmetallic particles, thus determining if a machined part will ultimately be subject to excessive wear or failure.
The importance of wear debris analysis in machined part performance
The problem that many machined part manufacturers face is the presence of particulates left behind from the manufacturing process or their appearance over time as parts wear down. This accumulation of wear debris, which can range in size from 3 µm to 1000 µm, can interfere with the operation of a machined part or, alternatively, accelerate its wear as time passes. How can you determine whether you have such a problem?
 |
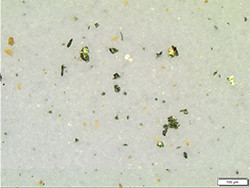
| Example of metallic particles; steel chips, aluminum oxide, cast iron, etc. |
The established protocol is to flush the machined part with a rinse fluid and collect the particulates in liquid phase. This collection is achieved by rinsing, pressure spraying, ultrasonic rinsing, or wiping. The particles are then transferred onto filter paper by vacuum filtration and then reviewed under a microscope. Microscopic imaging of the filter paper enables the QA/QC observer to count and characterize any particulates on the filter paper, while accompanying software enables advanced particle analysis and saves all data in a permanent record. In this case, the key determinant is whether the particulate is shiny or not, as an indication of whether the particulate is metallic or nonmetallic. It is this determination that serves as a red flag and indicates whether the machined part will be subject to failure or excessive wear.
Examples of shiny or metallic particles include steel chips, aluminum oxide, aluminum, shot, cast iron, steel bristles, brass, and copper. Examples of dark or nonmetallic particles include soot, fibers, paint, oil, rubber, and plastic. These are referred to as “soft particles” and are not expected to cause machined parts to fail or impact their wear over time.
How your software package can enable accurate particulate analysis
Today’s software packages can enable the operator to characterize the particulates captured on standard 45 mm filter paper. Specifically, particulates on the filter paper that reflect light when a polarized light is shined on them are marked as metallic and differentiated from those that don’t reflect light.
Traditional Two-Scan Method
Up until recently, particulate analysis data output was collected from two scans of the filter paper. The first scan, when the polarized light is crossed, identifies the total particulate count (all particulates appear dark). The second scan, when the polarized light is uncrossed, identifies reflecting and non-reflecting particulates.
New One-Scan Technology
With the OLYMPUS CIX90 technical cleanliness inspection system, a new polarization method delivers a unique all-in-one scanning technology that can be used to detect both reflecting (shiny and metallic) and non-reflecting (dark or nonmetallic) objects in one scan.
Based on wavelength separation and color detection, and developed to deliver extremely accurate results, this one-scan technology can improve throughput by a factor of two.
The data output from automated scans of the filter paper on a motorized microscope stage is then stored in a database as a permanent record. Compliance with international regulations (e.g., ISO 16232 and ISO 4407) and/or company standards have driven the adoption of this solution by machined part manufacturers around the world.
Cleanliness inspection software and heavy equipment manufacturing
The wear debris analysis described above, particularly the determination of metallic versus nonmetallic particulates, is especially important in the automotive industry and within the field of heavy equipment manufacturing, where it used to determine if contaminants are present and what they are, and to increase wear and serviceability during the manufacturing process.
 |
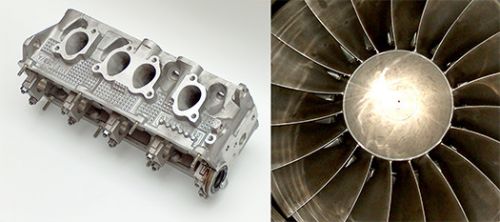
| The technical cleanliness of components and parts is at the center of the manufacturing process, especially in the automotive and aerospace industries. |
The software packages discussed here can also be used to analyze the hydraulic fluids, oils, and other fluids that flow through machined parts, helping determine the presence of particulates within these fluids and their impact on performance, friction, conductivity, and corrosion. (Software packages are often integrated into comprehensive fluid contamination control and conditioning systems.) In the end, the goal is the same—improving the lifespan of a machined part.


