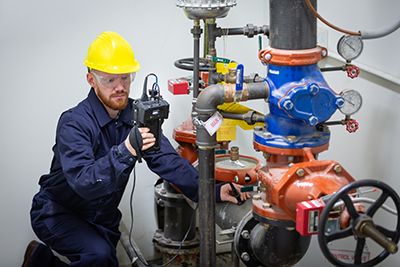
Inspection service companies commonly perform routine nondestructive testing (NDT) on the piping, vessels, tanks, and other equipment used in the oil and gas industry. Larger jobs can require a whole team of inspectors, each of whom is responsible for recording thickness measurements from different parts of the facility. Managing a job at this scale can be complicated, but it doesn’t have to be.
The Conventional Way to Collect Data
A supervisor or data analyst will usually assign a portion of the work to each inspector. Data is typically collected in one of two ways:
Digital ultrasonic thickness gage with datalogger: Inspection survey files are created with thickness measurement locations (TMLs) that correspond to the assets and locations that need to be inspected. At the end of the day, the inspector transfers the completed survey files using a USB or RS232 connection. From here, the data is manually imported into asset management software.
Write down results by hand: Each inspector is given a sheet of inspection locations corresponding to the asset they need to measure, and they manually record each thickness reading on the paper. Sometimes the inspectors work in teams where one takes the thickness reading and the other records it. At the end of the day, the inspector hands the paper to the manager or data analyst, who then inputs the values into a spreadsheet or asset management software to analyze the data. In some cases, the inspectors will bring a tablet or PC with them into the field and manually enter the thickness readings into their asset management program.
Even though these processes are slow, inefficient, and have the potential for inaccurate data due to human error, they’ve remained relatively unchanged since the advent of digital ultrasonic thickness gages. Now, there’s a better way.
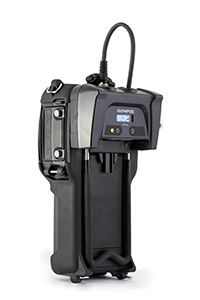
Using the Cloud to Transform Your ProcessThe 38-Link™ wireless adaptor enables any 38DL PLUS® ultrasonic thickness gage to connect to the Olympus Scientific Cloud™ (OSC), providing supervisors with tools to improve overall efficiency, data integrity, resource allocation, and data visibility for large inspection jobs. Setting up your OSC account and connecting your 38DL PLUS thickness gage is simple. First, visit the OSC website to register for an account.* Next, attach the 38-Link adaptor to the back of the gage and connect to a wireless network. Once you’ve connected to the OSC, managers will find a suite of helpful data management tools. |  The 38-Link adaptor attaches to the back of the 38DL PLUS thickness gage. |
4 Ways the Olympus Scientific Cloud Improves Job Management
Push Survey Files Directly to Your Fleet of Thickness Gages
In the OSC, you can create a Project, which you can divide into Jobs with individual Tasks. You can build survey files within the OSC and assign them to Tasks that can be wirelessly deployed to instruments in the field. You can monitor job progress, organize large inspection jobs, assign tasks to individual inspectors, and even track data in the Cloud. If you don’t have a wireless network available, you can use your mobile phone as a hotspot to connect the 38-Link adaptor to the Cloud to upload data.
Improved Data Integrity
The OSC provides supervisors with a complete workflow management solution. With the 38-Link adaptor and a wireless connection, survey files can be deployed remotely to an inspector in the field. The inspector can save the readings to the instrument and upload data directly from the gage to the Cloud without ever leaving the field. This not only improves efficiency, but it also eliminates the chances of transcription errors, significantly improving the integrity of your data.
Better Data Visibility
Efficient Resource Allocation
In many cases, an inspector is allotted a set amount of time to complete their assigned work. Currently, the manager has little insight into who is completing their work early and is able to take on additional work.
Using the OSC, managers can track each inspector’s work and push new survey files to the inspector’s gage when they’ve finished their assigned tasks. And the inspection files are accessible from the OSC dashboard as soon as they’re uploaded. This functionality enables managers to expedite tasks remotely without having to bring inspectors in from the field, helping minimize downtime and ensuring that resources are being used effectively.
*Some Cloud features and applications require a paid OSC subscription after an initial trial period. Visit the OSC account registration page for more information.
Wireless LAN and Bluetooth® dongle availability varies by region. Contact your local Olympus sales representative for more information.
Related Content
Video: Register for a Cloud Account
What Does It Mean to Work Connected?
Connect Your Inspections: Embracing the Digital Present
5 Benefits of Cloud Connected Inspections


