STM7-BSW
Overview
STM7-BSW measurement support software for measuring microscopes helps make your inspections more efficient. You can capture and display images, make observations and measurements, and create reports all from the same screen.
- More Accurate, Faster, and Simpler Measurement of Objects with Complex Shapes
- Capture Clear, Pin-Sharp Images for Highly Accurate Measurement with a Complete Lineup of Cameras
- Place the Sample and Start to Measure—No Parallel Alignment Required
- Record Repeat Measurement Procedures
- Convenient Functions Eliminate Subjectivity in Measurement
- Customizable Report Generation
- Advanced Acquisition Functions
Quickly and Accurately Measure Objects with Complex Shapes
It is essential to see your measuring microscope’s output display clearly and easily. This software was created to do just that, helping deliver complex measurements with greater accuracy. The software also enables you to take advantage of digital microscope cameras.
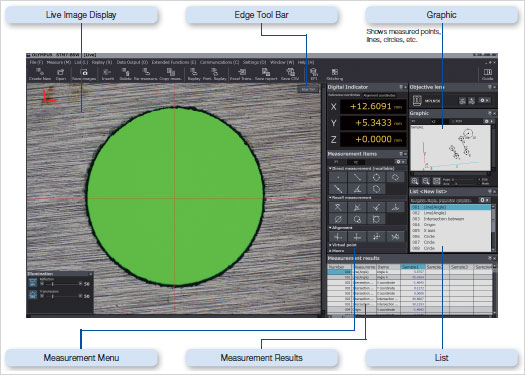
STM7-BSW Sample Interface
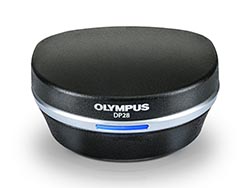
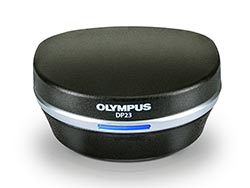
Capture Clear, Sharp Images with Our Digital Microscope Cameras
High performance with fast live display
DP28
| DP23
|
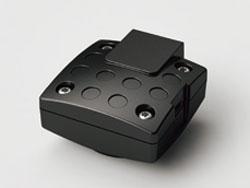
Excellent value with a high price/performance ratio
STM7-CU
|
Place the Sample and Start to Measure—No Parallel Alignment Required
Direct Measurement
| Recall Measurement
|
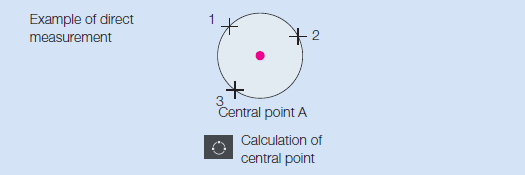
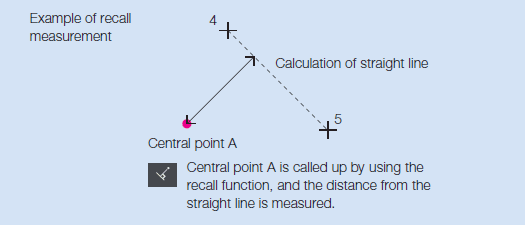
Virtual Point Measurement
| Alignment Measurement
|
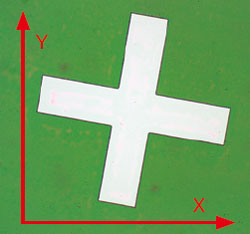 Original axis | 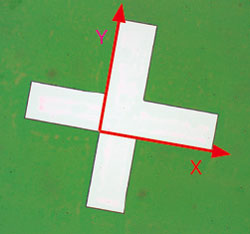 New axis |
XZ Plane Measurement
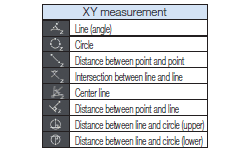 | Conventional measuring microscopes measure the XY plane directly from above. However in response to user demands, we incorporated an XZ plane measurement function in the STM7-BSW to enable the measurement of crosssections as seen from the side. Now measurements that used to be difficult are much easier—such as radius measurements for vertical sections of hemispherical objects or measurement of the depths of grooves with curved bases compared to a reference line. |
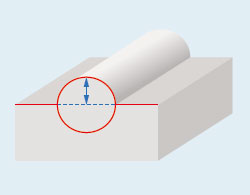 R measurement of a hemispherical sample | 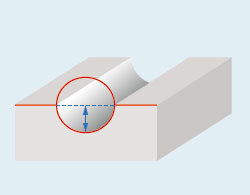 Height measurement of a groove from its base and the reference line |
Record Regularly Used Measurement Procedures
Macro Registration
Frequently used alignment and other measurement procedures can be combined and assigned to a single macro button—eliminating the need to start from scratch each time the microscope is set up.
Replay Measurement
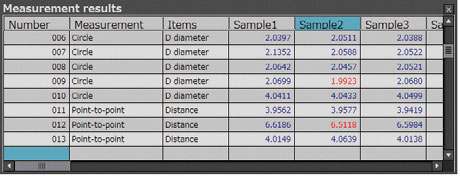
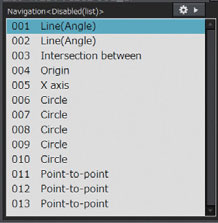 | Measurements can be easily repeated based on a recorded workflow by simply inputting the movement of the stage and the coordinates in response to a software prompt. This function can be used to repeatedly carry out the same measurement on the same sample or different versions of the same sample. |
Measurement Point Navigation for Replay Measurement
 | 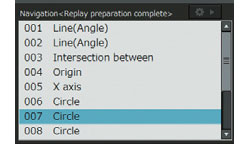 | This function displays the direction and distance to the next measurement point, helping minimize operator confusion. The function also eliminates the need to check the next measurement point on the diagram each time, speeding up the workflow through a series of repeated measurements. |
Convenient Functions Eliminate Measurement Subjectivity
Automatic Edge Detection
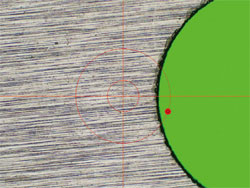
This function detects the edges of the sample and automatically acquires and measures their coordinates. As a result, you no longer need to designate coordinates, minimizing subjectivity. Automatic Edge Detection also features a timer that enables coordinates to be acquired in a specified time and supports the use of a foot switch that enables the operator to focus on measurement operations without taking his or her hands off the stage handles.
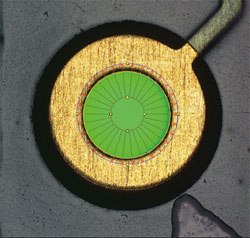 Automatic edge detection inside the circle | 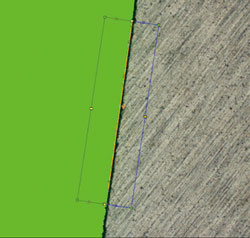 Multipoint automatic edge detection |
Abnormal Point Elimination
Metal burrs and other abnormal points can be excluded automatically during edge detection. This enables a consistent calculation of measured values, irrespective of the state of the sample. Points excluded as abnormal can also be displayed on the screen in different colors.
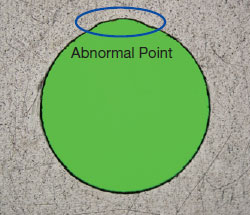 Sample with abnormal point | 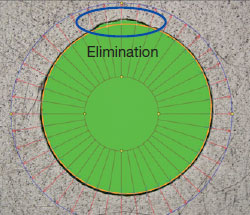 Abnormal point elimination |
Illumination Control
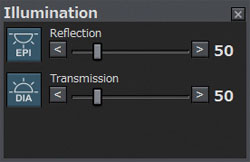 | The light intensity of the microscope can be maintained by accurate software control. Light intensity settings can also be saved when recording a workflow for replay measurement, enabling measurements to be made under the same conditions during replay or automatic edge detection. |
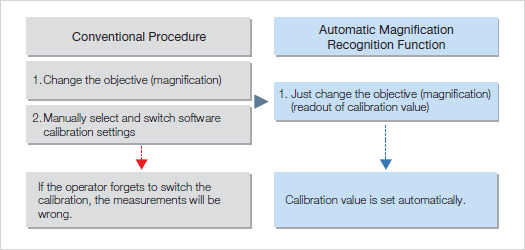
Automatic Magnification Recognition (optional, with coded revolving nosepiece configuration only)
Using the coded revolving nosepiece, previously set calibration values are automatically recalled when changing the objective. This enables you to be confident that the proper scale is on display.
Advanced Acquisition Functions
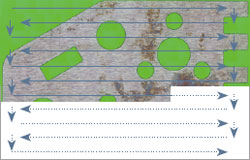
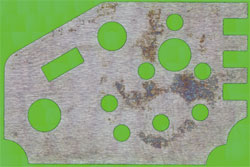
Multiple Image Alignment (MIA) (optional)
Tile multiple images to capture a single high-magnification, wide-area image. Because the images are tiled on the basis of coordinate data, the system is capable of producing highly reliable images.
 |  |
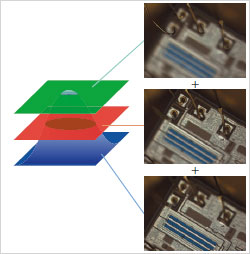
Extend Focus Image (EFI) (optional)
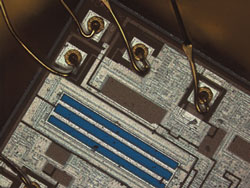
The EFI function is effective for obtaining images that are well-focused throughout on samples with an uneven, complex surface shape. Generate a single image with focal points aligned in all positions.
Simply process multiple images with different focal point positions while moving the Z-axis, or use the motorized model for automated image composition.
 |  |
Specifications
STM7-BSW System Requirements
| Item | System Configurations |
|---|---|
| CPU | Intel Core i3 Processors 3 GHz or more with an STM7-CU camera, an Intel CORE i5 or equivalent or higher with DP23/DP28 cameras |
| Memory | 4 GB or more with an STM7-CU camera, 8 GB or more (16 GB recommended) with DP23/DP28 cameras |
| HD available space |
100 GB or more hard disk space for installation
SSD hard disk is recommended for high speed image acquisition |
| Graphic card | Graphic card available for resolution 1980 x 1080 and 32bit color |
| Drive | DVD Drive |
| PC input device | 2-button mouse (3-button mouse with a wheel is recommended.) Keyboard |
| Operating system | Windows 10 Pro/Pro for Workstations 64 bit |
| Web browser | Internet Explorer 11 |
* Microsoft Office 32 bit or 64 bit 2013/2016/2019/2021/365 (SAC) are also supported.


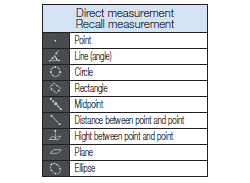
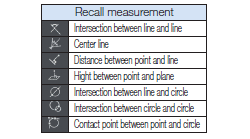 Once measured and calculated, coordinates can be reused for subsequent measurements. This eliminates the need to do the same work twice, enabling a more efficient workflow.
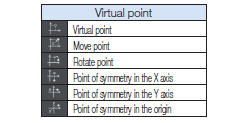 Intersections, central points, lengths,and a range of other measurements can be made by drawing straight lines and circles, which can then be set to remain as reference points on acquired sample images.
 Both the origin and the X-axis are set with respect to the sample, allowing the sample to be measured even when it’s not aligned with the stage.