Overview
Wind Towers are large structural components erected to harness electricity from wind. Increasing pressures to reduce emissions, diversify power source portfolios, and reduce dependence on nuclear and coal power sources have increased the number of wind turbines being constructed in many countries both onshore and offshore. The structural integrity of both the blades and tower base are paramount to safety, starting with the manufacturing of the tower. Tower sections are typically constructed by rolling a flat plate and welding a longitudinal seam. These individual tapered sections are then welded together with circumferential welding into sections small enough to be transported and connected in the field by flange sections. The circumferential weld is a critical weld that must be thoroughly inspected. These circumferential welds are usually welded by automated welding process to ensure efficiency and quality of weld. The most common encountered discontinuity is lack of fusion, porosity and other voids. Conventional inspection is usually done with manual shear wave and longitudinal ultrasonics, often from both the inner and outer surfaces of the tower section.
Summary of Current Nondestructive Testing (NDT) Issues
- Many circumferential welds to be inspected per tower.
- Large diameters and long length of welds to be inspected take a long time to inspect especially when discontinuities are found.
- Tower manufacturing is done in-line with one process often quickly following the other. A longer NDT process can hold up the line easily.
- Conventional Shear Wave Method is time consuming, highly dependent on inspector, and lacks permanent data recording.
- Probability of detection for manual shear wave ultrasonics relies heavily on flaw orientation, and operator training and diligence.
Solution
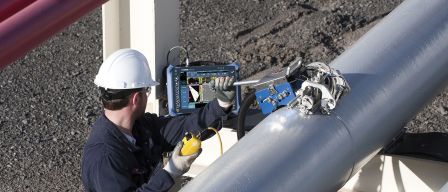
Complete ultrasonic scanner and acquisition units are packaged to fully and quickly inspect the circumferential weld in one pass while saving all data for quality and auditability purposes. Application specifics, inspection speed requirements, and budget may require different ultrasonic techniques utilizing the OmniScan acquisition unit to inspect the welds. Both PV100 and PV200 methods are suitable to find all orientation of discontinuities and provide accurate length and height information for disposition and repair as necessary. Full volumetric coverage is achieved by both with all data recorded for archiving and post analysis. All channels can be viewed simultaneously for quick analysis. Typical inspection times are cut down from hours manually to minutes using either technique. Semi-automated scanners are held in place by a scanner technician while the tower section is rotated on the same rotator used to complete the welding. Fully automated systems typically offer better data quality by further regulating speed and limiting human manipulation of the scanning mechanism. The inspection techniques are adaptable to the long seam welds as well with the correct scanning mechanism.
The PV100 Technique
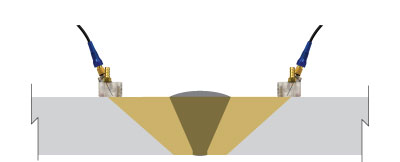
With the PV100 system Time-of-Flight Diffraction (TOFD) is utilized to cover most of the volume of the weld as it offers a very large coverage area. Pulse Echo shear wave is utilized to cover the top and bottom areas of the weld joint where TOFD has inherent weak areas. This technique has the advantage of incorporating conventional shear wave which is the same as the traditional method as well as a lower cost of equipment. Faster scanning speeds can usually be achieved due to fewer ultrasonic beams utilized in the inspection. In some cases if the thickness becomes too great to cover in this manner double zone TOFD and creeping wave techniques can be utilized on the thicker weldments for full volumetric coverage.
The PV200 Technique
In the PV200 technique, Phased array is utilized by itself or combined with TOFD for even better detection and sizing capability. Phased Array offers flexibility in programming the probes to optimize inspection and reduce the number of setups required. It offers the best probability of detection especially for oriented defects and also improves the sizing and characterization ability of the system. Up to eight groups of phased array and TOFD can be combined in a single acquisition. It has the added benefit of allowing for technique development utilizing manual or encoded phased array for doors, flanges and other more complicated weld arrangements found on towers using the same acquisition unit.
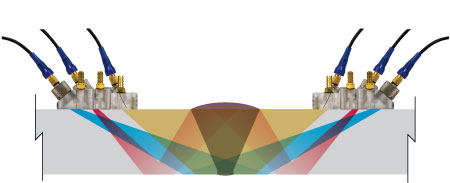
Combining pulse-echo and TOFD channels offers complete coverage of the weld.
Illustration of TOFD and Pulse Echo Shear wave Technique
(PV100)
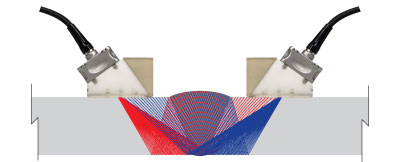
Phased array channels for full volumetric weld coverage
TOFD channel for additional volumetric coverage
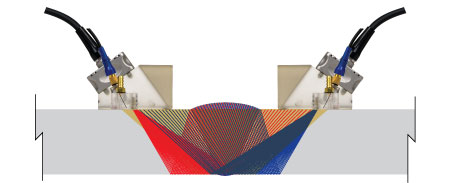
Combining PA and TOFD offers complete coverage of the weld.
Illustration of Phased Array and TOFD Techniques
(PV200)
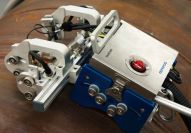 | 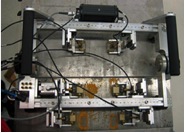 |
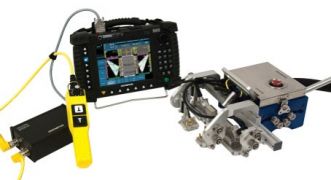
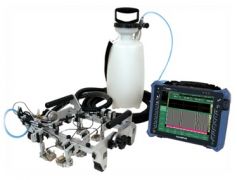
Typical Fully and Semi-Automatic Scanner Options for either technique.
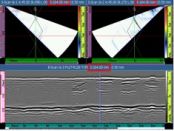 | 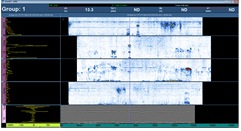 |
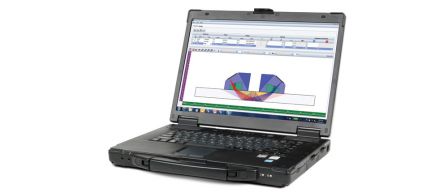
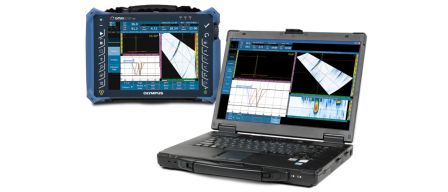
Both OmniScan and OmniPC allow simultaneous view of all Ultrasonic data
(PV200 on OmniScan and PV100 in OmniPC shown)
Typical Equipment
- OmniScan MX2 unit with phased array or 8 channel UT module
- Semi-automated scanner (Compact, Flex, HST-03) or WeldROVER scanner for fully automated data collection. Scanner is chosen by technique and tower details.
- Suitable frequency and size probes and wedges (Phased Array, TOFD, Conventional)
- Couplant Flow Unit (CFU) utilized with water for couplant
- Post analysis software (OmniPC or TomoView)
- Scan plan design software for probe placement planning (NDT Setup Builder)
- Accessories (preamps, spare parts, cabling, etc. as required)
Conclusion
Semi or fully automated scanning systems utilizing various ultrasonic methods have been frequently applied to wind tower weldments to replace manual shear wave examinations. This approach saves time, reduces human dependence, increases probability of detection, and allows full saved data for post analysis and auditability.
Olympus also offers inspection solutions for gear boxes (remote visual inspections), composite blades (conventional and phased array ultrasound), blade drain holes (remote visual inspection), and other components of wind turbines.
