Background
As electronics become smaller and more sophisticated, the demand for miniaturized flexible printed boards continues to grow. In order to make a flexible printed board, one or more copper foil layers are attached to a dielectric resin substrate. The copper foil is then etched to create the desired wire patterns. Before being applied to the substrate, the copper surface is roughened to promote adhesion. If the copper surface does not have sufficient roughness, it will not hold to the resin strongly enough to survive the rigors of the manufacturing process. This leads to defects and the failure of electronic devices. Consequently, the roughness of copper foil must be carefully measured.
The Olympus solutions
The Olympus LEXT 3D laser measurement microscope is capable of measuring surface roughness with plane and unevenness resolutions of 0.12 μm and 5 nm, respectively. The microscope has an ultra-high pixel density so that even subtle surface unevenness is accurately measured. Since the LEXT uses non-contact roughness measurement, the soft copper film will not be damaged.
Features of the product
The Olympus LEXT gives you the ability to make 3D observations with ultra-high-resolution and a high pixel density. The microscope has high inclination sensitivity enabling it to make accurate measurements of complex geometric structures with steep sides. The non-contact roughness measurement feature ensures that sensitive copper surfaces are measured without damage.
Image

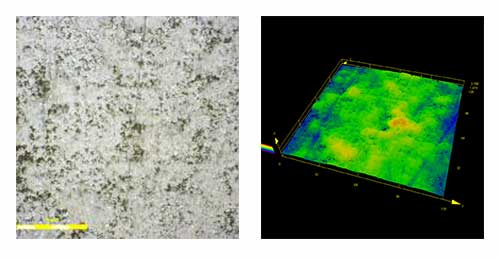
Figure 1: A high-resolution image and 3D model of a copper surface

