Evident LogoOlympus Logo
Olympus Industrial Resources
Application Notes
Back to Resources

Thickness Measurement of Coextruded Cap Layers


Application: Measurement of individual layers and total thickness in coextruded plastic, both raw sheet stock and molded products.

Background: Sheet stock of engineering thermoplastics such as acrylonitrile butadiene styrene (ABS) and acrylic, used to form a wide variety of molded consumer products such as automotive interior parts, refrigerator shelves, and plastic window frames, is sometimes produced as two coextruded layers, an outer cap layer that provides cosmetic properties such as a glossy surface, and a base layer that optimizes structural properties. Manufacturers and fabricators need to measure the thickness of the cap layer as well as total product thickness to insure compliance with specifications.
Equipment: It is often possible to measure cap layer, base layer, and total thickness both in the sheet stock and in the final molded product using a Model 38DL PLUS thickness gage with the optional Multi-Measurement software and a common delay line transducer such as an M208-RM (20 MHz) or an M202-RM (10 MHz). Cap layers may often be measured down to a minimum thickness of 0.008 in. (0.20 mm) or less. The primary limitation on ultrasonic testing of this class of products is that occasionally the cap layer and base layer are both made materials with very similar acoustic properties, in which case there can be insufficient reflection from the boundary between them to measure the layers separately. For this reason, performance should be evaluated on samples of the actual product to be measured. Total product thickness can be measured in all cases.

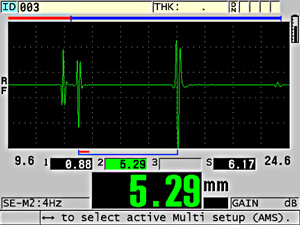
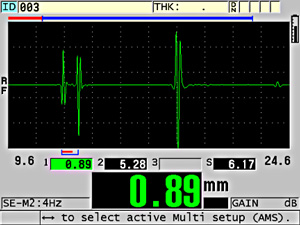
Typical Procedure: The waveforms below show simultaneous measurement of cap layer and base layer in a typical coextruded ABS plastic part, using an M208 transducer. The echoes seen on the screen represent the outer surface of the part, the boundary between the cap layer and the base layer, and the inner surface of the part.

cap layer measurement


base layer measurement

As with any ultrasonic thickness measurement, accuracy is dependent on proper sound velocity calibration. Velocity calibration must be performed for each material being measured, on samples of known thickness.

Olympus IMS

Products Used for This Application
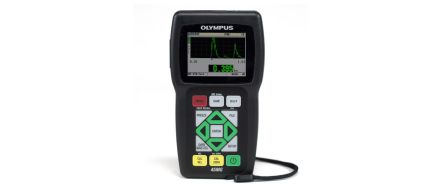
The handheld 45MG ultrasonic thickness gauge is packed with measurement features and software options. This unique instrument is compatible with the complete range of Olympus dual element and single element transducers, making this gauge an all-in-one solution for virtually every thickness gauge application.
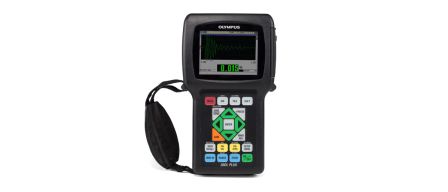
The 38DL PLUS is an advanced ultrasonic thickness gauge. Uses dual element transducer for internal corrosion applications, and has features that include THRU-COAT technology and echo-to-echo. Uses single element transducers for very precise thickness measurements of thin, very thick, or multilayer materials.
Sorry, this page is not available in your country
Let us know what you're looking for by filling out the form below.
Sorry, this page is not available in your country