Ruckus Composites is a carbon fiber inspection and specialty repair shop located in Portland, Oregon, US. Founded in 2008, Ruckus has evaluated over 13,000 bicycles and repaired more than 6,000. The shop works with professional racing teams and bicycle shops all over the world.
The shop’s owner, Shawn Small, holds a mechanical engineering degree from the University of Wisconsin-Milwaukee. He has studied and worked with carbon for more than a decade.
About four years ago, Shawn invested in an Olympus 45MG ultrasonic thickness gage for high-tech carbon fiber inspection, investigation, and quality control. We spoke with him to learn about his process.
Inspecting High-Tech Bikes with an Ultrasonic Thickness Gage

Driven by a love of bicycle technology, Ruckus Composites serves as a hybrid bicycle science, engineering, art design, and carbon fiber material research lab.
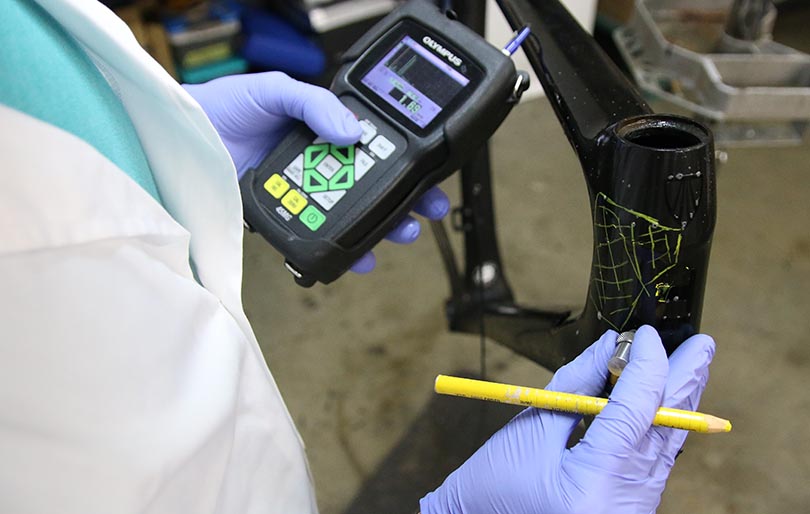
Their process begins with using the 45MG thickness gage for ultrasound scanning and damage mapping. The nondestructive instrument is used to detect internal delamination; it can “see” the internal structure of the constructed composite material layers of a bicycle frame—without the need to physically cut into the frame.

Mapping out damage areas on a carbon fiber frame with the 45MG thickness gage.
Carbon fiber bikes are complex and have varying quality. Ruckus uses aerospace-grade carbon fiber for frame repairs. The shop uses a 3D printer, enabling them to model their own molds and additively manufacture their own woven or uni-directional carbon fiber material for tube repairs (e.g., dropouts, bottom bracket shells, and seat stays).
Using their own materials, Ruckus can strategically reinforce a bicycle to be about 10% stronger than the original. After carbon repair, the Olympus 45MG thickness gage is used again to test the frame for safety and quality control purposes.
During the off season, Ruckus often performs internal testing on their materials by rolling their own frame tubes and then repeatedly breaking and repairing them.
Ruckus also catalogs every bicycle that comes through their doors. With this data, they can even perform their own statistical modelling.
“We could run a report on a specific bike, model, and year, and then look at what breaks,” Shawn explained in an interview about their inspection process with FOX 12 Oregon.
The Journey Leading to the Olympus 45MG Thickness Gage
It can be difficult to detect signs of damage in a carbon composite bicycle frame because fissures in carbon fiber often hide beneath the paint. Before integrating the Olympus 45MG thickness gage into their process for ultrasound scanning, Ruckus performed bicycle frame inspections using traditional methods and other nondestructive testing (NDT) technologies. These included:
Visual inspection: A small detail such as a paint chip on the bicycle frame could indicate a crack, so visual inspections are useful for detecting delaminations at the surface and edges of materials.
Tap testing: Also known as sounding, this method involves gently striking a material with a hammer or hard object to find a delamination based on resulting sound. A clear ringing sound in laminated composites indicates a well bonded material. In contrast, a duller sound can indicate the presence of delamination (because of the defect dampening the impact).
However, both visual inspection and sound are subject to human error and depend on the inspector's quality of vision or hearing.
Dye penetrant inspection This is a method used to reveal surface breaking flaws with the bleeding out of a colored or fluorescent dye. Fluorescent penetrant needs to be applied in darkened conditions with an ultraviolet black light. Then the penetrant must be removed. Finally, a developer must be applied.
The material to be inspected must first be carefully cleaned, otherwise the penetrant won’t adequately penetrate the defect. If the surface penetrant is not fully removed before developer is applied, misleading indications will result.
None of these methods delivered the accuracy needed for carbon fiber bike inspection and repair, so Ruckus Composites turned to Olympus for a new solution.
Solving a Nuanced Ultrasound Challenge with the 45MG Thickness Gage
Before switching to the Olympus 45MG thickness gage, Ruckus Composites engaged in several discussions with the Olympus engineering team. They also sent samples of high-end bicycle parts to Olympus for evaluation. It was initially a bit of a struggle to obtain usable readings.
“Bikes are a specific and nuanced ultrasound challenge. There are significant variations in materials and geometry unknown to the user. Therefore, you also need intimate knowledge of the structure of bikes,” said Shawn.
Ruckus worked with their local Olympus sales representative to arrange for a prolonged rental of a 45MG instrument so they could perform the necessary testing and research.
Shawn explained, “Most of our studying and evaluation is performed internally. There is no information available on composite bikes. Luckily, we can fabricate all our own reference blocks (amplitude, distance, porosity, etc.) to create all the reference needs we come across.”
After a successful evaluation period, the portable Olympus 45MG ultrasonic thickness gage was adopted into Ruckus Composites’ process to nondestructively detect internal damage within the structure of the constructed composite material layers of a frame.

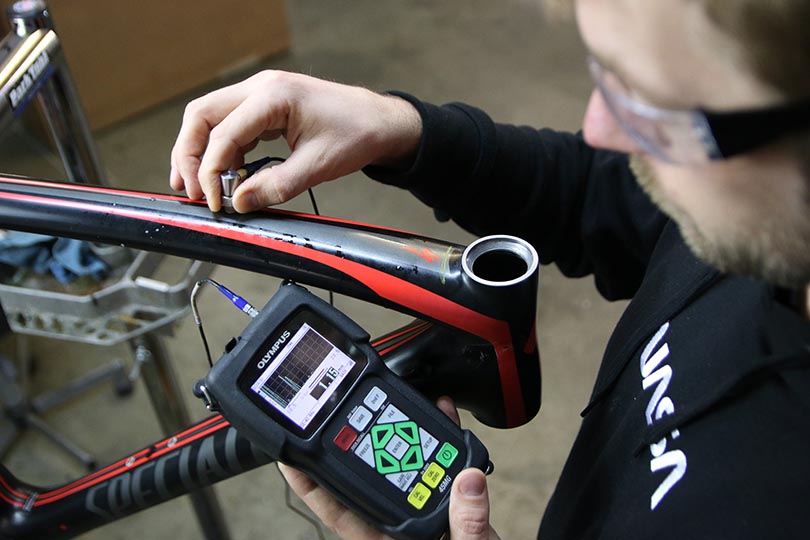
Shawn Small, Owner and Chief Engineer of Ruckus Composites, displays an A-scan reading on the 45MG thickness gage while conducting an ultrasound inspection on a carbon fiber bicycle frame. This reading displays the amount of received ultrasonic energy as a function of time.
How the 45MG Thickness Gage Detects Internal Damage in Bike Frames
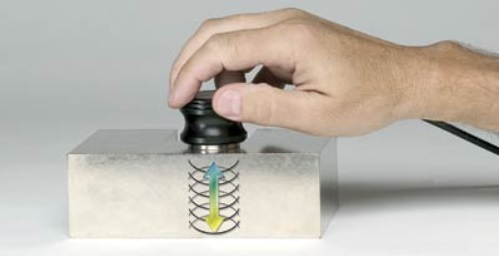
For those who are unfamiliar, the 45MG ultrasonic thickness gage works by precisely measuring how long it takes for a sound pulse generated by an ultrasonic transducer to travel through one side of a material.
In composite materials, sound energy scatters from individual grain boundaries between fibers within the composite. The instrument can detect irregular scatter patterns in the material and signals this back to the operator.

Ultrasound gages work by measuring how long it takes for a sound pulse generated by a small probe (transducer) to travel through a test piece and reflect back from the inside surface or far wall.
To learn more about the science behind the technology, check out our thickness gage tutorial or ultrasonic testing FAQs.
Mechanics of the Materials: The Benefits and Drawbacks of Carbon Fiber Bikes
A potential undetected crack in a carbon fiber bicycle frame or component could present a large catastrophic liability to a cyclist. If the structure you’re relying on to support your body shatters into pieces beneath you, physics holds that your body will follow, leading to potential injuries.
So, why ride a carbon fiber bicycle?
The answer is that carbon fiber is significantly lighter than aluminum, steel, or even titanium. The lower density of the carbon fiber material absorbs road vibration rather than transmitting it. This results in a more comfortable ride. Composite material can also be shaped to reduce aerodynamic drag force. This drag force is based on the square of the velocity, so reducing this force significantly matters the faster a cyclist rides.
Ruckus Composites upholds that a carbon fiber frame is one of the best investments in a bicycle that a cyclist can make because of its seemingly infinite fatigue life and repairability. While they can be an expensive investment—you can have it for years.
For instance, Shawn explained that a $10k carbon fiber bike could last for 20 years, and that you could structurally rebuild it as many times as it is safe to do so. Metallic bicycle frames, on the other hand, can be too costly to repair due to the material involved.
Cost Analysis: The Value of Ultrasonic Testing for Bike Inspection
With thousands of bikes inspected, Ruckus Composites continues to find value in the 45MG ultrasonic thickness gage.
“We push our Olympus 45MG to the limits; the device has paid for itself,” Shawn said. “The 45MG has become a staple to our daily business services.”

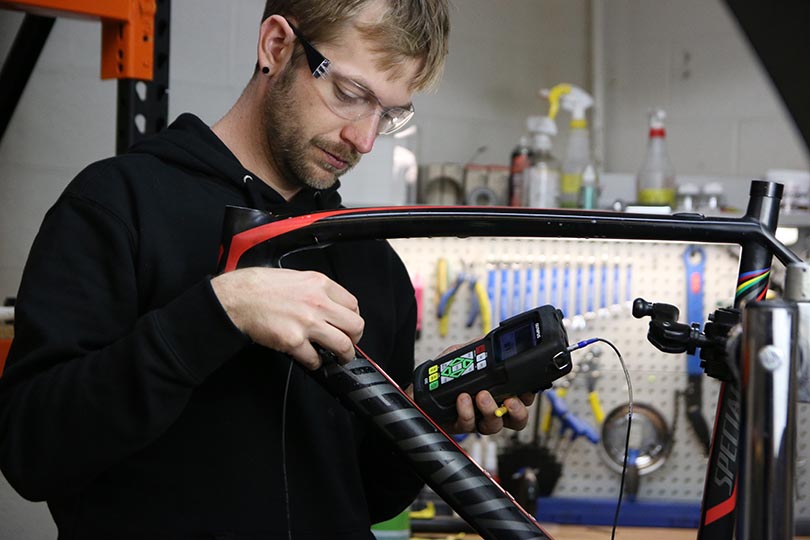
Shawn Small inspects a carbon fiber frame using the 45MG thickness gage.
Its ability to show the structural integrity invisible to the human eye is a top benefit and helps them ensure quality service.
“It’s shocking how little visible damage the bike could show,” Shawn said. “We use the 45MG to evaluate the structural integrity of the composite structure. It also allows us to accurately map out our composite repair process.”
Shawn continued, “This helps us ensure the quality of our service work. For example, we can scan the bike in an undamaged area for comparison to determine the laminate thickness. We then use this data to inform how much material our lay-up technician needs to apply to the damage area.”
Ruckus Composites charges $250 for a full frame and fork inspection, crediting back $100 if the customer decides to repair their frame post-inspection. The average repair cost is $500, which includes paint restoration.
Shawn explained his straightforward repair process.
“We map out the damage areas with the 45MG and then we design a tapered composite repair plan. We machine out all the damaged carbon fiber and apply all new carbon fiber based on our lay-up schedule. We vacuum bag and oven cure the structure and then restore all the paint and graphics in-house,” said Shawn.
Shawn also likes the 45MG thickness gage for its portability and ease of use.
“The Olympus 45MG is a simple machine, and that’s the value. You aren’t lugging around anything extra or larger when you don’t need it,” said Shawn.
Related Content
Ultrasonic Thickness Gage Tutorial
Video: Introducing the 45MG Thickness Gage

