What's the difference between ultrasonic thickness gauges and flaw detectors? This is a commonly asked question when determining the right nondestructive testing (NDT) tool for an application, as the two devices are similar in a few ways.
In this post, we discuss their key similarities, differences, and unique advantages so that you can select the best instrument for your task.
The Similarities Between Ultrasonic Thickness Gauges and Flaw Detectors
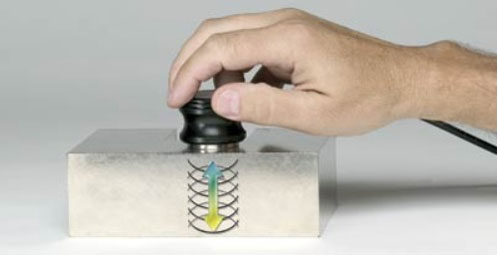
Ultrasonic thickness gauges and flaw detectors use the same basic concepts. They both use transducers that generate sound waves and both measure the time it takes for that sound to leave a transducer, travel through a material, bounce off a reflector, and return to the transducer.

A sound pulse generated by a transducer travels through a test piece and reflects back from the inside surface or far wall
And both use the basic equation of:
Distance =
Velocity * Time
2
This equation divides by two since the one-way time measurement to the reflector is all that’s required.
The reflection and transmission of high-frequency sound waves—known as ultrasound—has long been an important tool for evaluating the integrity of welds, as well as testing structural metals, pipes and tanks, boiler tubes, railroad rails and axles, aerospace composites, and many other industrial applications.
Industrial ultrasonic testing equipment continues to be popular since it:
- Is cost effective, quick, and reliable
- Usually requires no test piece preparation other than wetting with couplant
- Has no specific safety hazards or regulatory licensing requirements associated with its use
Selecting an ultrasonic thickness gauge or flaw detector for an application largely depends on the main goal of the measurement. Before we get into the key differences between these instruments, let’s take a brief look at their use throughout the years.
History of Ultrasonic Equipment
Ultrasonic test instruments have been used in industrial applications for more than 60 years. Early ultrasonic instruments were released in the 1940s, the majority of which were primarily focused on flaw detection.
The first digital thickness gauges (also known as “D Meters”) were released in the 1960s. However, using a flaw detector to measure thickness was the more popular, preferred method up until the 1980s—when digital thickness gauges offered the capability to display an onboard waveform (e.g., an A-scan). The visual display of the waveform on the thickness gauge device gave users more confidence as they could see what a digital reading corresponded to in real-time.

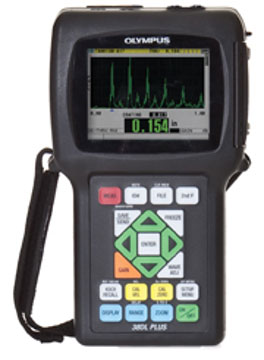
An Olympus 38DL PLUS™ ultrasonic thickness gauge displays an A-scan waveform
Today, these small, powerful instruments either come standard with waveform or provide it as a software option. Read on to learn more about the current capabilities of thickness gauges and flaw detectors and discover their unique advantages.
What Is an Ultrasonic Thickness Gauge?

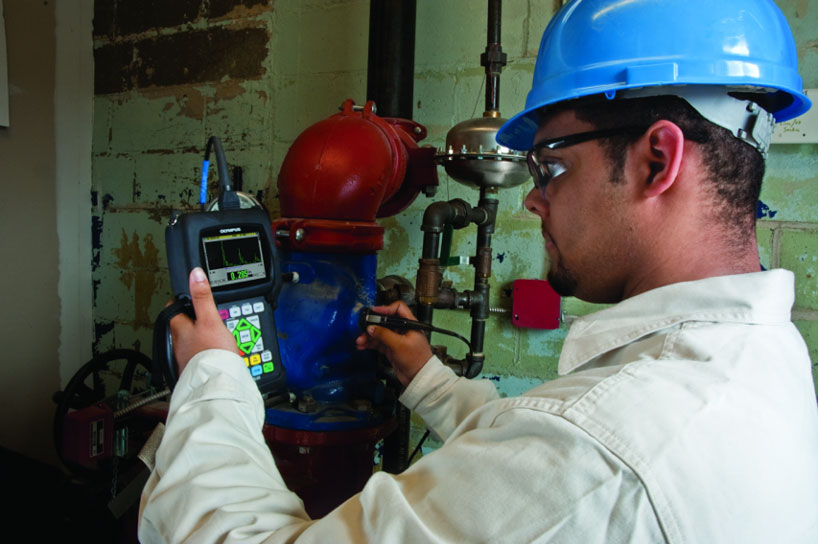
An inspector takes an ultrasonic thickness gauge measurement
An ultrasonic thickness gauge can accurately measure the thickness of a material and locate surface corrosion or erosion from one side of a part. It can measure just about any common engineering material of metals, plastics, composites, fiberglass, ceramics, and glass.
Ultrasonic thickness gauges can measure the thickness of a wide variety of products for manufacturing quality control, such as plastic tubing and parts used in the medical industry. Inspectors also use them to test the structural integrity of critical parts and infrastructure, such as aircraft turbine blades for wear or pipes and tanks for in-service corrosion. Make sure to check out our Ultrasonic Thickness Gauge Tutorial to learn more about how they work and how they can be used
Advantages of an Ultrasonic Thickness Gauge
Here are some advantages of an Olympus ultrasonic thickness gauge:
- More consistent and accurate time-of-flight (ToF) measurement. Straight beam inspection measures the ToF to a material’s back surface, which corresponds to the total thickness of that material.
- Compact size and lower cost.
- Easy to calibrate and operate.
- Specialized features or software for unique application needs, including boiler tube measurements, high temperature, and painted or coated applications.
- Measurement advantages include:
- Auto zero compensation: enables a more precise zero offset measurement, which contributes to a more accurate ToF measurement.
- V-path correction: compensates for the angular sound path of corrosion measurements using a dual element transducer, providing the highest degree of accuracy and repeatability over a large thickness range. Most flaw detectors do not compensate for this angular sound path.
- Auto probe recognition: the D79X series of dual element transducers includes an auto recognition pin, enabling the gauge to recognize the transducer; this eases user operation by recalling the optimized setup and receiver gain, and also determines the transducer’s pre-recalled V-path correction.
- Detection algorithms and digital signal processing (DSP): allows the calibrated accuracy to be maintained when gain or signal amplitude changes.
What Is an Ultrasonic Flaw Detector?

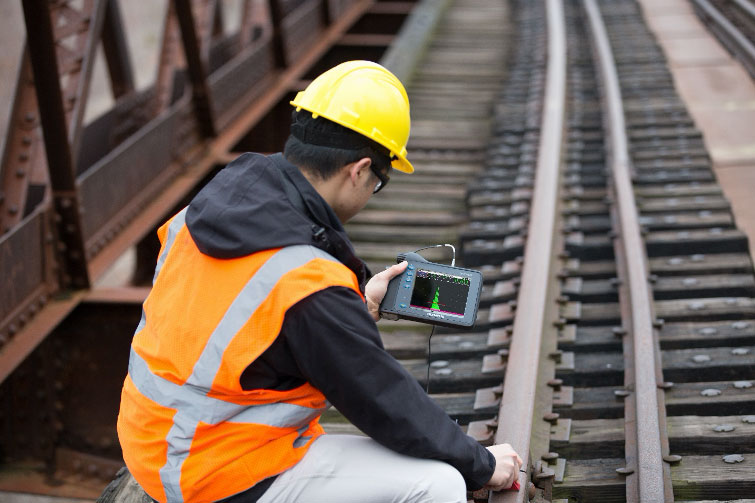
An inspector performs ultrasonic flaw detection in a factory setting
An ultrasonic flaw detector is designed to locate and size discontinuities such as cracks, voids, porosity, and disbonds in various materials and welded joints. Flaw detection can potentially be applied to any standard engineering material. Most tests involve steel and other structural metals, however flaw detectors can also be used on plastics, composites, fiberglass, and ceramics.
A flaw detector also has the ability to reasonably measure material thickness accurately but isn’t designed for precision thickness. To learn more, review our Ultrasonic Flaw Detection Tutorial.
Advantages of an Ultrasonic Flaw Detector
Here are some advantages of an Olympus ultrasonic flaw detector:
- Highly versatile:
- Straight beam inspection measures to a defect or a void to locate the distance to the flaw from the material’s surface.
- Angle beam inspection to check the integrity of welds.
- Ideal for scanning applications (due to a faster update rate of 60 Hz compared to a 25–30 Hz update rate of a thickness gauge)
- Includes specialized software for sizing defects:
- Distance amplitude correction (DAC)
- Time varied gain (TVG)
- Distance gain sizing (DGS)
Recommendations for Selecting a Flaw Detector or Thickness Gauge
It comes down to the application and what is being measured to determine your ideal instrument. For applications requiring repeatable precision and corrosion thickness measurements only, we recommend a thickness gauge. If you need to detect flaws or voids, check welds, and measure thickness, a flaw detector is the better choice.
We offer a diverse portfolio of nondestructive digital and portable ultrasonic flaw detectors and thickness gauges to meet your application and materials measurement needs.
Our line of ultrasonic thickness gauges includes:
- 27MG gauge: our most affordable, compact design for corrosion thickness
- 45MG gauge: advanced instrument for corrosion thickness with precision thickness capabilities (with Single Element software option) and an optional alphanumeric data logger for onboard reporting
- 38DL PLUS™ gauge: advanced instrument for precision thickness. Multilayer software option enables the simultaneous display of up to 4 individual layers. Pair this device with the 38-Link™ adaptor for wireless data transfer and connection to the Olympus Scientific Cloud™ (OSC).
Our line of ultrasonic flaw detectors includes:
- EPOCH™ 650 flaw detector: advanced flaw detector with a large screen and onboard data logger and reporting capability. This instrument can be used in nearly any inspection environment (benchtop testing to extreme outdoor and hazardous conditions).
- EPOCH 6LT flaw detector: our highly portable, lightweight flaw detector offers one-handed operation for working at height and rope access inspection needs. With optional wireless LAN connectivity, this instrument can connect to the OSC. It also offers a corrosion module, combining the most important features of a corrosion thickness gauge with the capabilities of a flaw detector.

