Precision Single Element Transducers
- Contact Transducers
- Delay Line Transducers
- Immersion Transducers
- Test Blocks & Cables
- Transducer Selector
- Resources
Contact Transducers
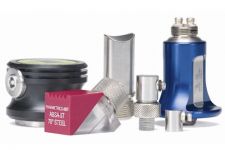
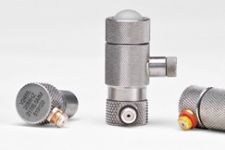
Microscan™ transducers are frequently used for a variety of applications with thickness gauges, flaw detectors, and other ultrasonic instruments.
Microscan transducer part numbers reflect the connector designation:
RM = Right Angle Microdot™
SM = Straight Microdot
RB = Right Angle BNC
SB = Straight BNC
SU = Straight UHF
When selecting a transducer, please review the chart below or consult the transducer frequency range in the instruction manual that was shipped with your gauge.
| Thickness Gauge Model 45MG 38DL PLUS® | Transducer Frequency Range 2.0 to 30 MHz |
Contact Transducers
One of the advantages of a Microscan contact transducer is its versatility; a single transducer can cover a broad thickness range in many engineering materials. Contact transducers are constructed with the unique WC-5 wearplate for greater durability and a longer life.
| Frequency
(MHz) | Element
(inches) | Diameter
(mm) | Transducer
Part Number | Transducer
Part Code | ||
| 0.5 | 1 | 25 | M101-SB† | U8400017 | ||
| 1 | 1 | 25 | M102-SB† | U8400018 | ||
| 1 | 0.5 | 13 | M103-SB† | U8400020 | ||
| 2.25 | 0.5 | 13 | M106-RM, M106-SM | U8400023, U8400025 | ||
| 2.25 | 0.5 | 13 | M1036 | U8400019 | ||
| 5 | 0.5 | 13 | M109-RM, M109-SM | U8400027, U8400028 | ||
| 5 | 0.25 | 6 | M110-RM, M110-SM, M110H-RM** | U8400030, U8400031, U8400029 | ||
| 10 | 0.25 | 6 | M112-RM, M112-SM, M112H-RM** | U8400034, U8400035, U8400033 | ||
| 10 | 0.125 | 3 | M1016 | U8400015 | ||
| 20 | 0.125 | 3 | M116-RM, M116-SM | U8400038, U8400039 | ||
| 20 | 0.125 | 3 | M116H-RM* | U8400037 | ||
RM = Right Angle Microdot; SM = Straight Microdot; SB = Straight BNC
†High Penetration Transducer *Use with Holder, P/N 2133 **Use with Holder, P/N 2132
Delay Line Transducers
SONOPEN® Transducers
The Sonopen® transducer has a replaceable delay line that is tapered to a small contact area. This transducer makes reliable thickness measurements in applications such as turbine blades, threads on plastic bottle necks, and tight radii on plastic containers. High-temperature Sonopen delay lines are also available. |  |
|
*High-temperature delay for use up to 350° F (175° C) | |||||||||||||||||||||||||||||||||
Delay Line Transducers
Microscan delay line transducers provide excellent performance on very thin materials, elevated temperatures, or in applications that require a high degree of thickness resolution.
| Frequency
(MHz) | Element
(inches) | Diameter
(mm) | Transducer
Part Number | Transducer
Part Code | Holders |
| 0.5 | 1 | 25 | M2008† | U8415001 | - |
| 2.25 | 0.5 | 13 | M207-RB | U8410017 | - |
| 5 | 0.5 | 13 | M206-RB | U8410016 | - |
| 5 | 0.25 | 6 | M201-RM | U8410001 | - |
| 5 | 0.25 | 6 | M201H-RM* | U8411030 | 2127 |
| 10 | 0.25 | 6 | M202-RM, M202-SM | U8410003, U8410004 | - |
| 10 | 0.25 | 6 | M202H-RM* | U8507023 | 2127 |
| 10 | 0.125 | 3 | M203-RM, M203-SM | U8410006, U8410007 | - |
| 20 | 0.125 | 3 | M208-RM, M208-SM | U8410019, U8410020 | - |
| 20 | 0.125 | 3 | M208H-RM* | U8410018 | 2133 |
| 20 | 0.125 | 3 | M2055* | U8415013 | - |
| 30 | 0.25 | 6 | V213-BC-RM* | U8411022 | - |
RM = Right Angle Microdot; SM = Straight Microdot; SB = Straight BNC † High Penetration Transducer *Used with Holder, P/C 2133
Replaceable Delay Lines
Standard Delay Lines
Standard delay lines are used in many applications. Special conditions such as high surface temperature, the curvature of the material, or hard-to-access areas may require the use of special delay lines.
| Element
Diameter | Delay Line Part Number | Maximum Thickness
Measurement Limit* | ||||||
| Steel
Mode 2 | Steel
Mode 3 | Plastic
Mode 2 | ||||||
| Inches | mm | Inches | mm | Inches | mm | Inches | mm | |
| 0.5 | 13 | DLH-2 | 1.0 | 25 | 0.5 | 13 | 0.5 | 13 |
| 0.25 | 6 | DLH-1 | 1.0 | 25 | 0.5 | 13 | 0.5 | 13 |
| 0.125 | 3 | DLH-3 | 0.5 | 13 | 0.2 | 5 | 0.2 | 5 |
*Exact range depends on material sound velocity, transducer frequency, part geometry, and surface condition.
High-Temperature Delay Lines
High-temperature delay lines function as a protective buffer between the hot surface of the test piece and the transducer's crystal. At elevated temperatures, intermittent contact is recommended to protect the transducer from thermal damage.
| Element
Diameter | High-Temperature Delays | |||
| To 350 °F
(175 °C) | To 500 °F
(260 °C) | To 900 °F
(480 °C) | ||
| Inches | mm | |||
| 0.5 | 13 | DLHT-201 | DLHT-2 | DLHT-2G |
| 0.25 | 6 | DLHT-101 | DLHT-1 | DLHT-1G |
| 0.125 | 3 | DLHT-301 | DLHT-3 | DLHT-3G |
Immersion Transducers
Immersion Transducers
Microscan immersion transducers are designed to transmit and receive ultrasound in water. Thickness measurements by immersion technique are often preferred when the test piece has a complex geometry or in online applications. Typical offline applications include wall thickness measurements on small diameter plastic or metal tubing, scanned or rotary measurements and thickness measurements on sharply curved parts. Transducer focusing may be necessary depending on the application.
| Frequency | Element Diameter | Transducer Part Number | Transducer Part
Code | |
| (MHz) | inches | mm | ||
| 2.25 | 0.5 | 13 | M306-SU | U8410027 |
| 5 | 0.5 | 13 | M309-SU | U8420001 |
| 5 | 0.25 | 6 | M310-SU | U8420004 |
| 10 | 0.25 | 6 | M312-SU | U8420008 |
| 15 | 0.25 | 6 | M313-SU | U8420009 |
| 20 | 0.125 | 3 | M316-SU | U8420011 |
Bubblers
We offer bubblers for easy implementation of immersion testing. They act as a holder for the transducers to maintain consistent water flow from transducer to test surface, and prevent the accumulation of air bubbles on the transducer face.
| Part Number | Opening | Water Path | Fits Transducer
Part Number | ||
| inches | mm | inches | mm | ||
| B100 | 0.125 | 3 | 1.25 | 32 | M310A-SM, M312A-SM, M316A-SM |
| B103* | 0.35 | 9 | 0.575 | 14.5 | M310-SU, M312-SU, M313-SU, M316-SU |
| B103W* | 0.55 | 14 | 0.775 | 19.7 | M306-SU, M309-SU |
| B103A* | 0.35 | 9 | 0.575 | 14.5 | same as B103 |
| * The B103 has a V-notch shaped opening; the B103A and B103W are flat. | |||||
Bubbler Transducer Assembly
Handheld bubbler transducers are available in either 20 MHz (V316B) or 10 MHz (V312B). They are immersion transducers that screw onto a bubbler assembly (B120), which has a replaceable stainless steel tip and a water feed tube. They offer high resolution and easy access inspection of thin materials. |  |
RBS-1 Immersion Tank
RBS-1 immersion tank is designed to simplify ultrasonic thickness measurements using immersion techniques. It consists of a clear acrylic tank, a submersible pump and a transducer fixture in a single, portable unit. It is ideal for offline thickness measurements on metal, glass and plastic products such as small containers, pipe or tubing, sheets or plates or machined parts.
Tank
• 5.5 x 12 x 8 in (140 x 305 x 200 mm)
• 0.83 gallon (3.1 liter) capacity
Pump
• 0 to 0.25 gallons (0 to 0.9 liters) per minute
• 115 or 230 V, 30 Watt (voltage range 90 to 135 VAC), 50 to 60 Hz
• Submersible (ground fault interrupter circuit recommended)
Couplants
The use of couplant is almost always necessary to provide acoustic coupling between the transducer and the test piece. We offer various types of couplants to suit virtually all applications.
| Part Number | Description | Volume | Application |
|
A2
AP AQ AG |
Propylene Glycol
Propylene Glycol Propylene Glycol Propylene Glycol |
2 oz (0.06 liter)
1 pint (0.47 liter) 1 quart (0.95 liter) 1 gallon (3.78 liter) | General purpose couplant for smooth surfaces. Chemically non-reactive; does not evaporate quickly. The maximum recommended temperature is 200 °F (90 °C) |
|
B2
BQ |
Glycerin
Glycerin |
2 oz. (0.06 liter)
1 qt. (0.95 liter) | General purpose, more viscous and has a high acoustic impedance making it the preferred couplant for rough surfaces and highly attenuating materials. |
|
D12
DG D-5G |
Gel Type
Gel Type Gel Type |
12 oz. (0.35 liter)
1 gal. (3.78 liter) 5 gal. (18.90 liter) | Rough surfaces such as sand-cast metals and fiberglass layups, weld inspections, overhead surfaces or vertical walls. |
| E-2 | Ultratherm | 2 oz. (0.06 liter) | 500 °F to 970 °F (260 °C to 520 °C) |
| G-2 | Medium Temp | 2 oz. (0.06 liter) | 0 °F to 600 °F (-12 °C to 315 °C) Easy removal at high temperatures. Non-toxic and biodegradable |
| SWC | Shear Wave | 4 oz. (0.12 liter) | Normal Incidence Shear Wave, non-toxic, water soluble organic substance of very high viscosity. |
Test Blocks & Cables
Calibration Test Blocks
Test blocks are necessary for the calibration of ultrasonic thickness gages and should be used to maintain and verify the accuracy, dependability and reliability of ultrasonic measurements. Blocks are held to tighter tolerances than called out in ASTM E797 code. Metric test blocks are available.
| Part Number | Material | Steps |
| 2211E | 304 Stainless Steel | .100, .200, .300, .400 and .500 in |
| 2212E | 1018 Carbon Steel | .250, .500, .750, .400 and 1.00 in |
| 2213E | 7075-T6 Aluminum | .100, .200, .300, .400 and .500 in |
| 2214E | 1018 Carbon Steel | .100, .200, .300, .400 and .500 in |
| 2214M | 1018 Carbon Steel | 2.5, 5.0, 7.5, 10.0 and 12.5 mm |
Transducer Cables
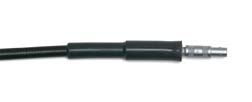
Olympus-NDT offers a wide selection of transducer cables suitable for all ultrasonic thickness gaging instrumentation.
| Part Number | Connectors | Available Lengths |
| LCM-74-X | Small LEMO® 00 to Microdot® |
3 ft (0.9 m), 4 ft (1.2 m),
6 ft (1.8 m) |
| LCB-74-X | Small LEMO® 00 to BNC |
3 ft (0.9 m), 4 ft (1.2 m),
6 ft (1.8 m) |
| BCM-74-X | BNC to Microdot® |
3 ft (0.9 m), 4 ft (1.2 m),
6 ft (1.8 m) |
| LCU-74-X | LEMO® 00 to UHF | 3 ft (0.9 m) |
Standard • Standard cables are recommended for normal usage. | Heavy Duty - Teflon® • Heavy duty, Teflon® (HD) transducer cables may provide durability and longer life. |
Waterproof | Heavy Duty - Armored PVC Jacket
|
| Heavy Duty - Armored Silicone Jacket • Heavy duty, armored super flexible silicone jacket (HDAS) transducer cables combine a spiral stainless steel jacket with a heavy silicone coating for great flexibility. Length can be specified up to 20 ft (7 m). | Heavy Duty - Stainless Steel • Heavy duty, armored stainless steel jacket (SSA) transducer cables are recommended for heavy and industrial use provide flexibility, protection and long life. |
Transducer Selector
Please choose your material below to see relevant transducers.
Your search did not yield any results.
High Resolution
Measurement to 0.0001 in. or 0.001 mm resolution. Usually recommended only when measuring smooth, acoustically transmissive materials like most metals and ceramics with delay line transducers.
Small Radius
Measurement on curved surfaces with radiuses smaller than approximately 50 mm or 2”. This requires small diameter transducers.
Below 1.000” OD: Use 0.250” diameter transducer or smaller
Below 0.500” OD: Use 0.125” diameter transducer or smaller
Below 0.250” OD: Use V260 Sonopen
Below 0.125” OD: Use immersion transducers
Consult Olympus for details.
High Temperature
Surface temperature greater than 50º C or 125º F. In such cases a high temperature delay line transducer must be used.
Precision Thickness Gage Transducer Ranges for Metals, Plastics and Miscellaneous Materials
These tables are intended as a general guideline only, listing only the most commonly used Microscan transducers and typical material thickness ranges when used with the Olympus Model 38DL PLUS and 45MG gages (45MG-SE or 45MG-HP software option required.) All thickness ranges are approximate and should be used as a starting point. The actual measurement range in a given case will always depend on instrument setup as well as material properties such as part geometry, surface condition, and grain structure.
In many cases, these measurement ranges will require an optimized gage setup where gain and blanking have been adjusted by a trained operator. The pre-programmed transducer default setups can always be used as a starting point, but performance can be often optimized and range extended with some simple setup adjustments. Contact Olympus for details.
Your choices also depend on geometry, temperature and resolution. Please consider the follloiwng before making your selections.
| Name | Description |
| High Resolution | Measurement to 0.0001” or 0.001 mm resolution. Usually recommended only when measuring smooth, acoustically transmissive materials like most metals and ceramics with delay line transducers. |
| Small Radius |
Measurement on curved surfaces with radiuses smaller than approximately 50 mm or 2”. This requires small diameter transducers.
Below 1.000” OD: Use 0.250” diameter transducer or smaller Below 0.500” OD: Use 0.125” diameter transducer or smaller Below 0.250” OD: Use V260 Sonopen Below 0.125” OD: Use immersion transducers Consult Olympus for details. |
| High Temperature | Surface temperature greater than 50º C or 125º F. In such cases a high temperature delay line transducer must be used. |


