In-service inspection of pipelines is a challenging yet crucial operation, particularly for pipes buried under ground. After scanning the pipeline from the inside with the proper equipment, sections that present any anomalies are excavated. Once the specific section of the pipeline is accessible, the entire surface of the exposed pipe is sand-blasted until the coating is completely removed. Traditional surface inspections such as magnetic particle inspection (MPI) require this kind of intensive coating-removal preparation procedure. MPI is considered the standard method for detecting surface breaking cracks, including stress corrosion cracking (SCC), even though the technique has been used for pipeline inspection for decades without any major advancement. The MPI method also presents some significant disadvantages: the reliability of results is highly dependent on operator skill; when it’s raining, outdoor inspection is problematic; and there is no result traceability or information on the depth of flaws that are detected. However, these weaknesses can be resolved by using a different inspection technique: Eddy Current Array.
Eddy Current Array Semiautomated Solution for Pipeline Surface Cracking Inspection
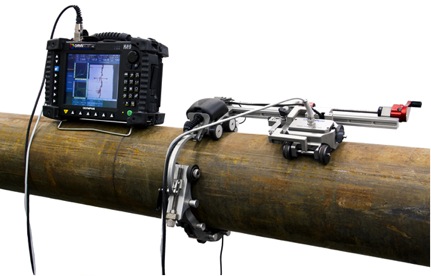
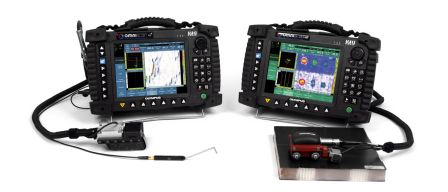
Olympus offers a variety of solutions for surface crack detection on ferromagnetic material. One of these solutions is based on existing equipment that many Olympus customers already use for PA weld inspection: the OmniScan MX, the HydroFORM scanner and the CHAIN scanner. Here is how it works: First, the HydroFORM buggy, which is equipped with a specially designed ECA probe, is attached to the CHAIN scanner. Then, the scanner and probe assembly is connected to the OmniScan MX with the ECA module. This equipment combination enables two-axis mapping of the inspected area of the pipeline. Unlike MPI, ECA inspection is able to record data for advanced reporting and result traceability. Detection sensitivity can be adjusted to show the severity of the indication or to set an inspection threshold that will reject a specific defect depth. According to the capacity of the CHAIN scanner, this solution is applicable to pipes ranging from 1.75 to 38 in. OD.
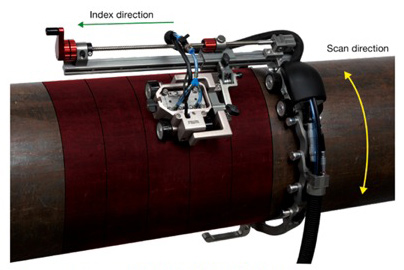
XY mapping principle on pipes with the HydroFORM and CHAIN scanner.
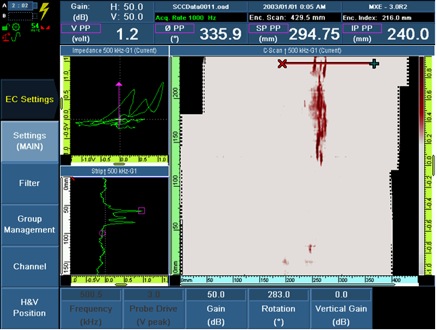
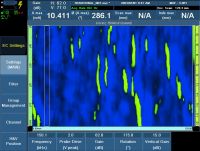
Scan for stress corrosion cracking.
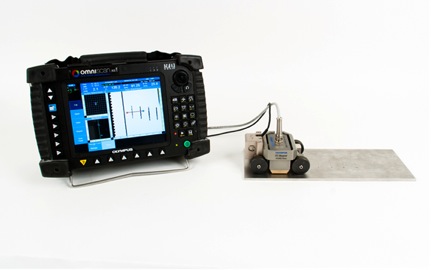
Calibration over reference material and specific EDM notches.
Advantages of Eddy Current Array over the Standard Surface Inspection Methods:
Using eddy current array (ECA) technology for stress corrosion cracking helps keep surface preparation to a minimum. With acquisition speeds of up to two meters per second, performing an inspection with ECA is also extremely fast. Instrument calibration is very simple; all that is required is a material sample with target defect to ensure that the sensitivity is adjusted properly. Setup files can be saved and easily recalled for subsequent jobs. The data recording function permits post-process analysis as well as data archiving, and reports can be easily created directly on the instrument.
- Major time savings when compared with MPI.
- Intuitive imaging, very similar to MPI and PT displays.
- Solution uses existing standard phased array scanner.
- Result traceability and post-process analysis.
- High scan speed and instant results.
- Defect depth evaluation capability.
- Adjustable sensitivity.
- Environment-friendly method (no chemicals involved).
Equipment Required:
OmniScan ECA
- OmniScan MX mainframe (which can also be used for phased array inspection).
- C-scan view.
- Battery operated.
- Drives up to 32 channels and up to 64 channels with an external multiplexer.
- Encoded or time-based scan.
- Data and setup recording.
Probe:
- Robust probe design to fit in the HydroFORM buggy.
- 32-channel probe.
- Omnidirectional sensitivity.
- Absolute-mode signal for easy interpretation.
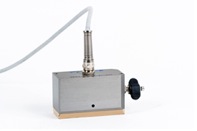 ECA probe | 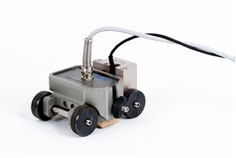 ECA probe mounted in the HydroFORM buggy |
Replacement of Traditional NDT Methods with ECA
Eddy current array easily replaces traditional NDT methods such as MPI and PT for surface inspection. ECA provides imaging that is similar to these traditional techniques but with more possibilities. Rejection criteria can be adjusted so that it is based on probe sensitivity, a feature that is unavailable with the traditional methods.
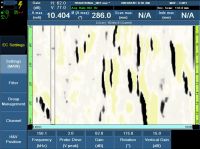
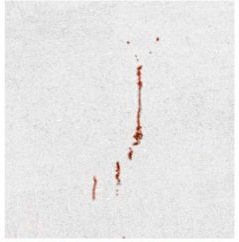 Part inspected with penetrant testing (visible red dye) |  Scan using a standard ECA probe that features the same color representation as the red dye PT (patent rights protected.) The sensitivity can be adjusted to reveal more or fewer defects. |
A Variety of Familiar Color-Palette Choices Offering More Possibilities
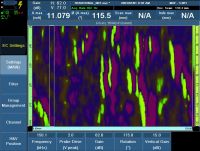
The MXE 3.0 ECA software features a range of patented intuitive color-palette representations that replicate the look of traditional NDT methods, facilitating the interpretation of ECA signals.
Examples of sensitivity adjustments that can be done using ECA method.
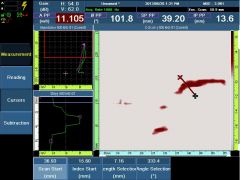 Adjustment of the new MXE 3.0 selection cursors is very intuitive, allowing the user to quickly select any indication. | 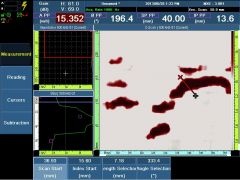 Corrections can be easily done on recorded data. Above example shows gain (contrast) adjustment. |
Part Number:
| U8 | Part Number | Description |
| U8100027 | OMNI-P-ECA4-32 | OmniScan MX and eddy current acquisition module. |
| U8270186 | SBBR-HYDRO-64-500 | ECA rigid probe, 64 mm coverage, 32 channels, 500 kHz. Designed to be used with the HydroFORM buggy for the SCC solution. |
| U8750041 | CHAINSCAN-XY38 | CHAIN Scanner-XY38: Hand scanner for pipe inspection with encoded x-axis and y-axis for pipes from 1.75 inch to 38 inch OD. |
| U8750058 | HydroForm-K-ADPCHAIN | HydroFORM corrosion mapping package with one HYDROFORM-K-MANUAL and one HYDROFORM-A-ADPCHAIN. |
| U8863116 | RSTD-10133 | Reference standard with certificate, 4340 steel. |

