In industries like oil & gas and power generation, aging infrastructures can lead to unscheduled maintenance and safety concerns. Using ultrasonic testing (UT) to map corrosion is an essential part of infrastructure integrity programs.
In conventional UT, ultrasonic waves are transmitted into a pipe or other part to detect internal flaws that can’t be seen with the naked eye. Dual crystal UT probes can be used manually to perform spot checks or with a motorized 2-axis scanner to perform C-scan imaging. The manual technique can be slow and prone to missing defects while the automated systems used to be cumbersome and require unsafe and unreliable fast rastering scanners.
To help companies more effectively inspect parts with smooth surfaces for mid-wall damage or internal corrosion, we created a Dual Linear Array™ (DLA) probe that utilizes a pitch-catch technique. Used with an OmniScan® SX or OmniScan MX series flaw detector, this probe combines the advantages of dual UT conventional probes with phased array technology imaging.
Five advantages of using DLA probes for corrosion inspection include:
1. Larger beam coverage
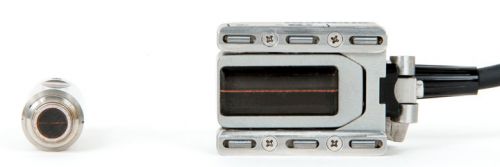
Increase your productivity and the probability of detection with DLA probe’s wider beam coverage. While the width of a typical UT probe’s inspection beams is 4.7 mm (0.19 in.), making it useful for spot checks only when used manually, the DLA probes have a beam width of 30 mm (1.18 in.) so you can inspect a large area quickly. It is, therefore, possible to generate a C-scan with a higher likelihood of detecting small flaws.
Conventional UT (left) has a 4.8 mm (0.19 in.) effective beam versus 30 mm (1.18 in.) beam with a DLA probe (right).
2. Locate smaller defects
One common conventional UT method used to monitor corrosion is taking manual point thickness measurements on the pipe (spot check). An inspector will typically use a 1 in.2 grid, but this can cause inspectors to miss smaller defects that fall between the point measurements.
The smaller elements used in DLA probes help inspectors perform high data-point density inspections faster than what can be accomplished using conventional dual UT probes. With a higher point density, you can reduce your chances of missing small defects.
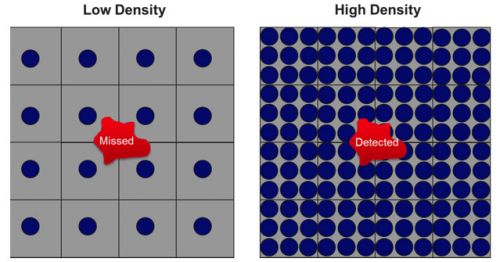
The data point density of conventional UT (left) versus DLA probes (right).
3. Better near-surface resolution
DLA probes employ the pitch-catch technique for increased near-surface resolution as compared to phased array pulse-echo. DLA probes have a minimal interface echo, enabling inspectors to locate flaws as close as 1 mm (0.046 in.) to the surface. This feature is essential for locating critical defects such as wall thinning and pitting.
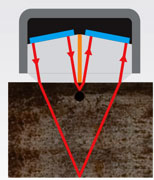
The emitting array (left) is isolated from the receiving array (right) resulting in a reduced interface echo and better near-surface detection.
4. Corrosion scanning made easy
The probe is ready for encoded data acquisition using the Mini-Wheel™ encoder or any of our scanners and comes supplied with OmniScan® setup files so you can start your inspections quickly with minimal setup time.
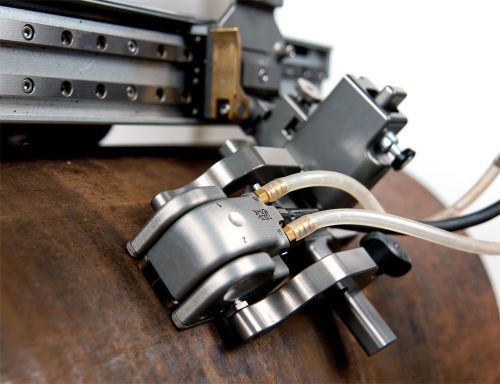
Thanks to enhanced features, such as built-in irrigation and a replaceable delay line that can be contoured to better adapt to pipe curvature, the DLA corrosion probe can also be used to perform semi-automated inspection using the MapSCANNER™ or automated inspection using the MapROVER™ with improved sound transmission and no headaches having to deal with couplant.
5. Reliable and versatile
On top of a replaceable delay line, DLA corrosion probes feature a carbide wear plate for extra protection. The probe also features an integrated stabilization system with a quick radius adjustment for increased stability on curved surfaces with a 4-inch outside diameter (OD) all the way up to flat surfaces.
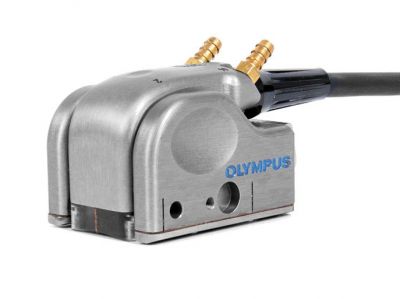
An Olympus DLA corrosion probe.


