OLS4100
Productos discontinuados
Overview
This product has been discontinued, check out our current laser confocal microscope >>
With the Olympus LEXT OLS4100 laser scanning digital microscope non-contact 3D observations and measurements of surface features at 10 nanometer resolutions are easy to produce. The OLS4100 industrial microscope has distinctive features for fast image acquisition and high-resolution microscope images over a wider area.
- Superior Metrology
- Industry's First* Double Performance Guarantee
- High-Quality Imaging
- Systematic Workflow via Intuitive GUI
Superior Metrology
Wider Sample Range
Imaging Slopes up to 85°
With the Olympus LEXT OLS4100 laser scanning digital microscope non-contact 3D observations and measurements of surface features at 10 nanometer resolutions are easy to produce. The OLS4100 industrial microscope has distinctive features for fast image acquisition and high-resolution microscope images over a wider area.
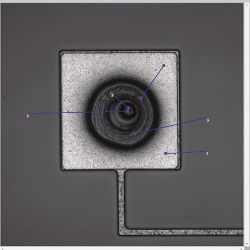
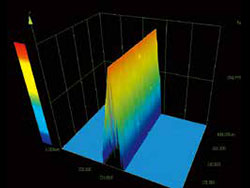 Razor with an Acute Angle | 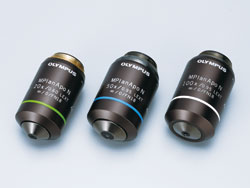 LEXT-Dedicated Objectives | 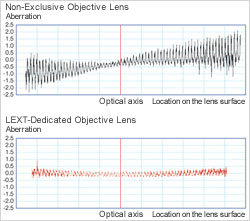 Minimized Aberrations with Dedicated Objective |
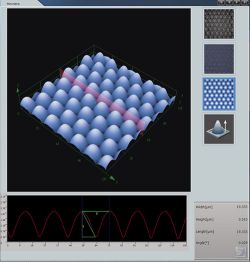
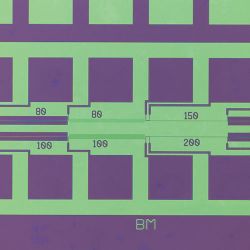
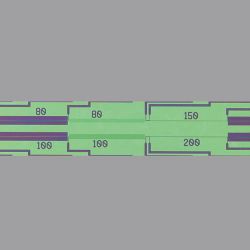
Micro-Profile Measurements with 10 nm Height Resolution
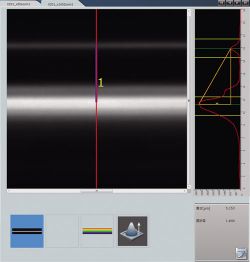
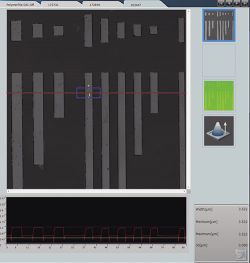
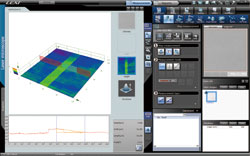 (MPLAPON50XLEXT) STEP Height standard Type B, PTB-5, Institut für Mikroelektronik, Germany, 6 nm Detection in Height Measurement | These operative microscope capabilities also enable submicron measurements of a sample's surface and measurement of micro-roughness on an uneven surface. A precise 0.8 nanometer resolution linear scale and software algorithms, such as our original I-Z curve, can resolve height differences of 10 nanometers. |
Overcoming Reflectance Differences
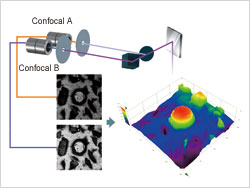 Diamond Electroplated Tool Objective Lens: MPlanApoN50xLEXT | The OLS4100 opto-digital microscope employs a dual confocal system, incorporating two confocal optical light paths. In combination with a high sensitivity detector for precise 3D microscope images from a sample consisting of materials with different reflectance characteristics. (More on reflectance, measuring transparent samples and other imaging capabilities of the OLS4100 professional microscope in our gallery) |
Applicable to Transparent Layers
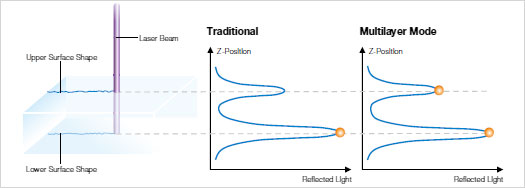 | Multi-Layer Mode |
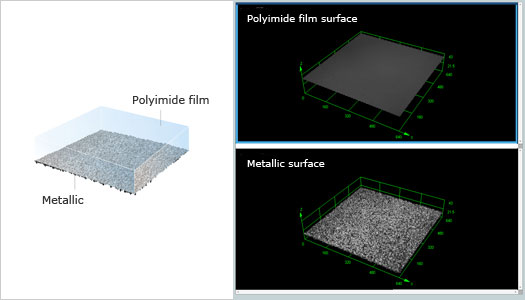 | Observation/Measurement of Multiple Layers of Transparent Material |
Industry's First* Double Performance Guarantee
Accuracy and Repeatability
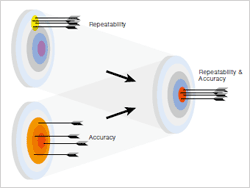 | The performance of a measuring tool is typically expressed using two different terms: "accuracy," which indicates how close a measurement value is to its true value, and "repeatability," which indicates the degree of variations among repeated measurement values. The OLS4100 is the industry's first laser scanning compound microscope to assure both accuracy and repeatability. |
Traceability System
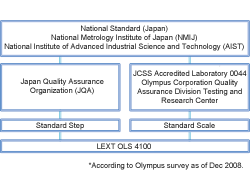 | The OLS4100 uses a rigorous system of production for every component. From the objective lens to the laser head, Olympus delivers only the highest-quality systems based on comprehensive inspection to the strictest standards. On delivery, final adjustment and calibration is performed by qualified engineers in the actual measurement environment. |
Wide Range of Measurement Types
OLYMPUS Stream (optional)
Workflow Solution for Improved Image Analysis Performance
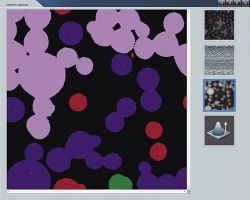
After choosing the OLS4100 industrial microscope, final adjustment and calibration is performed by qualified engineers in the actual measurement environment. In addition, customers have the option to add OLYMPUS Stream digital micro imaging software for grain size analysis or nonmetallic inclusion rating directly to the OLS4100.
Learn more about the OLYMPUS Stream >
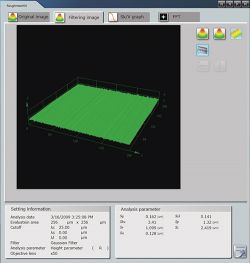
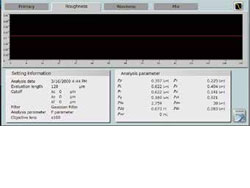
Improved Roughness Measurement
LEXT OLS 4100 Parameters
Specifically, for improved roughness measurement and surface analysis, the LEXT OLS4100 industrial microscope is calibrated in the same way as contact surface roughness gages. It has the necessary roughness parameters and filters required per ISO and JQA. This allows users with contact surface roughness gages to get output results from the system consistent with their existing instruments, with the advantage of greater speed and non-contact measurement. A roughness surface-specific mode enables roughness profile measurement for sample lengths up to 100mm with an automatic line stitching function.
| Primary Profile | Pp, Pv, Pz, Pc, Pt, Pa, Pq, Psk, Pku, Psm, PΔq, Pmr(c), Pδc, Pmr |
|---|---|
| Roughness Profile | Rp, Rv, Rz, Rc, Rt, Ra, Rq, Rsk, Rku, Rsm, RΔq, Rmr(c),Rδc, Rmr, RZJIS, Ra75 |
| Waviness Profile | Wp, Wv, Wz, Wc, Wt, Wa, Wq, Wsk, Wku, Wsm, WΔq, Wmr(c), Wδc, Wmr |
| Bearing Area Curve | Rk, Rpk, Rvk, Mr1, Mr2 |
| Motif | R, Rx, AR, W, Wx, AW, Wte |
| Roughness Profile (JIS 1994) | Ra(JIS1994), Ry, Rz(JIS1994), Sm, S, tp |
| Others | R3z, P3z, PeakCount |
Accommodating Next-Generation Parameters
The OLS4100 comes with roughness (3D) parameters conforming to ISO25178 for reliable evaluation of the planar area.
| Amplitude Parameters | Sq, Ssk, Sku, Sp, Sv, Sz, Sa |
|---|---|
| Functional Parameters | Smr(c), Sdc(mr), Sk, Spk, Svk, SMr1, SMr2, Sxp |
| Volumetric Parameters | Vv(p), Vvv, Vvc, Vm(p), Vmp, Vmc |
| Lateral Parameters | Sal, Str |
LEXT OLS4100 performance is comparable with results of a sur face roughness gauge.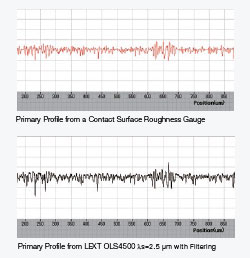
Micro Roughness
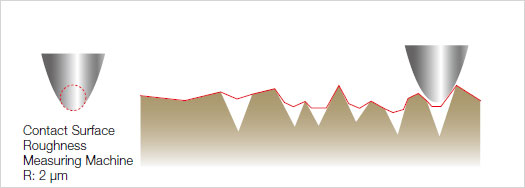 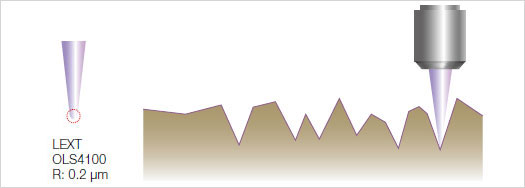 | Contact surface roughness gages cannot measure micro surface contours less than the stylus tip diameter. The OLS4100 professional microscope can measure the surface roughness of micro geometries at high resolution due to a diminutive laser spot diameter. |
Non-Contact Measurement
Since a contact surface roughness gage uses a hard needle-shaped stylus, it is more likely to scratch the surface of a soft specimen. With adhesive specimens, on the other hand, the stylus can attach to the specimen and be damaged when pulled. The OLS4100 is a noncontact industrial microscope that can correctly identify a measuring position and easily perform accurate surface roughness measurement of a micro area regardless of surface texture conditions.
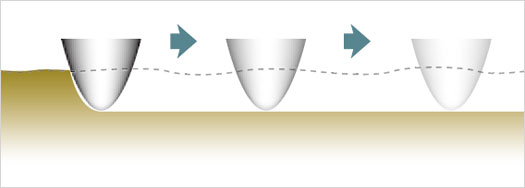 Soft Specimen 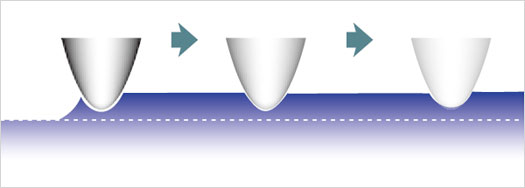 Adhesive Specimen |
|
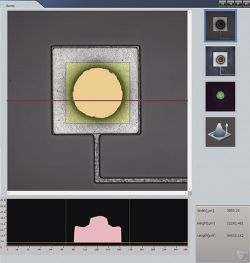
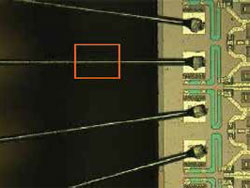
Measurement of Features at the Micron Level
| 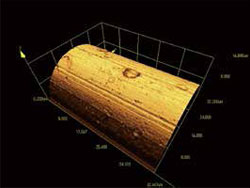 | Surface roughness gauges cannot measure micron-level features since their styli are not able to access these areas. The OLS4100 can correctly identify a measuring position and easily perform roughness measurement of a target micro area. |
High-Quality Imaging
Crystal-Clear 3D Color Images
Three Types of Integrated Images
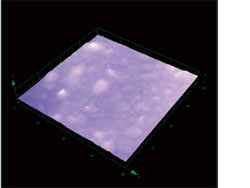
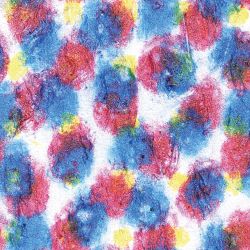
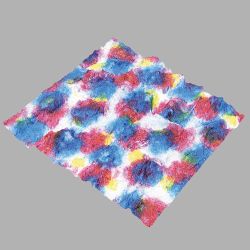
The OLS4100 industrial microscope can acquire three different types of information at the same time: a true-color optical microscope image, a laser microscope image, and height map. Operators can also capture an optical microscope image consisting of in-focus pixels only and integrate them with a true-color optical microscope image containing height information for crystal-clear 3D surface roughness color images.
Natural Color Reproduction
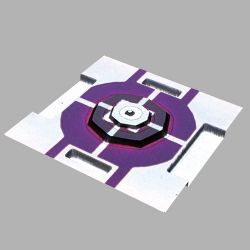 Real-Color 3D Image | 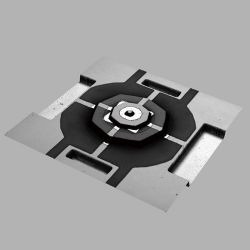 Confocal 3D Laser Image | 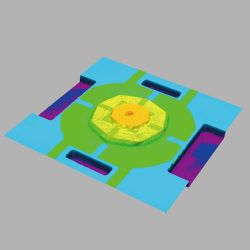 Height Map |
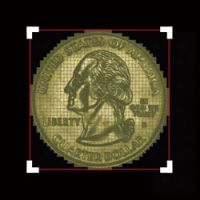
Realistic Surface Reproduction, Laser DIC (Differential Interference Contrast)
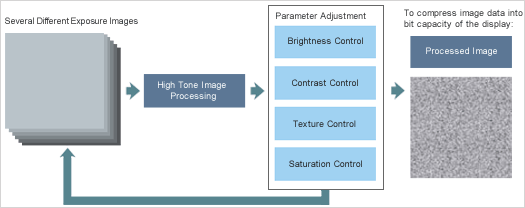
Optimized Balance Between Brightness and Contrast, HDR (High Dynamic Range) Imaging
Stabilization of Measurement and Imaging Environments
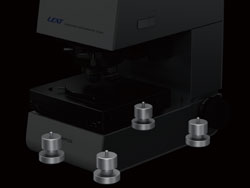 Hybrid Vibration-Dampening Mechanism | To eliminate external influences on measurement and imaging, the OLS4100 incorporates a hybrid vibration dampening mechanism using coil springs and dampening rubber to stabilize the operating environment. This eliminates the need for a dedicated vibration-dampening stand, allowing measurements on any desktop. |
Systematic Workflow via Intuitive GUI
Easy Three-Step Process
With the LEXT OLS4100, observation or measurement begins immediately once the sample is placed on the stage. Thanks to our easy three-step “Imaging, Measurement and Reports” process, measurement procedures can be quickly mastered, even by those not familiar with laser microscopy.![]()
Keeping Track of the Sample
Macro Map Functionality
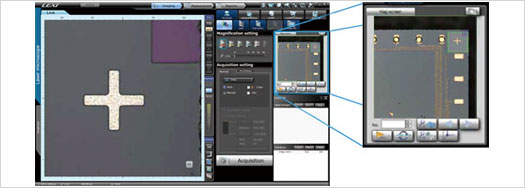 | Once you receive your OLS4100, you can begin observation or measurement immediately once the sample is placed on the stage. Our easy three-step “Imaging, Measurement and Reports” process set-up means that measurement procedures can be quickly mastered, even by those not familiar with industrial laser microscopy, simply by selecting the operating mode suitable for the operator’s experience level. |
Fast Macro Map Stitching
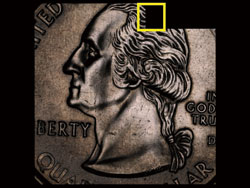 | Two stitching methods are available for scanning large areas: Manual mode for live image acquisition and Automatic mode for faster image acquisition. Operation is quick and simple—2D stitching starts automatically at the touch of a single button, and wide area images are acquired immediately. The stitching size is available from five steps in 3x3, 5x5, 7x7, 9x9, and 21x21 in Automatic mode. Unnecessary parts of the acquired images can also be removed manually with simple mouse/joystick operation. |
Smart Scan for Simple 3D Imaging
Automatic 3D Image Acquisition
Since conventional 3D scanning requires complicated settings that are difficult for novice users, Smart Scan mode lets first-time users quickly acquire 3D roughness images with one click. In addition to upper and lower limit settings, appropriate brightness level is automatically set up by the system based on the image to be captured. All of these functions speed the imaging, measuring and reporting processes, besides making them reliable with same-use by all operators.
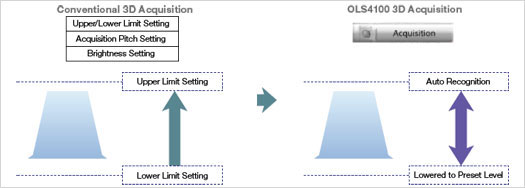
Automatic Brightness Control
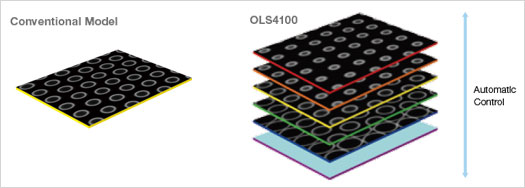
Brightness Control on a Plane Brightness Control with a Range of Height.
Greater Reduction of Acquisition Time
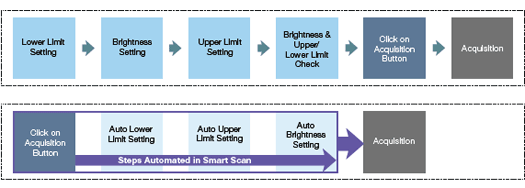
Improved Scanning Speed
The new Ultra-Fast mode allows scanned image acquisition at twice the speed of conventional Fast mode, and approximately nine times the speed of Fine mode. This makes it possible to measure micro-samples with very steep angles, such as the tip of a knife, which is difficult to observe due to fine Z-step movement and high magnification.
Number of images acquired in a set amount of elapsed time: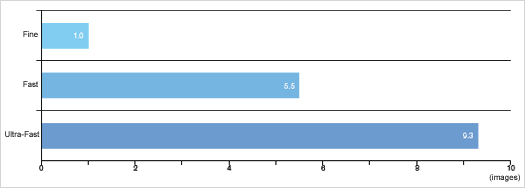
Actual scanning time varies depending on magnification in use and Z-acquisition range.
High-Speed Acquisition of Required Areas Only
New High-Speed Stitching Mode
Specify Target Areas from Wider-Area Stitched Images
As in macro mapping, the area to be observed can be specified from a wide area map. In Automatic mode, an area map can be automatically generated in roughly half the time it normally takes by setting a rectangular stitching size of up to 625 images. Observation can begin immediately once the target area is specified on the area map.
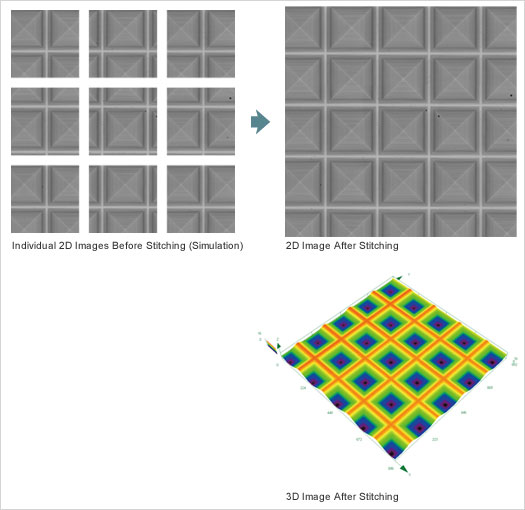 | Stitching Area: Square (21x3) 63 Pieces |
Manually Specifying Required Image Areas
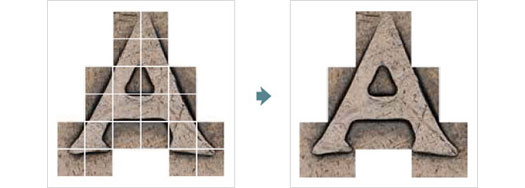 | In Live mode, the area to be observed can be selected manually by tracing the required region onscreen. This is ideal when the sample has an irregular shape. |
Quick Image Acquisition
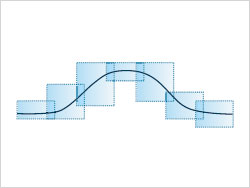 Smart Scan Mode | 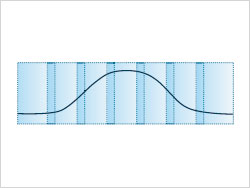 Conventional Acquisition Mode | In Smart Scan mode, all it takes is the click of a button. As the location across the Z-axis is automatically adjusted, image acquisition in the Z-axis direction can be restricted to required areas only, for rapid high-power observation across a wide area. |
Customizable Reports at the Touch of a Button
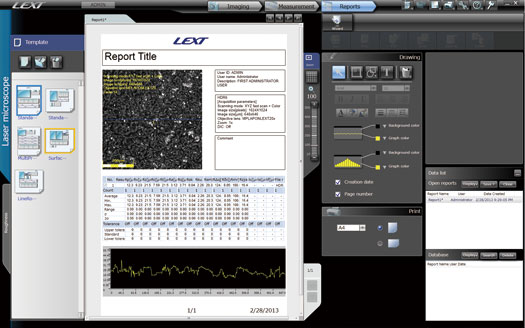 | The OLS4100 professional microscope generates customizable reports at the touch of a button after measurement, and an edit function allows the operator to customize each report template, too. Copying and pasting measured results into a document or spreadsheet is also quite simple, as is retrieving required images or reports from a database. |
One-Click Solutions
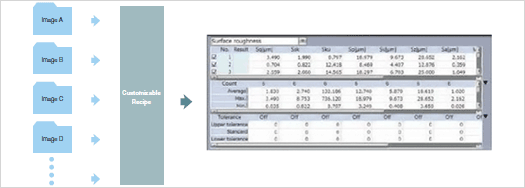 | A detailed user-designed wizard function eliminates the need for lengthy training and allows quick and easy operation by new operators. |
