5. Basic Features of Olympus Industrial Laser Scanning Microscopes
5-1. 405-nm Laser Scan
The plane resolving power of optical microscopes largely depends on the wavelength of the light used. A laser scanning microscope using laser light with a short wavelength has better horizontal resolving power than conventional microscopes, which use visible light (average wavelength: approx. 550 nm). The OLYMPUS LEXT OLS5000 provides an excellent plane resolving power by adopting a 405-nm short wavelength semiconductor laser.
Figure 6: Laser Light Source of the LEXT OLS5000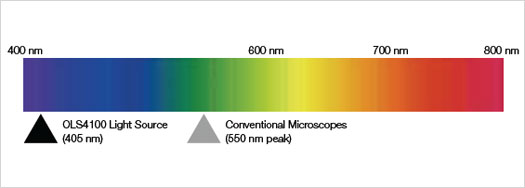
5-2. Objective Lens Specially Designed for 405-nm Light
It is important to reduce the effect of aberration of the optical system in addition to shortening the wavelength of the light source to realize a high resolving power in a confocal optical system. The most important part in the optical system is the objective lens. The OLS5000 adopts an objective lens specially made for 405-nm light developed by Olympus, which realizes ideal performance with blue-violet laser light (λ = 405 nm), which is a wavelength on the short end of the visible light spectrum.
The two graphs in Figure 7 compare the measurement results acquired using the specially designed objective lens and those acquired using an objective lens with the same NA used in an ordinary optical microscope. The sample has a nominal period of 10 mm and a sine wave profile with amplitude of 0.3 mm. In the case of the ordinary objective lens, the area around the optical axis shows the correct measurement result as the nominal value. However, the measured amplitude is larger than the actual value in the periphery of the field of view. This error is caused by the difference in aberration performance on the optical axis and in the periphery of the field of view at the light source wavelength of 405 nm. This phenomenon becomes more prominent in proportion to the inclination angle of the sample. In contrast, when the objective lens specially designed for 405-nm light is used, this behavior is not seen and the correct measurement result is acquired in the periphery of the field of view. In this way, the OLS5000 provides reliable measurement of shapes often seen in typical measurement targets such as regional inclination created by minute irregularities in the sample across the whole field of view. In addition, accurate detection is possible in the periphery of the field of view and the measurement performance for samples with steep inclination has been improved.
| Figure 7: Lens Performance Comparison with Objective Lens Specially Designed for 405-nm Light | ||
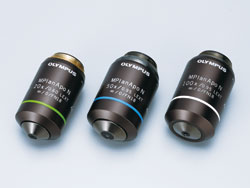 LEXT-Dedicated Objective Lenses | 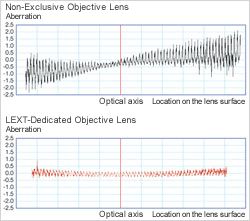 Minimized Aberrations with Dedicated Lens | |
5-3. High-Speed Two-Dimensional Scan with Low Distortion and Excellent Plane Resolving Power
The OLS5000 incorporates a proprietary two-dimensional scanner from Olympus. The electromagnetic induction type MEMS scanner and the highly accurate galvano mirror are adopted for the X and Y directions respectively. An ideal compact optical layout has been realized by positioning this scanner at a position that conjugates the pupil of the objective lens. This ideal optical layout enables high-speed accurate X-Y scans with low distortion. Combining this with the high-performance confocal
optical system, short wavelength laser, and specially designed objective lens realizes a plane resolving power of 0.12 μm. The OLS5000 also supports ultra-high resolution scans at up to 4,096×4,096.
Figure 8: Two-Dimensional Scan System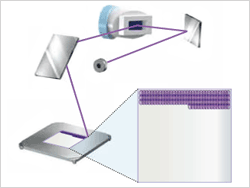
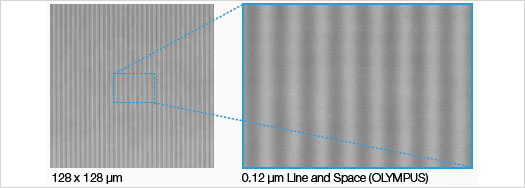
Accurate X-Y Plane Measurement
5-4. PEAK Search
The reflection intensity data for each Z step can be acquired by moving the objective lens in the Z direction and detecting changes in the intensity of the reflected light. This PEAK search technology, which uses a proprietary algorithm from Olympus, calculates an appropriate I-Z curve including the reflection intensity between steps from the obtained reflection intensity data and obtains the height position with the maximum intensity across the whole range in the Z direction. An accurate
three-dimensional image of the whole field of view can be obtained by making this calculation for every pixel. The OLS5000 PEAK search enables reliable three-dimensional measurement.
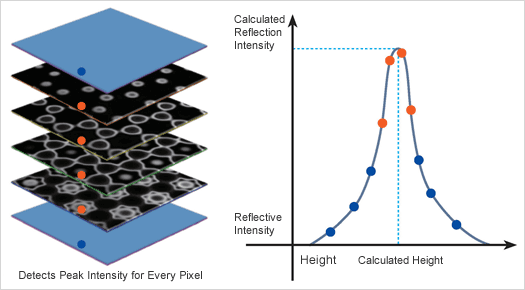
Multiple Images Acquired by Shifting Focus
5-5. Differential Interference Contrast of Laser (DIC)
Differential interference contrast observation is an observation method that allows one to see minute irregularities on the nanometer level, exceeding the resolving power of the laser scanning microscope. With this laser DIC, the OLS5000 can obtain images at a resolving power close to that of electron microscopes even during live observation at low magnification.
| Figure 9: Image of Differential Interference Contrast of Laser (DIC) | ||
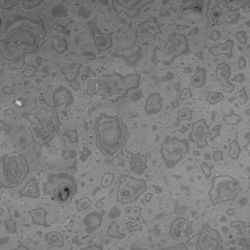 Laser Image with No DIC (Polymer Film) | 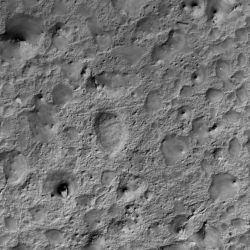 Laser Image with DIC (Polymer Film) | |
5-6. Improvement of Detection Capability for Combined Samples Containing Materials with Different Reflectance Values and Steep Slopes
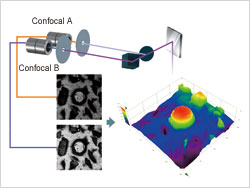
The OLS5000 has adopted a dual confocal system that incorporates two confocal systems. In combination with a highly sensitive detector, clear images and reliable height images can be obtained from a sample consisting of parts that have very different reflectance values. In addition, it was difficult to detect the height data of steep slopes from which little reflected light returns with conventional laser scanning microscopes. The OLS5000, however, can reliably measure samples that have steep angles using the specially designed objective lens with a high NA and a 405-nm laser.
| Figure 10: Dual Confocal System and Example of Acquisition of Steep Slope | |
 Diamond Electroplated Tool Objective Lens: MPlanApoN50xLEXT | 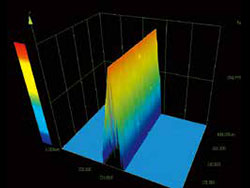 Razor with an Acute Angle |
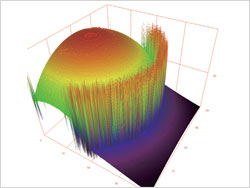 With conventional laser microscopes | 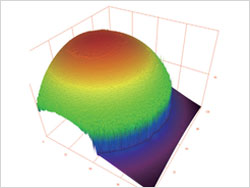 With LEXT OLS5000 |
5-7. Noncontact/Nondestructive Observation, Inspection, and Measurement
Laser light measurement allows for observation, inspection, and measurement without damaging the sample. Samples can be measured in atmosphere without having to cut them into small pieces. All you have to do is place the sample on the stage of the microscope. For example, in stylus-type measurement the stylus directly touches the sample surface. Therefore, the surface of soft samples could be scraped or sticky samples could be pulled along, making it impossible to obtain a correct value. However, noncontact laser scanning microscopes are not affected by the condition of the surface and allow for accurate roughness measurement.
| Figure 11: Data Acquisition of Soft Surface Sample | |||
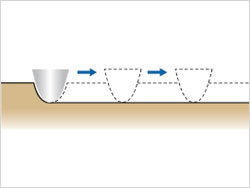 | 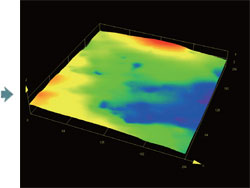 | ||
| In contact measurement, the stylus scrapes soft samples. | Observation image sample using the laser scanning microscope: adhesive tape, 256 × 256 μm area | ||
5-8. Measurement of Fine Irregularities Using Miniscule Laser Spots
While the tip radius of a new stylus (before wear) is 2 μm or 10 μm, the radius of the laser spot of the laser scanning microscope is very small (0.2 μm) and does not wear. The laser spot reaches into narrow crevices that other devices cannot enter, making it possible to measure surfaces with fine irregularities.
| Figure 12: Laser Spot of Laser Scanning Microscope | |
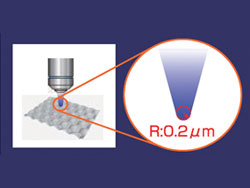 | 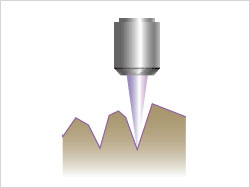 Noncontact laser microscope R: 0.2 μm (OLS5000) |
5-9. Performance Assurance of Accuracy and Repeatability and Ensuring Traceability
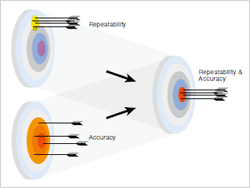
The performance of a measuring unit is represented by the terms "accuracy" and "repeatability." Accuracy refers to how close the measurement value is to the true value. Repeatability refers to how small fluctuations are after several measurements. The OLS5000 guarantees these two performance values. All the components in the OLS5000 are manufactured in a rigorous system. The components from the objective lens to the main body are all manufactured at Olympus factories, shipped after passing rigorous inspection standards. A specialist engineer calibrates and makes final adjustments to the product at delivery in the environment where the product will actually be used.
| Figure 13: Assurance of Two Performance Values and Ensuring Traceability | |
 |  |
- 1. Basic Principles of Laser Scanning Microscopes
- 2. Resolving Power of Laser Scanning Microscopes
- 3. Measurement Accuracy of Laser Scanning Microscopes
- 4. Software for Laser Scanning Microscopes
- 5. Basic Features of Olympus Industrial Laser Scanning Microscopes
- 6. Application Examples
> Click here for detail about OLS5000, laser confocal microscopes
> Click here for detail about OLS4500, nano search microscopes