3D Measuring Laser Microscope LEXT OLS4000
Discontinued Products
Vue d’ensemble
This product has been discontinued, check out our current laser confocal microscopes >>
The LEXT OLS4000 3D Laser Measuring Microscope is designed for nanometer level imaging, 3D measurement and roughness measurement. Magnification ranges from 108x - 17,280x satisfy the needs of today's researchers.
- Advanced Measurement Performance
- Ideal Operating Environment
- Outstanding Surface Roughness Analysis Capability
Advanced Measurement Performance
Imaging Slopes Up to 85 Degrees
The OLS-4000's dedicated objective lenses with high numerical apertures and a dedicated 405nm optical system provide the capability to obtain maximum performance from the 405 nm laser, the LEXT OLS4000 can reliably measure acute-angled specimens that were previously impossible to measure.
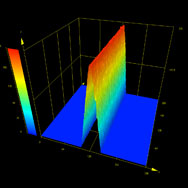 Razor with an Acute Angle | 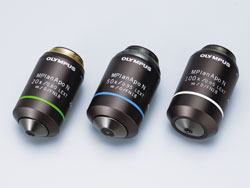 LEXT-dedicated Objective Lenses |
Overcoming Reflectance Differences
The LEXT OLS4000 employs a newly developed dual confocal system. This system allows the LEXT OLS4000 to capture a clear image from a specimen consisting of materials with extremely varied reflectivity levels.
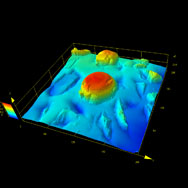 Specimen with Diverse Reflectance (Diamond-electrodeposited Tool) | 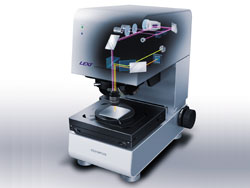 Dual Confocal system |
Multilayer Mode Facilitates Measurement of Transparent Layers
Traditionally, the focal point of laser microscopes was set to the position where the reflected light intensity on the specimen was the highest. However, this design sometimes made it hard to identify the correct specimen shape of a transparent specimen because the laser beam would pass right through it. The LEXT OLS4000's new multilayer mode is capable of recognizing the peaks of the reflected light intensities of multiple layers and setting each layer as the focal point, making it possible to observe and measure the upper surface of a transparent specimen, as well as to analyze multiple layers and to measure the thickness of each layer.
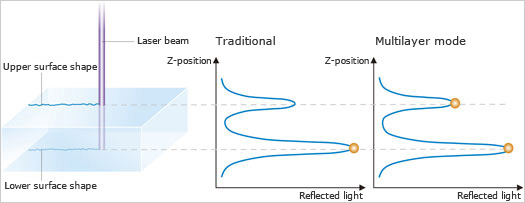
Observation/Measurement of Top Surface of Transparent Material
In general, with a laser scanning microscope, it can be difficult to measure a specimen, such as a transparent film on a metal substrate. The OLS4000's multilayer mode facilitates observation and measurement of the transparent films.
Surface coating on a metallic material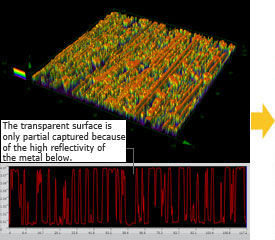 Conventional mode Conventional mode | 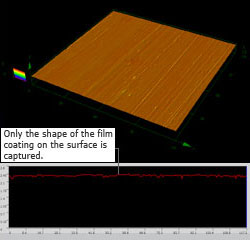 Multilayer mode Multilayer mode |
Analysis of multiple layers of transparent material
The multilayer mode can also analyze the multiple layers of a transparent specimen. For example, even when the specimen is a transparent resin layer on a glass substrate, the shape and roughness of the layer below the transparent material as well as the thickness of the surface film can be measured.
Polyimide film on a metal substrate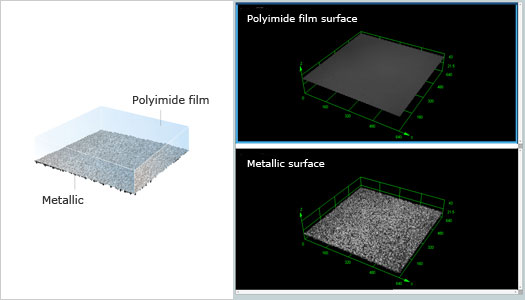 |
| 20x |
Minimize influence from Measurement Environments
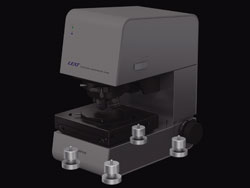 Hybrid Vibration-damping Mechanism | To eliminate external influences from the environment on the measurement, the LEXT OLS4000 incorporates a hybrid vibration-damping mechanism using coil springs and damping rubber. This mechanism eliminates the need for a dedicated vibration-damping stand, allowing measurements on any desktop. |
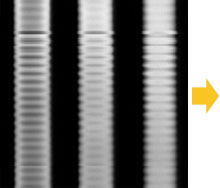 Influence Derived from External Vibrations | 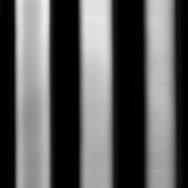 Reduced Vibration Influence with the Vibration Isolation Mechanism |
World's First Double Performance Guarantees
The performance of a measuring tool or its accuracy is expressed in two different terms. One is "Accuracy", which indicates how close a measurement value is to the true value, and the other is "Repeatability", which indicates the degree of variations among repeated measurement values. The LEXT OLS4000 assures both accuracy and repeatability - a world's first for laser microscopes.

measurements
Reproducing More Realistic Images of Micro Asperities
Differential Interference Contrast (DIC) is an observation method for visualizing sub-nanometer micro asperities, which are far beyond the resolving power of a typical laser microscope. This DIC method allows a user to obtain live images comparable to those of an electron microscope under relatively low power magnifications.
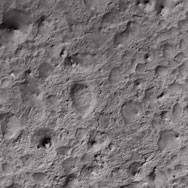 Laser Confocal with DIC (Polymer Film) | 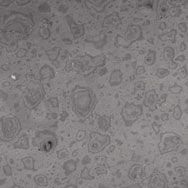 Laser Confocal (Polymer Film) |
Supporting Wide-field Observation
Higher-magnification imaging generally narrows the visual field range. The advanced stitching function of the OLS4000 enables you to stitch up to 500 images together to create a high-resolution, wide-field image. In addition, 3D display and 3D measurements are available on the stitched image.
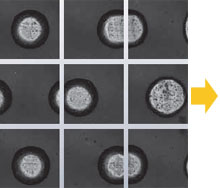 Brightness of Image After Stitching | 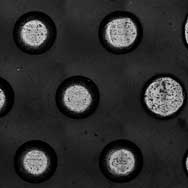 Brightness of Image Before Stitching |
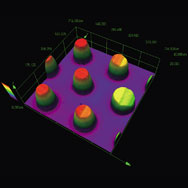 Stitched 3D Image |
Ideal Operating Environment
Customizable ID Control and Security Enhancement
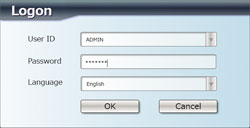 Login GUI | Operators can log in to the LEXT OLS4000 using individualized IDs that provides them with an operation environment and database customized to their needs.. Each operator's ID is displayed on every report and specimen image, giving the administrator an at-a-glance picture of when each report was created or each image was captured and who created the report or image. |
Wizard Function that Gives Novice Operators a Sense of Security
For quick and easy operation by new operators, the LEXT OLS4000 has a detailed user designed wizard function. This wizard function greatly reduces the time spent reading the manual or attending lengthy training.
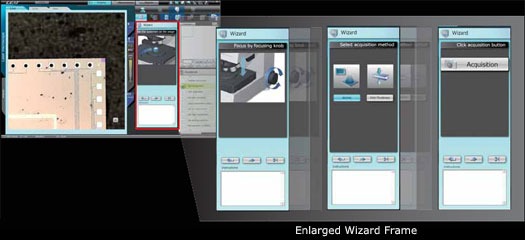
Wizard Frame Function
Auto Measurement Function* For Reliable, Efficient Consecutive Measurement
Accurate, efficient operation is required to repeat specified measurements on each sample. The need for accuracy
and efficiency is even greater when a number of repeat measurements have to be performed. With the optional auto
measurement function, the LEXT OLS4000 can automatically execute a series of operations - from sample alignment to
acquisition of measurement results - according to parameters set in advance by the user.
* Auto measurement is an optional function.

Auto Measurement Function
Macro Map
Since the visual field is narrowed during high magnification observation, in many circumstances the operator will lose track of their location on the specimen. The LEXT OLS4000 is equipped with the macro map function to solve this problem. The screen always displays a wide-field image of the specimen under low magnification, displaying a rectangular marker to denote current location..
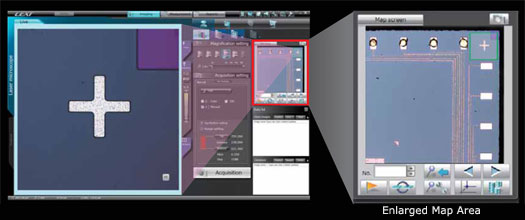
Macro Map Function
Motorized Revolving Nosepiece - Protect Your Valuable Samples
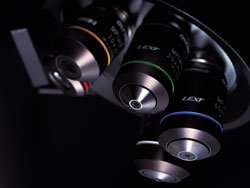 Motorized Revolving Nosepiece | The LEXT OLS4000 is equipped with a motorized revolving nosepiece standard to prevent contact with a specimen during an objective lens change. When a new lens is selected, the revolving nosepiece automatically retracts to avoid contacting the specimen. At the same time, the system automatically brings the objective lens into focus, aligns the image and adjusts light intensity, allowing stress-free switchover of magnifications. |
Intelligent Noise Removal (INR) Algorithm
For optimal operation, Olympus has successfully preset a skilled operator's criteria in the system based on experience accumulated over Olympus's 90 year history. Much of this is attributable to the INR (Intelligent Noise Reduction) algorithm newly installed on the LEXT OLS4000. This algorithm allows even a new operator to easily obtain an image identical to that of a expert.
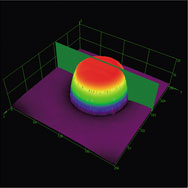 INR Algorithm Installed | 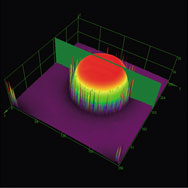 No INR Algorithm Installed |
User Defined Reports - Reports in your format
Fast production of easy-to-understand reports is vital to metrology instrument. The LEXT OLS4000 generates a measurement report with one click. It also provides an edit function to allow the operator to customize report templates.
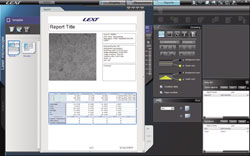 Report GUI | 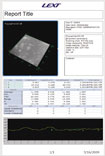 Completed Report Form |
Outstanding Surface Roughness Analysis Capability
New "Roughness Measurement" Capabilities Open New Possibilities in Measurement
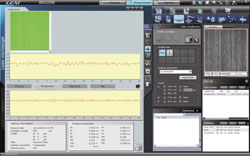 Roughness Measurement GUI | The LEXT OLS4000 has been developed to represent a new standard of surface roughness measuring tool and offers ideal capability to measure surface area texture, not to mention surface profile measurements. This system is calibrated in the same way as standard stylus instruments for roughness measurement, and has the necessary roughness parameters and filters required per ISO. This allows users with stylus instruments to obtain output results from the system consistent with their existing instruments, with the advantage of greater speed and noncontact measurement. The LEXT OLS4000 has a new line roughness-specific mode enabling roughness profile measurement for sample lengths up to 100 mm with the new automatic line stitching function. |
Measurement Profile Comparison between OLS4000 and Contact Surface Roughness Gage (Total profile length: 1.6 mm)
| Entire Length of Profile: 1.6 mm | ||
 Primary Profile from LEXT OLS4000 λs=2.5 µm without Filtering |  Primary Profile from LEXT OLS4000 λs=2.5 µm with Filtering |  Primary Profile from a stylus instrument |
Parameters List

LEXT OLS4000 Surface Profile Parameters List

LEXT OLS4000 Areal Surface Roughness Parameters List
(Conforms to ISO25178)
Micro Roughness
Stylus instruments cannot measure micro asperities less than the stylus tip diameter. The laser microscope can measure the surface roughness of micro geometries at a considerably higher resolution due to a minute laser spot size.

Stylus Roughness measuring Instruments
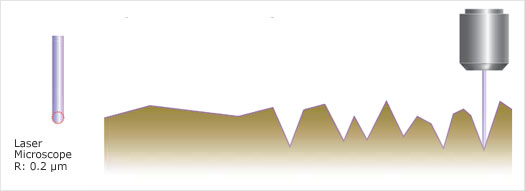
Laser Microscope
Non-Contact
Since a stylus instrument uses a hard needle-shape stylus, it is more likely to scratch the surface of a soft specimen, damaging or deforming it. With adhesive specimens, on the other hand, the stylus could attach to the specimen and be damaged when pulled loose, making it impossible to obtain correct results. Laser microscopes, which are non-contact, can perform accurate surface roughness measurement regardless of surface texture conditions.

Soft Specimen

Adhesive Specimen
Measurement of Micro Areas
Stylus instruments cannot measure micro areas since their stylus are not able to access these areas. Laser microscopes can correctly identify a measuring position and easily perform roughness measurement of a target micro area.
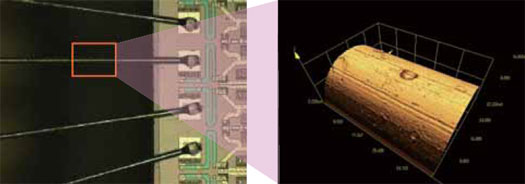
Bonding Wires