Nondestructive testing (NDT) methods, such as phased array ultrasonic testing (PAUT), are a powerful way to determine the integrity of components or structures and discover flaws without causing any damage. Since NDT does not harm, stress, or destroy materials, it saves time and costs. For the integrity inspections of in-service components, PAUT can be an invaluable tool since it can quickly and efficiently detect surface and volume defects using compact equipment.
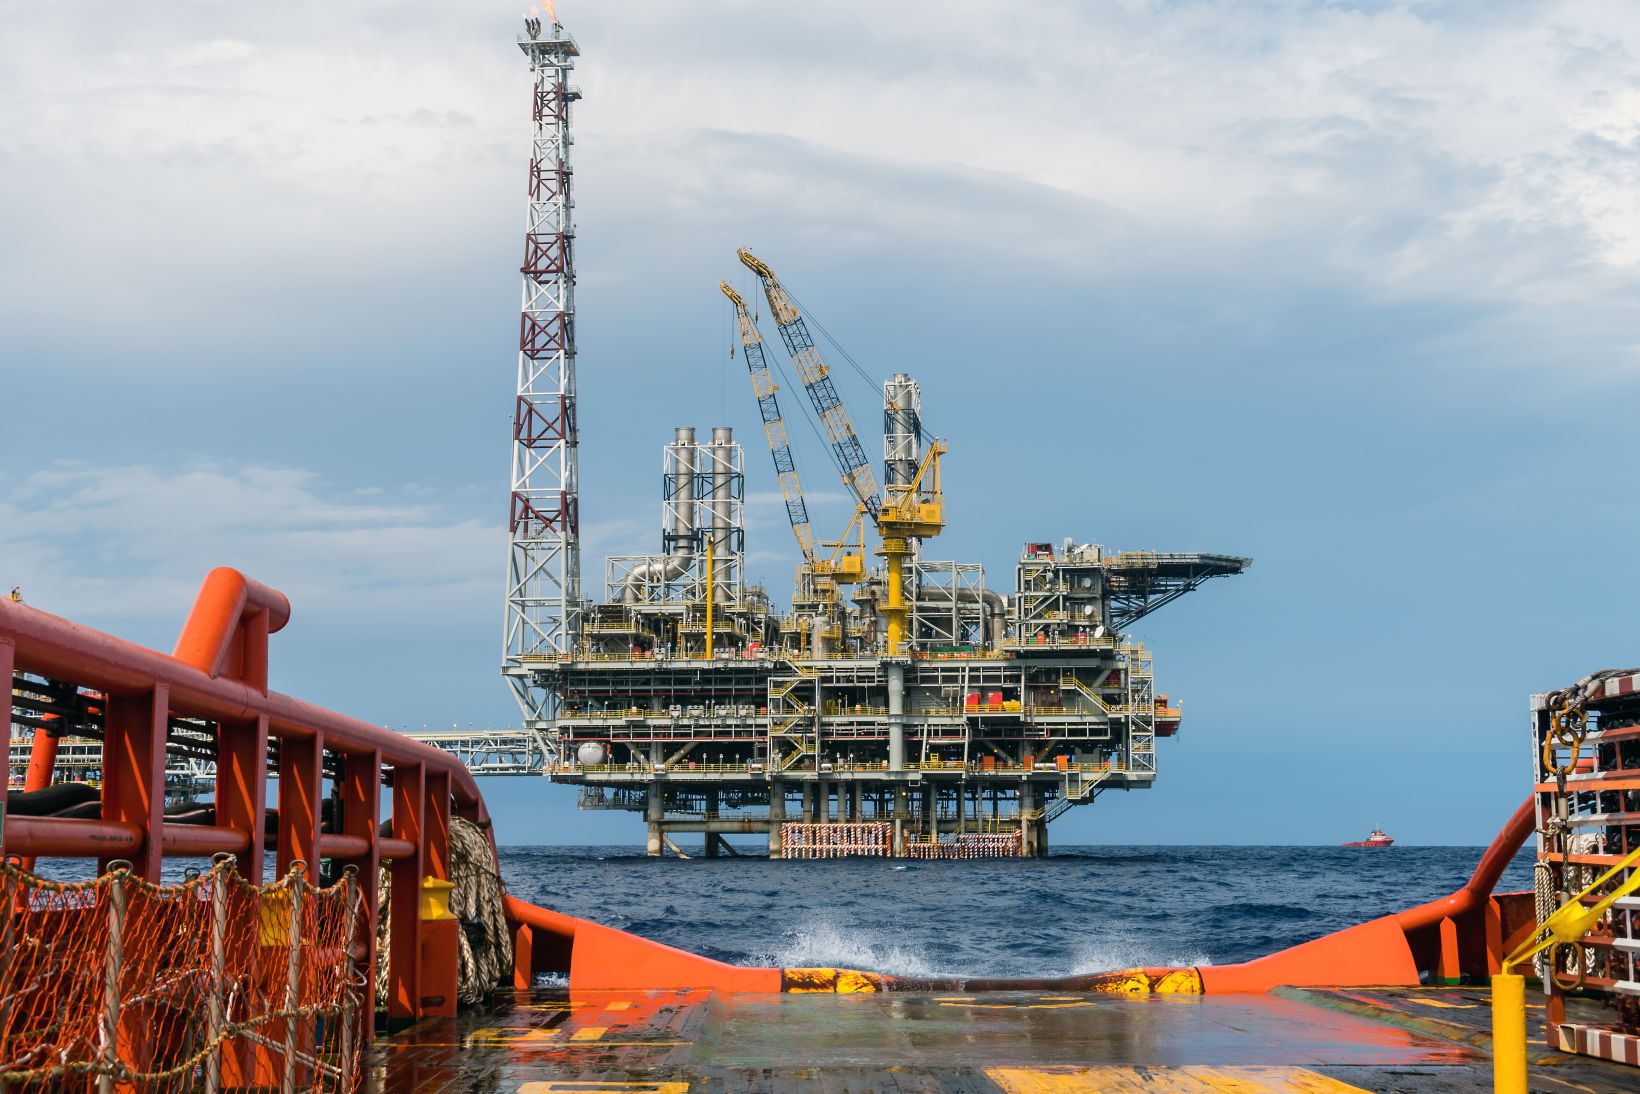
On offshore oil and gas production platforms, risers are the conduit tubes that channel the flow of oil or gas up to the platform. They’re particularly difficult to inspect for two reasons:
- Location—Risers are partially submerged in water and pass through what is called the “splash zone.” This means that these steel tubes are beaten by waves and wind and subjected to a corrosive combination of saltwater and oxygen, so proactive integrity inspections are a regular part of riser maintenance. The inspection equipment must also be rugged enough for the harsh environment and able to detect the defects that are caused by these natural forces.
- Complex geometry—To secure risers and improve their resistance to the environmental onslaught, they are fixed to the platform jacket (the main frame) using brackets, and the jacket itself has nodes and bracing. These physical features can obstruct mechanical scanners and crawlers that inspect the tube from the exterior.
Pigs—a type of scanner that can inspect tubes and pipes from the inside—are sometimes used for riser inspection. The problem with using pigs for ultrasonic testing (UT) is that they tend to move quickly, limiting the sensors’ sensitivity and impacting the probability of detection (POD).
RotoTech—an inspection, repair, and maintenance (IRM) company—offers a solution that addresses the sensor sensitivity issue as well as the physical obstruction and environment issues of riser inspection. Our phased array inspection technology is a big part of this solution.
Solving the Challenges of Riser Inspection
The Mark II model of RotoTech’s Roto Climber™ is a motorized robotic system that can incorporate inspection packages such as high-resolution video cameras for visual inspection, an ultrasonic gauge to measure the tube’s wall thickness, and a phased array ultrasonic testing (PAUT) system for corrosion mapping and crack detection. This PAUT system is composed of Olympus’ rugged, high-performance FOCUS PX data acquisition unit and the HydroFORM™ scanner with a phased array probe. WeldSight™ software is used for the data analysis.

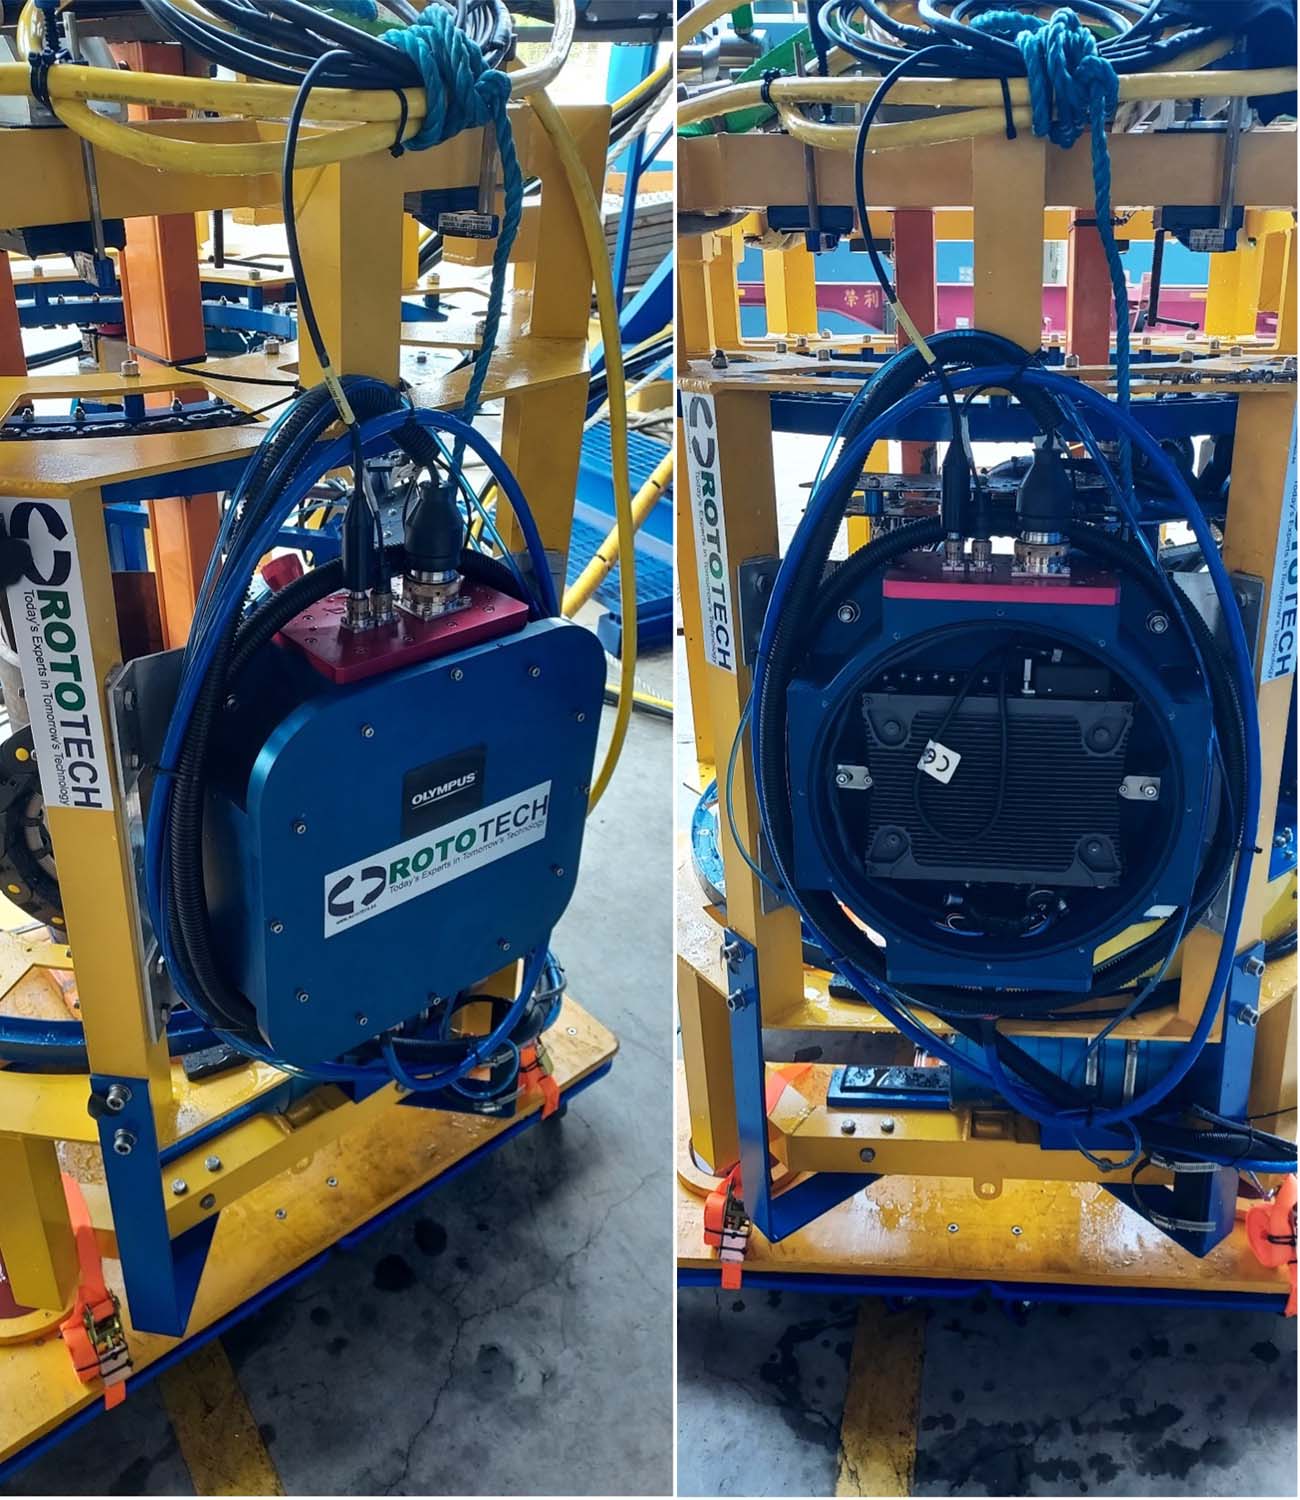
FOCUS PX unit mounted on the Roto Climber frame with the cover on (left) and cover off (right)
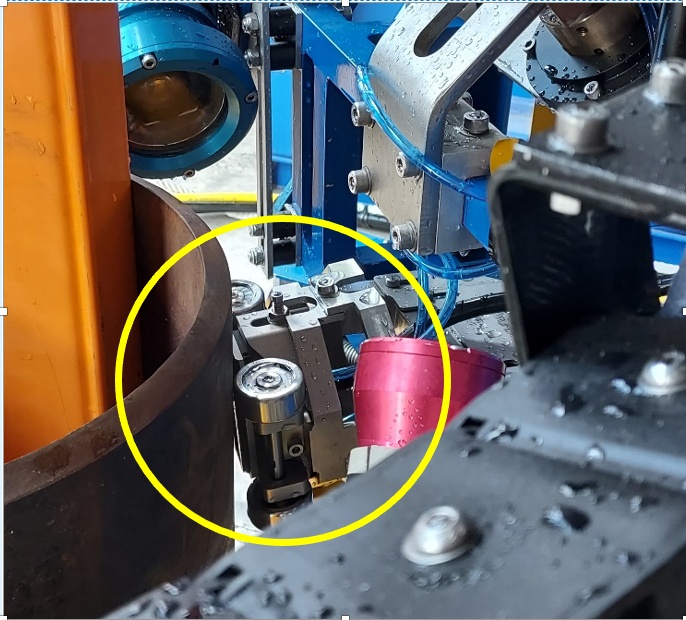
The FOCUS PX unit is mounted inside the Roto Climber near the HydroFORM scanner, which is applied to the surface of the metal riser tube. To withstand the conditions of the splash zone both devices had to be marinized, enabling them to be submerged. The HydroFORM scanner and probe have been tested up to 80 meters underwater but could go deeper. The probe mounted in the scanner, our 7.5L64-64X7 PAUT model, was also marinized with subsea connectors.
To circumvent any physical obstructions, the Mark II is equipped with clamping mechanisms that can partially disengage the scanning system from the riser tubing and re-engage once it’s bypassed any blockage or abutment in its path.
PAUT’s Advantages for Marine Applications
A PAUT flaw detector can be used to locate and size discontinuities such as corrosion, cracks, voids, porosity, and disbonds in various materials and welded joints. PAUT flaw detection can be applied to almost any engineering material. Most tests involve steel and other structural metals, but phased array devices can also be used on plastics, composites, and fiberglass commonly used in commercial marine craft components and structures.
Inspecting structural welds in metals is a common ultrasonic NDT application in the marine industry. Flaw types in welds include cracking, lack of fusion, incomplete penetration, porosity, and slag inclusions. All these flaws are potentially detectable using PAUT.
A Complete Corrosion Monitoring Toolbox
As risers are in constant contact with seawater and continually beaten by waves and wind, cracks and corrosion are the targeted defects for the integrity inspection. The FOCUS PX unit and HydroFORM scanner combine to enable high-performance corrosion mapping at rates exponentially faster than conventional methods.*
Using the advanced corrosion tools of WeldSight software, the data can be analyzed efficiently, either by an operator offshore or shared with onshore inspectors using remote collaboration.

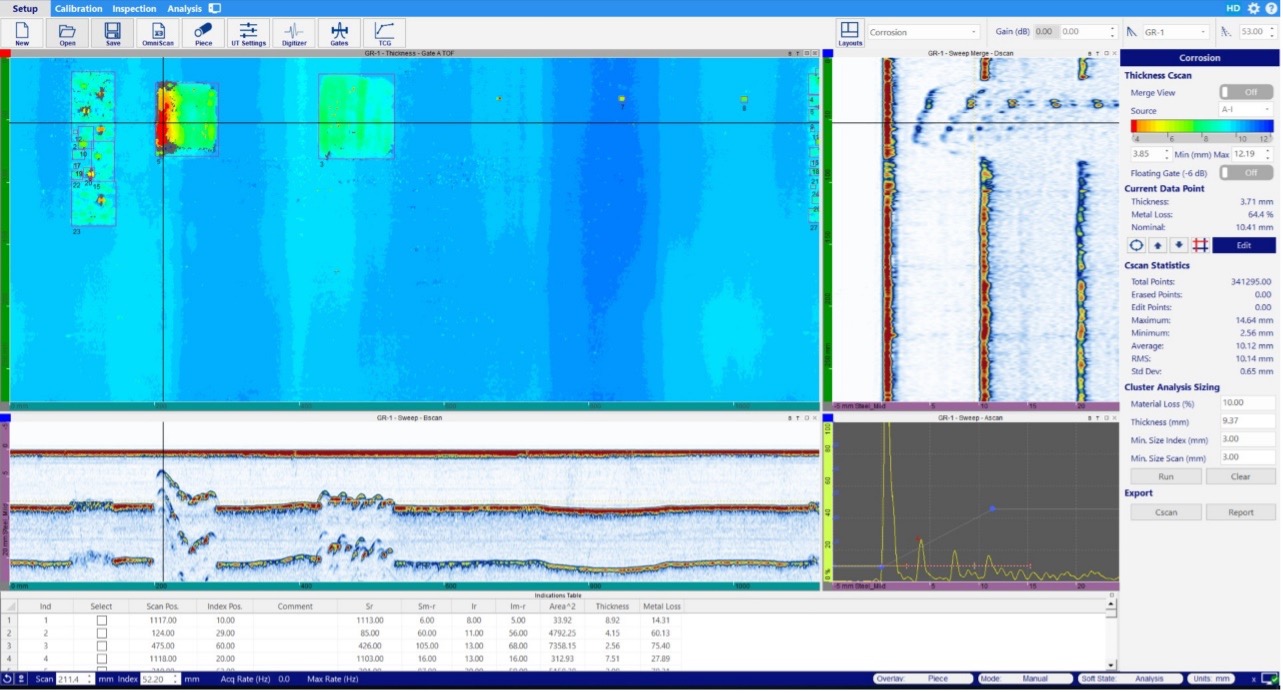
Corrosion monitoring is eased by the automatic cluster sizing and thickness loss analysis tools
WeldSight software’s corrosion manager provides practical features that facilitate corrosion monitoring, including:
- Thickness C-scan
- C-scan statistics
- Cluster analysis sizing
- Export to a report
Minimum thickness and cluster indications are automatically detected by the software. The cursor is positioned at the detected minimum thickness for you, and the clusters sizing stats are calculated and displayed, including the material loss percentage.
These advanced analysis capabilities of WeldSight software, backed by the detection performance of the FOCUS PX and HydroFORM hardware, demonstrate why Olympus’ package was chosen for RotoTech’s riser inspection solution.
*Source: Society for Underwater Technology (SUT). Underwater Technology Two, Issue 4, Risers Dredgers, 2021. https://ut-2.com/issue-4-2021/
Related Contents
5 Reasons Pros Will Value WeldSight Software
Corrosion Inspection Solutions
Get In Touch


