Simple operation with no sacrifice in image quality
Highly sophisticated imaging can now be performed with the same ease of use you’d expect from your smartphone or tablet. Specifically designed for industrial QA/QC control labs, today’s digital microscopes can help you enhance your QC processes while allowing more team members to easily perform advanced imaging tasks.
A digital microscope combines the observation power of traditional microscopy with the convenience of today’s digital technology, achieving a new level of simplicity with no sacrifice in image quality. Even a novice operator can quickly master microscope operation and begin producing exceptional results.
Enhanced Performance, Increased Efficiency
With digital microscopy, the eyepiece is eliminated, greatly enhancing operator comfort. On-screen viewing also allows convenient group access and immediate result sharing.
Meeting a Variety of Demands
Digital microscopes are ideal for the observation, measurement, and analysis of electronic components, circuit boards, construction materials, semiconductors, medical devices, shielding components, and much more.
Here are some usage examples I found to be especially indicative of the advantages a digital microscope can deliver:
Pressure Sensor: Inspection of a Crimped Terminal
With a standard optical microscope, a dent in a crimped terminal is difficult to see due to shadowing (Fig. 1A). This is caused by the light beam hitting the slope of the crimped terminal.
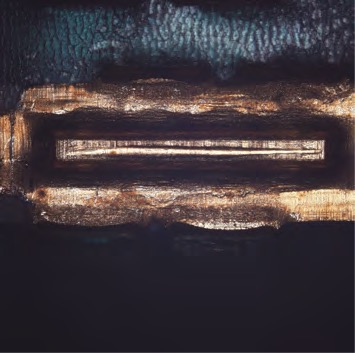 |
| Figure 1A: Olympus DSX500 microscope, 1x zoom, MIX observation, EFI |
With a digital microscope, MIX contrast provides ideal observation conditions by providing enough reflected light to the sensor by using two beams (Fig. 1B).
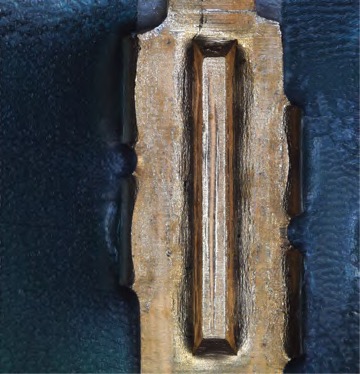 |
| Figure 1B: Olympus DSX500 microscope, 1x zoom, MIX observation, EFI |
Multilayer Circuit Board: Observation of Inner Circuit
When performing this inspection with a traditional microscope, it is often impossible to image the inner pattern of the circuit board (Fig. 2A) because of the high reflectance pattern on the surface.
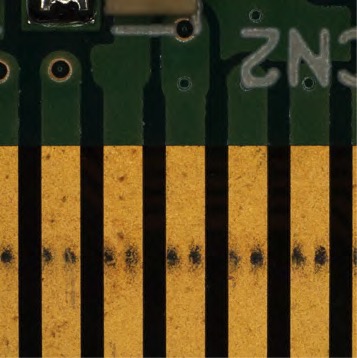 |
| Figure 2A: Olympus DSX100 microscope, 2x zoom, upright observation, HDR |
Using a digital microscope, a live image can be displayed using HDR observation to combine multiple images with different exposure times (Fig. 2B). This makes it possible to observe both bright and dark areas at the same time.
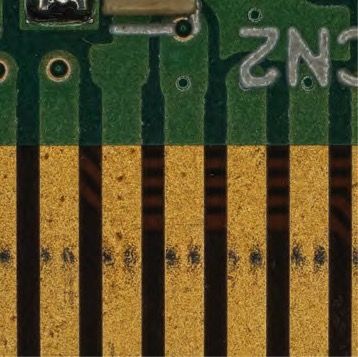 |
| Figure 2B: Olympus DSX100 microscope, 2x zoom, upright observation, HDR |
Decarbonized Structure: Observation of Texture Changes
The sample shown here here exhibits a white decarbonized section and an inner dark section on the surface, which cannot be clearly observed at the same time using a standard inverted microscope (Fig. 3A).
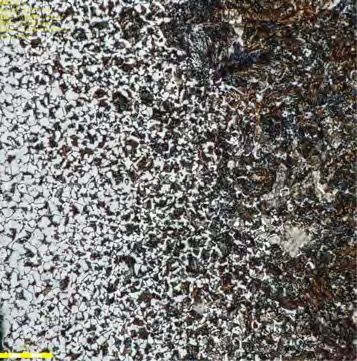 |
| Figure 3A: Olympus DSX500i microscope, 3x zoom, brightfield observation, Fine HDR, EFI |
Using a digital microscope, an image with higher contrast can be obtained by creating multiple images at different exposures to clearly observe both the decarbonized structure and the inner structure at the same time (Fig. 3B).
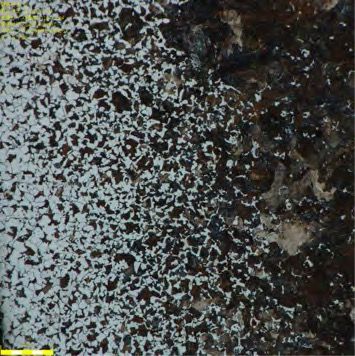 |
| Figure 3B: Olympus DSX500i microscope, 3x zoom, brightfield observation, Fine HDR, EFI |
Dental Tools: Confirmation of Appearance
Observation and inspection of dental tools are traditionally conducted by frequently changing the position of the sample. A digital microscope makes it easy to inspect samples that even lie on different planes (Fig. 4).
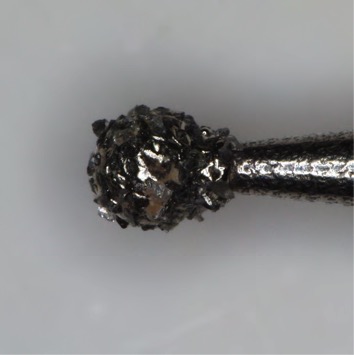 |
| Figure 4: Olympus DSX100 microscope, 6x zoom, upright observation, HDR, EFI |
With a digital microscope, a clear image of the sample can be obtained by combining images from different focal positions (Fig. 5).
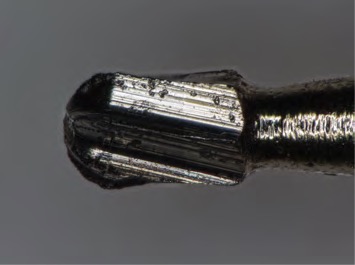 |
| Figure 5: Olympus DSX100 microscope, 10x zoom, upright observation, HDR, EFI |


