Challenges when creating a scan plan
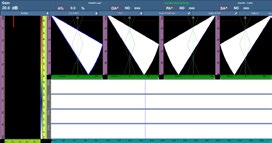
When creating a scan plan for weld inspection, the goal is to ensure that the entire area of interest (usually the weld volume and the heat affected zone) is covered by the range of ultrasonic beams that have been selected. Often, multiple groups of sectorial scans are needed to achieve this goal. Depending on the angle of the weld bevel, it can also be challenging to generate a beam that is perpendicular to the bevel. For example, if a weld has a 30-degree bevel, a 60-degree beam would create a theoretical 90-degree incident angle and, consequently, better detection for an indication occurring in the bevel wall. Increasing the number of probes or increasing the number of groups in a scan plan was often required to get successful coverage, however, adding either groups or probes often results in bulkier mechanical setups and decreased inspection speed.
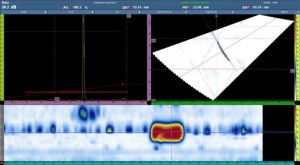
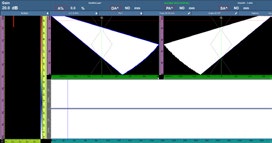
Advantages of the compound S-scan techniqueSince only one group is often sufficient to cover the entire weld, users gain multiple advantages. First, using only one group means that only one calibration is required, enabling faster setup time. When using the compound S-scan, the range of angles required to get complete coverage of the weld is often reduced. Because the higher angles are the harder ones to calibrate due to beam divergence, the reduced range achieved with the compound S-scan makes calibration easier. Second, since one group is usually sufficient to achieve full coverage, this reduces the number of focal laws for the same weld. Reducing the number of focal laws increases the scanning speed without compromising weld coverage. It also reduces analysis time, since users only have to review one group instead of two. The inspection screen is also less crowded, helping the inspector to view the data better (Figure 2). |
|
A third advantage is that the index offset is shorter. Because the angles are generated at the back of the probe, users can position the probe closer to the weld than is usually possible. Being closer to the weld means that the coverage is primarily accomplished in the first leg, providing less sound attenuation in the part, more accurate sizing capabilities, and more confident results.
Furthermore, since the compound S-scan is distributing all the elements within the probe, a 16:XX configuration instrument, like the OmniScan® SX flaw detector, can still benefit from a 32 or 64 element probe and have increased coverage.
Conclusion
The compound S-scan can help improve the quality of a scan plan, as well as coverage, data file size, acquisition speed, and mechanical setup. Since this feature can now be used onboard your flaw detector with the latest version of OmniScan software (version 4.4 or later) and NDT SetupBuilder (version 1.1r2 or later), it is easier than ever to create a sectorial or linear scan.


