35, 35DL, 35HP
Discontinued Products
개요
This product has been discontinued, check out our current thickness gages >>
Panametrics 35 Series Features
• Velocity and Reduction Rate measurements are standard on all models
• Wide thickness range from 0.08 mm to 635.0 mm (0.0030 in. to 25.0 in.) depending on instrument and material
• Uses contact, delay line, and immersion transducers
• Application Auto-Recall with default and custom setups
• Hand-held; weighs only 0.24 kg (8.5 oz)
• Min/Max Mode
• Hi-Low alarm
• English and metric display (inches/mm)
• Multi-language user interface
• Long battery life
Panametrics 35 and 35DL
35 and 35DL are used in the majority of applications
The 35 and 35DL can use transducers ranging from 2.25 to 30 MHz, which means that these versatile gages can solve the majority of thickness gaging applications, from very thin to very thick. In general, transducers with higher frequencies and smaller diameters allow measurements of thinner or curved parts and enhance the accuracy of the measurement.
Applications
• most materials, from thin to thick
• plastic bottles, tubes, pipes, sheets as thin as 0.08 mm (or 0.003 inch)
• metal containers, steel coils, machined parts as thin as 0.10 mm (or 0.004 inch)
• cylinder bores, turbine blades
• glass bulbs, bottles
• thin fiberglass, rubber, ceramics, and composite materials
• curved areas or containers with small radii
• resolution up to 0.001 mm or 0.0001 in.
Models 35HP and 35DL-HP
With a very low ultrasonic frequency bandwidth and a special pulser-receiver, the HP gages are specifically designed to optimize ultrasound penetration when measuring thick, highly sound attenuating or sound scattering materials. Typically these materials cannot be measured with most other ultrasonic thickness gages.
Applications
• most thick or sound-attenuating materials
• thick cast metal parts
• thick rubber tires, belts
• fiberglass boat hulls, storage tanks
• composite panels
• resolution of 0.01 mm or 0.001 in.
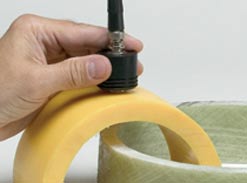
 | The 35HP gages are excellent tools to measure fiberglass or composite parts, from aerospace structures to boat hulls and storage tanks that require thickness control. |
Why HP gages
For more than three decades, we have developed the HP (High Penetration) series specifically for very sound-attenuating or thick materials. Not only can these gages use transducers as low as 0.5 MHz but their electronics (pulser-receiver) are highly optimized to process signals at these low frequencies. The result is that the Panametrics-NDT gages have earned a reputation for superior performance in measuring thick rubber, fiberglass, composites, and other tough materials.
Other Panametrics 35 Series Features
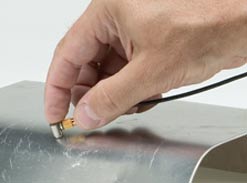
 | With reduction rate you can measure critical thickness metal thinning caused by bending. |
Reduction Rate Measurements
Differential Mode and Reduction Rate Mode are standard features on all models. Differential Mode shows the thickness variation from a pre-set thickness value. Reduction Rate calculates and displays the percent of thickness reduction after a material thinning process. A typical application is automotive sheet steel that is bent and formed to make car body panels.
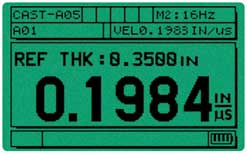
 | Velocity measurement mode with direct Velocity readout. |
Material Sound Velocity Measurements
All Panametrics 35 models have the capability to make material sound velocity measurements. This standard feature is useful in applications where the speed of the sound within the material can be correlated to other properties. Typical applications include cast metals to monitor the degree of nodularity, and composites/fiberglass to monitor variations in density. Olympus offers a digital caliper for automatic transfer of measurement thickness.
Application Auto-Recall Simplifies Gaging
Application Auto-Recall simplifies making thickness measurements. Select any of the stored transducers and the 35 gages recall all relevant internal transducer parameters.
Stored Standard SetupsStandard setups include most commonly used transducers.
Stored Custom SetupsJust in case your special application problem cannot be solved with a Standard Setup, these gages can create, store, and recall as many as 20 Custom Setups (10 with the 35 and 35HP).
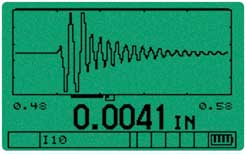
 | Thickness and waveform of a very thin (0.10 mm or 0.004 in.) sheet of steel. |
Why ultrasonics?
Ultrasonic measurements are accurate, reliable, and repeatable. Instant digital readings can be achieved by transmitting sound into just one side of a material, making it unnecessary to cut or destroy parts where the opposite side is difficult to reach and where micrometers or other inspection tools cannot do the job.
