Application
Using the EPOCH® flaw detector with dual element transducers (“duals”) for corrosion monitoring and flaw detection applications on offshore oil platforms.
Background
Marine drilling risers are an area of interest when discussing corrosion on offshore oil platforms. Marine risers form the link between the seabed pipeline or well and topside processing equipment. Risers are subject to constant wetting and drying in the splash zone—the area of the risers immediately above sea level. This wetting and drying combined with defects in the risers’ protective coatings can contribute to corrosion. Corrosion is concerning to platform managers because it can reduce the wall thickness and threaten the structural integrity of the risers. Assessing the remaining service life of aging risers is often dependent on corrosion monitoring with NDT technologies. There are several nondestructive testing methods used to inspect marine risers for corrosion, however conventional ultrasonic testing (UT) is often the most convenient and cost-effective method.
Theory of Operation
There are two primary corrosion inspection methods that use conventional ultrasound. The first is the point measurement method, using an instrument like the Olympus 38DL PLUS® ultrasonic thickness gage. The point measurement method uses precision thickness measurements taken in a defined pattern and repeated over time to monitor remaining wall thickness. This method is effective for periodic corrosion monitoring and precision measurements of discrete defects but is not well-suited for identifying neighborhoods of corrosion, corrosion-induced cracking, or other flaw mechanisms.
The second method uses an instrument like the EPOCH® 650 ultrasonic flaw detector to scan a suspected corroded part for pits and corrosion-induced cracks and to support length sizing and characterization of detected defects. Compared to the first method, this technique is better-suited for finding and sizing isolated defects but is less effective at making high-precision thickness measurements to aid in periodic corrosion monitoring.
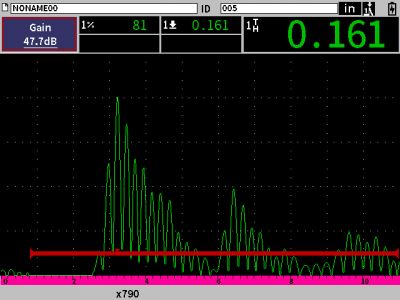
The EPOCH 6LT flaw detector with corrosion software enables the user to switch between a thickness gaging measurement algorithm (corrosion mode) and a flaw detection measurement algorithm (flaw detection mode), depending on the corrosion inspection method the user wishes to perform. Conventional flaw detectors typically use edge or peak gate detection modes, where the instrument records a thickness measurement based on where the edge of the echo crosses the gate or the peak of the gated echo, respectively. Edge measurement accuracy can be affected by the echo amplitude and surface conditions, while peak detection can be insensitive to small pits. The new corrosion software for the EPOCH 6LT flaw detector utilizes the zero-cross measurement algorithm typically used by corrosion gages when operating in corrosion mode. This measurement algorithm measures from the zero-crossing point of the first signal that breaks the detection threshold, resulting in less sensitivity to fluctuations in coupling and amplitude, helping ensure greater precision when taking thickness measurements. By combining the key functionalities of a precision thickness gage and a flaw detector in one instrument, NDT inspectors can use the EPOCH 6LT flaw detector for a wide range of conventional UT corrosion inspections. Users can scrub for pitting and size defects in flaw detection mode, and switch to corrosion mode to make reliable and accurate measurements of remaining part thickness.
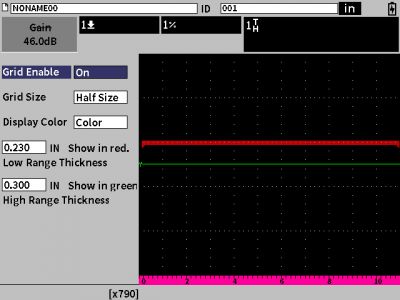
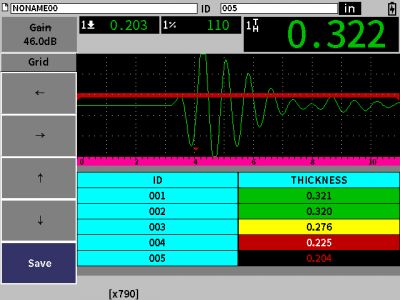
The EPOCH 6LT corrosion software includes the following features: automatic probe recognition, do-zero offset compensation, V-path correction for dual element transducers, automatic gain control, a thickness gage measurement algorithm, and a color-coded grid view for saving thickness readings.
Equipment
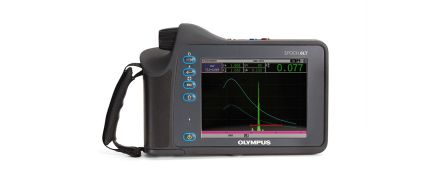
Offshore oil platforms pose a challenge for NDT inspectors and their equipment. They are subject to harsh weather conditions, and inspections often require rope access, with the inspector hanging over the ocean. For offshore rope access inspections, instrument size and weight are a key concern. The EPOCH 6LT portable ultrasonic flaw detector is uniquely suited for offshore corrosion inspections. This instrument is Ingress Protection (IP) rated to IP65/67, drop tested, and engineered to strict environmental ratings to withstand the challenging environment of an offshore platform. The instrument weighs less than 2 pounds and supports software that enables it to function as both a conventional flaw detector and a corrosion gage. These technical advancements enable offshore NDT inspectors to be confident in the reliability and usability of their flaw detector, even in a challenging offshore environment.
Procedure
Once the EPOCH 6LT corrosion software is activated and enabled, first calibrate the instrument in both corrosion mode and flaw detection mode for the intended material, inspection range, and general sensitivity. Pulser and receiver settings are automatically optimized for supported Olympus dual element transducers when plugged into the instrument.
Modern advancements in corrosion software offer the best of both worlds of corrosion inspection. By providing key corrosion gage and flaw detector functionality, the EPOCH 6LT flaw detector with corrosion software helps make corrosion inspections more accurate and efficient.
Please follow the link below for more information on the general principles of corrosion inspections with dual element transducers, whether used with a portable thickness gage, or with a flaw detector: www.olympus-ims.com/en/applications/corrosion-gaging-dual-element-transducers/


