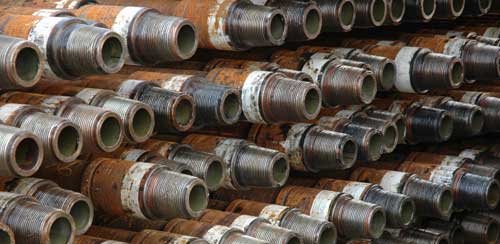
Application: Detection of cracking in Rotary Shouldered Assemblies (RSC) of down hole drilling tools.
Background: The depth of oil and gas wells range from 3,500 to 30,000 feet (1175 to 10,000 meters) vertical depth. Oil well drilling equipment is exposed to extreme conditions including tension, corrosion and cyclic loading while being exposed to elevated temperatures and damaging gases captured within layers of the earth. Because of the loads and environmentally influenced damage mechanisms failure of the Down Hole Drilling Tools (referred to as drill stem) are common. Failure
of a drill stem component usually results in enormous cost due to drilling rig cost per day, potential lost drill stem components and even having to abandon the oil well.
Drill stem components are joined together end-to-end to form a continuous string. The connection is referred to as a "Rotary Shouldered Connection" (RSC). Failure of drill stem components usually happen in the connection as a result of cyclic loads driving fatigue cracks to a point of total separation and parting of the drill string in the oil well.
The area of the drill string near the drill bit is known as the "Bottom Hole Assembly" (BHA). This is where connection failure is most frequent.
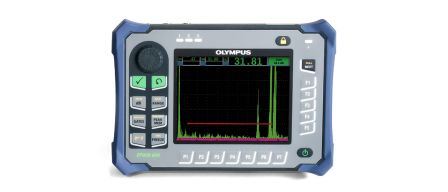
Equipment: EPOCH series flaw detector (EPOCH 600, EPOCH 650, EPOCH LTC)
Members of the OmniScan Family (OmniScan SX, OmniScan MX)
V109-RM contact transducer (5 MHz, 0.5" diameter)
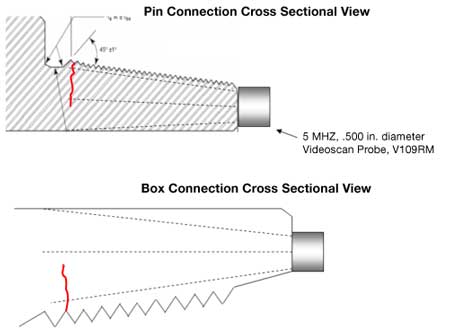
Procedure: This is a straight beam test using a contact transducer. A longitudinal wave is coupled into the end of the pin and box connection and the operator looks for crack echoes.
Pin and box connections are manufactured using a tapered design. The common tapers are 2" and 3" of taper per foot. When performing an ultrasonic test on RSCs, the outer perimeter of the ultrasonic beam is used to detect crack propagating from the thread root, as drawn in the illustrations below.

A file is essential for surface preparation of the pin and box ends, since a smooth, clean surface is essential for good inspection. Calibration for this test can be performed on an IIW Type 1 block. Range calibration adequate for RSC inspection using longitudinal waves can be conducted using the 4" width and the 8" dimension from the square end to the 90 degree step. Sensitivity calibration should be performed using EDM reference notches cut into an RSC of like type and size. The
notches should be placed in the last full depth thread root on the pin and box RSCs.
In addition to cracking, ultrasonic Inspection of RSCs is potentially capable of detecting hydrogen damage, inclusions, and anomalies beyond the location of the threaded region including work-induced or manufacturing problems. Other advantages include:
• Faster inspection process resulting in less down time on drilling rigs.
• Inspects ID and OD of both Pin and Box connections.
• Full length inspection of many down hole tools such as drill collars, stabilizers and subs.
Other inspection processes such as Wet Fluorescent Magnetic Particle are only a surface examination, typically applied in the threaded area only. WFMT has been the standard inspection practice for RSCs. It is very sensitive to surface breaking anomalies. The combination of WFMT and UT is the ultimate test for RSCs.
Related tests: There are numerous other applications for ultrasonic testing in the oil well drilling field. These include inspection of shafts, retaining pins, and lift equipment, corrosion thickness measurement, detection of water intrusion, and weld inspection for pressure vessels and structural equipment.

