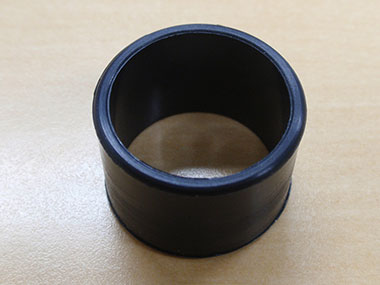
Injection-molded rubber product (provided by iwakami co., ltd.)
Overview of the Injection-Molding Process and Burr Generation
Injection molding is one of the main manufacturing methods for resin and rubber products. The process is outlined below:
- The thermoplastic material is charged into the heating cylinder.
↓ - The heating cylinder melts the material.
↓ - Pressure is applied so the melted material flows into the cylinder.
↓ - The melted material is injected into a metal mold through the nozzle at the tip of the cylinder.
↓ - The material flows into the space between the metal mold’s core and cavity, and then it cools and solidifies.
↓ - The metal mold is opened to extract the molded product.
Injection molding with metal molds makes it easy to manufacture large quantities of products with complex, finely detailed shapes.
How Burrs Are Generated During the Injection-Molding Process
Sometimes, however, resin and rubber, which are used as materials for molded products, may stick to the product in plate-like forms. This causes a defect called a burr. Burrs commonly occur in the vicinity of the material injection port and on the parting plane of the metal mold (parting line). Burr generation is one of the causes for product cost increases because a manual process is required to remove them.
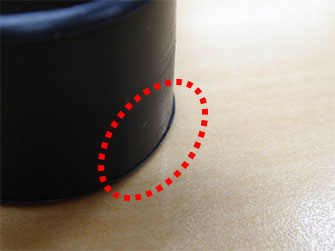 Molded product with burring at the bottom | 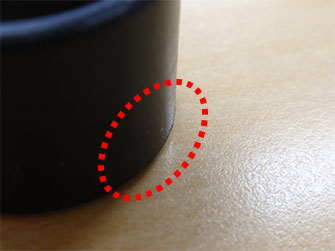 Molded product without burring |
Factors Affecting Burr Generation
There are several factors that can contribute to burr generation:
- Excessive fluidity (insufficient viscosity) of the material
- Excessive pressure is applied to inject the material into the metal mold
- Gaps in the parting line of the metal mold
- Friction wear and distortion that occur in the metal mold due to long-term use cause gaps at the parting line
If molding continues without eliminating the burrs, the gap in the parting line of the metal mold gradually increases, which can cause major problems, such as damage to the metal mold.
On the other hand, since completing a molded product free of burrs is difficult from the technical and cost viewpoints, burrs of a size that are within the tolerance range of the design plan are commonly considered as not problematic for functional quality.
For this reason, the manufacturers of injection-molded products always measure burr size.
Problems with Using Conventional Measurement Microscopes for Burr Measurement
Burr size measurement is commonly performed using a measurement microscope, which remains an effective testing tool with high measurement accuracy. However, as the figures below demonstrate, a measurement microscope has certain limitations when measuring burrs, depending on the sample.
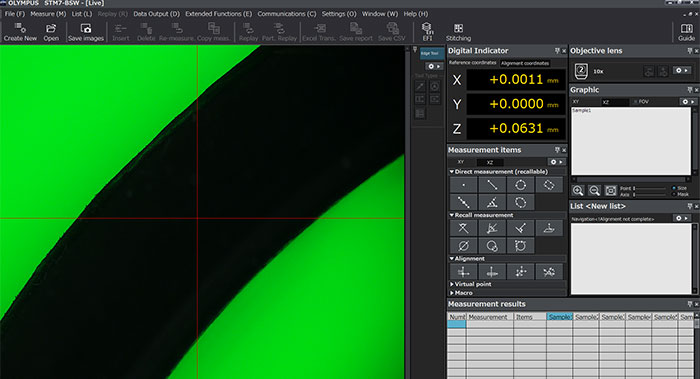
Measurement screen using light transmitted from the measurement microscope
1) Since the shape of the part is recognized from the silhouette generated by shining light from below, it may be difficult to identify burrs, depending on the product shape.
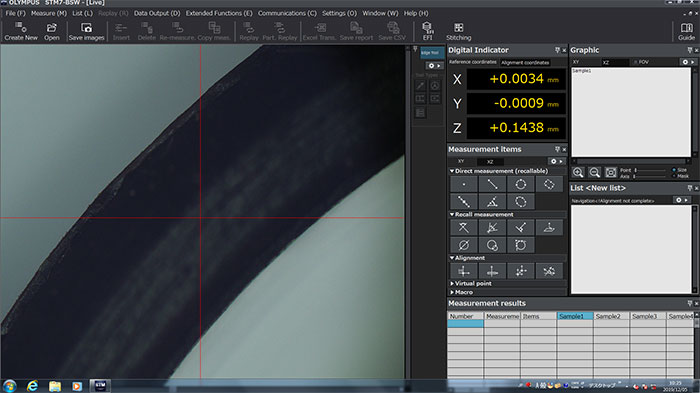
Measurement screen using incident light from the measurement microscope
2) When measuring a black product, it is difficult to determine the burr edges, and auxiliary illumination may be additionally required.
Precise Burr Measurement Using the DSX1000 Digital Microscope
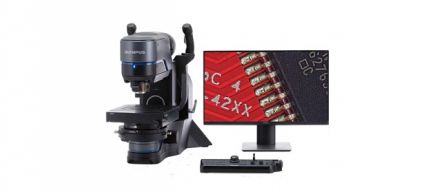
Olympus' DSX1000 digital microscope makes it easier to obtain optimal images that facilitate the quality control of burrs on injection-molded components. It comes equipped with various functions that enable you to acquire images at the desired magnification, observation method, and illumination angle, and an image-processing function emphasizes contrast and specific colors. It also comes standard with convenient functions that are useful for measuring burr size as well as other quantitative tests:
[1] The image-stitching function gives an overview of the entire product
With high-quality overview image of the entire product, you can estimate the portion where the burr size is likely to exceed the tolerance value.
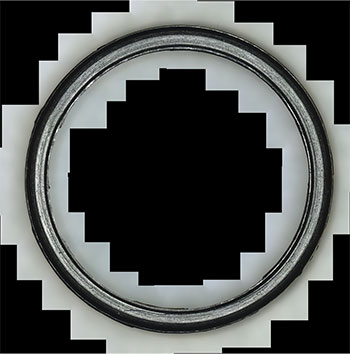
Image of a product observed from the upper surface (42X)
In the above image, the manual stitching function is used to acquire images only from the needed portions of the cylinder-shaped part. This way, you can observe the entire product at a glance as a high-quality image, enabling instant identification of oversized burrs.
The manual stitching process involves very simple manipulation. You can use the joystick or the arrow on the screen to move the motorized stage to the appropriate photographing position by tracing the visual field where the product is visualized. The image is then captured by clicking the traced area.
[2] The geometric measurement function enables measurement of as many points of interest as you want
If you detect a portion where a burr of significant size is found, you can immediately magnify that portion and easily measure the burr length at as many locations as you want on the magnified image.
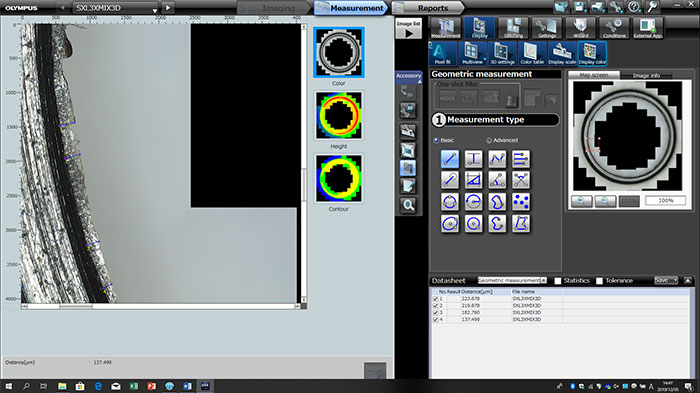
Measurement screen showing measurement of the burr length on the magnified image
You can magnify points of interest directly on the entire image, and easily measure the burr length on the magnified part. Thanks to the map image displayed in the upper-right of the measurement screen, which indicates the location of the portion visualized in the magnified image, you can measure any point of interest without hesitation.
[3] Automatic edge detection measurement with calipers
The DSX1000 digital microscope can automatically measure the mean length and the maximum and minimum lengths of burrs by detecting the edges of the burrs present within a preset range. This means you can easily grasp the state of burr formation in addition to the point measurement.
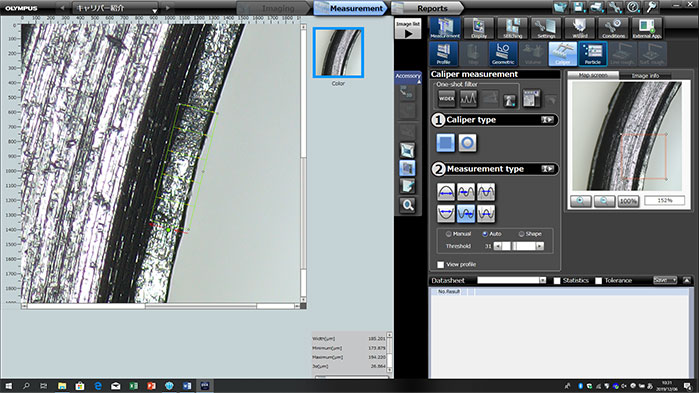
Caliper measurement screen
The edges are automatically detected at five points within the range surrounded by the rectangular frame to measure the length between edges, and the screen displays the mean, maximum, and minimum values.
[4] An extensive objective lens lineup gives you the flexibility to choose the lens according to the sample shape
There are so many shapes and types of injection-molded products, and the DSX1000 digital microscope’s lineup of 17 objectives enables you to use the appropriate lens for the shape and size of the sample.
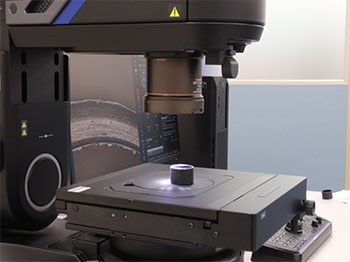
Image acquisition using DSX10-SXLOB3X objective lens
In this example, the DSX10-SXLOB3X objective lens was used for a sample measuring 20 mm (0.8 in.) in height. This objective lens, which has a very long working distance (66.1 mm (2.6 in.) distance between the lens tip and the sample's focal plane when in focus), never touched the sample even when bringing it into focus from the upper surface (height: 20 mm) to the bottom face of the sample. Lenses with long working distances are typically associated with low resolution. However, this lens for the DSX1000 microscope enables the acquisition of high-quality images, like those previously shown, despite its long working distance.
In addition, one of the major advantages of the DSX1000 digital microscope is that the objective lens is easy to change. When you need to switch lenses to examine a sample of a different shape, for example, you can simply slide in the objective holder to engage another objective lens.


