Application
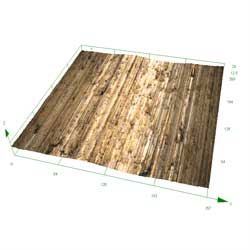
Screws are used to join parts by fitting tightly. A tight fit is created by static friction, and manufacturers need to ensure that the screws have enough friction to prevent them from becoming loose. The amount of static friction is proportional to the screw’s surface roughness. Consequently, manufacturers must measure surface roughness to ensure the screws conform to standards. In precision screws, the area that needs to be measured is so small that it is difficult to measure using conventional evaluation methods. In addition, to determine the friction values, the surface roughness needs to be measured instead of conventional line roughness.
Olympus' solution
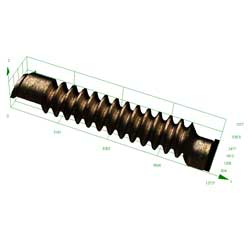
Olympus' LEXT 3D laser microscope enables you to evaluate three-dimensional shapes such as the threads or grooves of a screw, the pitch or height of the threads, and the angle of the flank. The LEXT also makes it simple to measure the roughness of a precision screw’s contact surface so manufacturers can ensure quality. The microscope’s stitching function seamlessly combines multiple images into a single image for wide-field observation.
Entire 3D image of a precision screw
10X objective lens; 1x zoom; stitching | Surface roughness of the root of a thread
100X objective lens; 1x zoom |


