Rearview camera
Application
Engineers continually look for ways to improve automobile safety, and one innovation that is becoming popular is an advanced driver assistance system (ADAS). An ADAS system uses vehicle-mounted cameras to provide the driver with additional information and improve safety.
The system’s onboard cameras are divided into two categories—view cameras that enhance the driver's view, such as during parking, and sensor cameras that use images to identify cars and humans ahead and behind. Since these cameras are mounted to the exterior of a vehicle, they must be scratch resistant. If the lenses get scratched, the images may become cloudy. To help protect them, camera lens manufacturers experiment with different materials and coatings to improve the scratch resistance. Each of these materials must be tested and any scratches quantitatively evaluated to measure the material/coating’s performance.
Olympus' solution
Measuring the shape and size of scratches using the OLS5000 3D scanning laser microscope
Quantitative scratch evaluation
- The objective lenses are designed to work with the microscope’s 405 nm laser, making it possible to achieve a horizontal resolution of 0.12 µm. This enables you to obtain accurate data for very shallow scratches on the camera lens’ surface.
- You can horizontally stitch together multiple 3D images to acquire data over a large area. This makes it possible to evaluate lenses that have multiple scratches over a large area.
- When a transparent coating is applied to the camera lens, the data of the top layer of the surface can be measured by using the microscope’s top layer detection filter. This helps prevent mistakenly acquiring data at the interface between the coating and lens.
- Using the laser differential interference contrast (DIC) observation mode, very shallow, nanometer-level scratches and foreign matter can be detected.
- The microscope’s extension frame can accommodate samples up to 210 mm tall. Even at this height, a 20X objective can still measure objects up to 25 mm deep.
Images

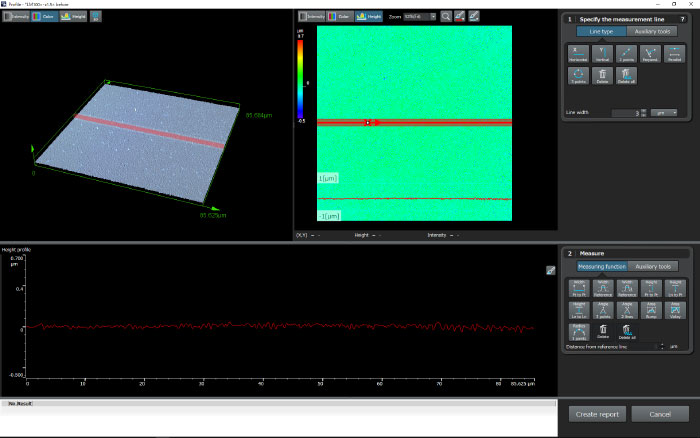
Measuring the shape of an unscratched camera lens surface
* The uniform surface is also found in the profile.

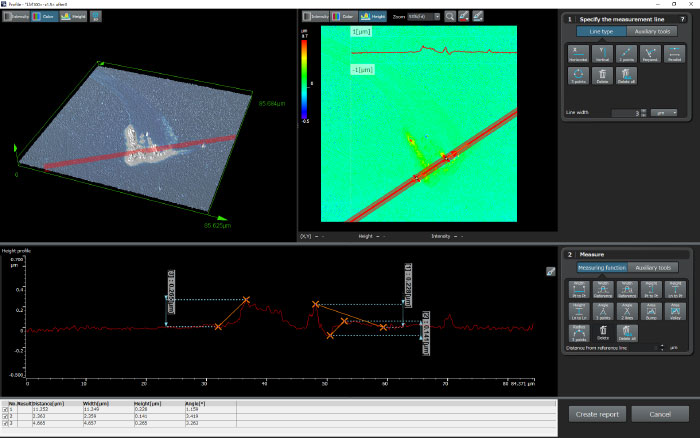
The shape of a scratched camera surface
* Scratches can be identified in the 3D image.
* Even for a scratch less than 1 µm deep, the shape can be accurately measured in the profile

