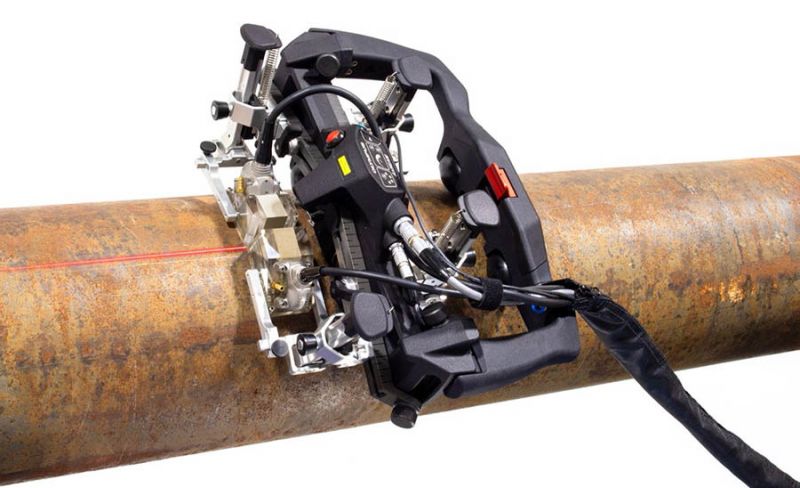
Figure 1 - AxSEAM™ scanner in an axial scanning configuration on an 8 in. OD pipeline section
Typical Challenges of Long Seam Weld Inspection
Inspecting a long seam—or axial—weld is challenging both acoustically and mechanically. From an acoustic standpoint, the tube geometry tends to defocalize the ultrasonic beam, reducing the potential imaging resolution. Long seam welds forged using the electrical resistance welding (ERW) manufacturing method are prone to difficult-to-detect defects such as vertical or hook cracks. An acquisition instrument, such as the OmniScan™ X3 flaw detector, that has total focusing method (TFM) capabilities and offers volumetric representations is an ideal tool for improved detection and characterization of such defects. Regarding the mechanical aspects, such as the equipment used, the long seam scanner must be able to correctly sit on the pipe’s curved outer diameter while it is rolled along the tube in the axial direction. Since the probes must be positioned at the desired distance from the weld centerline, easy repositioning is an advantage. The scanner must also be equipped with a mechanism to apply constant pressure on the probe to ensure acoustic coupling. The AxSEAM™ scanner’s (Figure 1) design takes into account all of these mechanical requirements, enabling easy configuration of phased array ultrasonic testing (PAUT) or TFM and time-of-flight diffraction (TOFD) setups for a multitechnology inspection of long seam welds.
AxSEAM™ Scanner Features and Description
The AxSEAM scanner is designed for weld inspection in the axial direction for pipe diameters ranging from 152.4 mm (6 in.) OD to flat, but it can also be used in a circumferential scanning configuration on pipes as small as 114.3 mm (4.5 in.) OD when using only 2 probes or 254 mm (10 in.) OD when using both PAUT and TOFD probes, or 4 probes total (Figure 2).
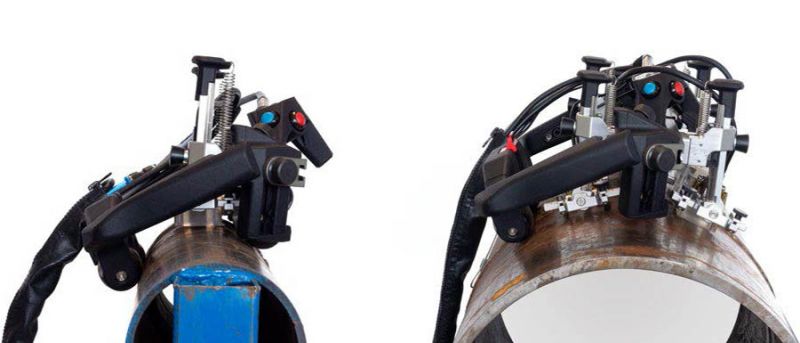
Figure 2 – Lateral view of the AxSEAM scanner in a two-probe configuration (left) and four-probe configuration (right), both on circumferential weld
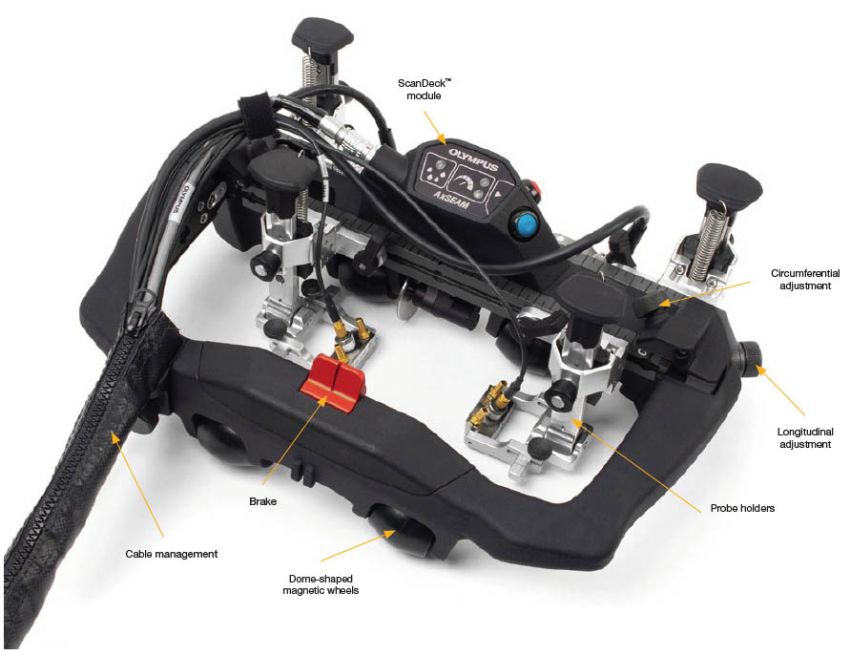
The scanner features four domed-shaped magnetic wheels (patented) that enable the scanner to be used on a range of external diameters without adjustment. A brake system can be used to lock the back wheels to maintain the scanner position, which is particularly useful for vertical scanning configurations. Other practical features include a convenient cable management sleeve for the probe and irrigation cables as well as intuitive tool-free mechanisms for probe positioning and scanner configuration adjustments (Figure 3).
The AxSEAM™ scanner’s ScanDeck™ module (Figure 4) provides important status information to the operator directly in the line of sight while scanning, and it enables remote operation of the instrument. Within easy reach, the module includes one button to ‘zero’ the encoder and start acquisition on any OmniScan™ instrument. The second button activates the laser guide. When the AxSEAM scanner is used in conjunction with the OmniScan™ X3 flaw detector, the ScanDeck module’s LED indicators also help ease the scanning process for the operator. The status indicator on the left of the module alerts the operator to a loss of coupling. The second indicator consists of a set of two status indicators, informing the operator when the scanner speed is under or has exceeded the allowable maximum acquisition rate of the instrument. | 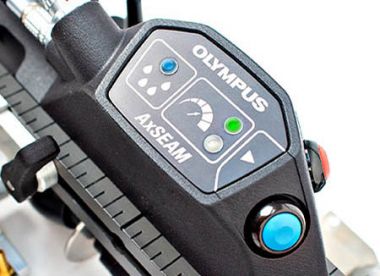 Figure 4 – ScanDeck™ module |
Experimental Results Using the AxSEAM Scanner on a Carbon Steel Pipe Sample
Figure 5 shows a PAUT C-scan obtained on a long seam weld with machined flaws. The acquisition was performed using an OmniScan X3 flaw detector and an AxSEAM scanner. Two different flaws are indicated on the C-scans. The AxSEAM scanner enabled stable scanning, even at the slow scanning speeds required for the total focusing method (TFM) multigroup (four wave sets) setup.
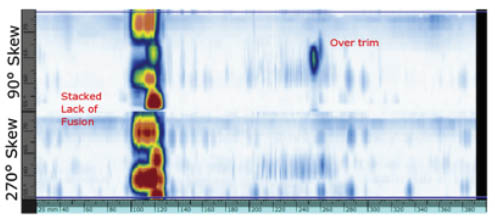
Figure 5 – C-scan (gated data) in PAUT showing two different flaws, a stacked vertical lack of fusion (left) and an overtrim (right) flaw
Figure 6 and Figure 7 show the results obtained with PAUT and TFM on both flaws. The flaw drawing is also shown for reference. The image curvature of Figures 6c and 7c alludes to one of the advantages that TFM imaging offers over PAUT—the flaws are portrayed in a near true-to-geometry representation.
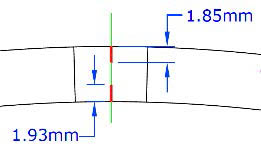 (a) Stacked lack of fusion | 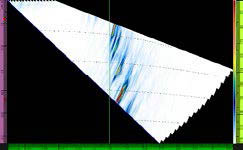 (b) PAUT | 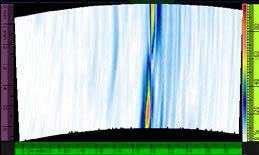 (c) TFM: T-T mode |
Figure 6 – Results on a stack lack of fusion (vertical)
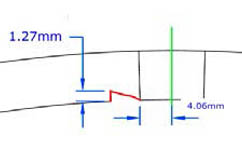 (a) ID over trim | 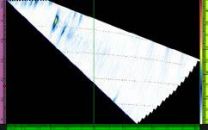 (b) PAUT |  (c) TFM mode: T-T | 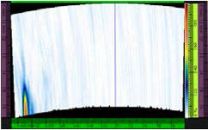 (c) TFM mode: TT-T |
Figure 7 – Results on an overtrim flaw
Summary of Benefits
The operator can use the AxSEAM scanner to quickly and easily inspect both long seam and girth welds in a wide range of pipe diameters. Accommodating up to four probes, the scanner enables both PAUT and TOFD technologies to be used at the same time to offer an effective detection and analysis combination. The same phased array probes can also be used for a second more targeted scan of the region of interest using up to four TFM modes for easier-to-interpret representations and improved characterization of vertical defects and to compensate for ultrasonic beam defocalization. The scanner features the innovative ScanDeck™ module, which incorporates an acquisition start button, a laser guide, a coupling check LED indicator, and a scan speed LED indicator. While the start button and laser guide can be used with any model OmniScan flaw detector, the coupling check and scan speed status monitors are only compatible with the OmniScan™ X3 flaw detector.
