This application note explains how to measure the thickness of tear seams in automotive air bag covers. The procedure described here can also be applied to any other measurement of thickness inside thin grooves, notches, or channels in non-magnetic materials. The Importance of Air Bag Cover Tear Seams in Automotive VehiclesThe use of inflatable air bags as a safety device in automobiles and trucks has become a nearly universal practice around the world. The air bags are stored in compartments on the steering wheel, dashboard, and doors that are enclosed by molded plastic covers. These covers have tear seams that are designed to break open instantly when the air bag inflates after an impact. The thickness of these seams is critical to proper air bag performance. If they are too thick, the air bag may not fully deploy in an emergency. If they are too thin, the seams may separate if the cover is bumped or pressed during normal driving. Consequently, the measurement of seam thickness is an important part of manufacturing quality control. While seam thickness can be measured through destructive techniques, the Magna-Mike™ 8600 Hall-effect thickness gauge offers a quick and nondestructive alternative to cutting and mechanically measuring air bag covers. Procedure to Measure the Thickness of Air Bag Cover Tear SeamsThe equipment for this procedure includes the Magna-Mike 8600 Hall-effect thickness gauge with the 86PR-1 probe and 86PR1-CWC chisel tip wear cap, along with target disks 80TD1 and 80TD2. The Magna-Mike 8600 gauge uses electromagnetic principles to measure the distance between the tip of a probe and a magnetic target. The probe tip is held on one side of the test piece and the target is placed on the other so that the distance between them represents the part's thickness. In tear seam applications, the Magna-Mike 8600 gauge is used with the special 86PR1-CWC chisel tip wear cap.
Typical tear seams in automobile air bags are about 1 to 2 mm (0.040 in. to 0.080 in.) wide, with a center thickness of about 0.5 mm to 1.5 mm (0.020 in. to 0.060 in.) The cross-sectional profile may be either flat on both sides, V-shaped on both sides, or flat on one side and V-shaped on the other side.
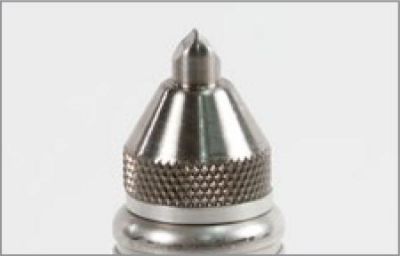
Figure 1. Close-up of the 86PR21-CWC probe tip. Instrument calibration is performed in the same manner as for any other combination of probe and target, as described in detail in the Magna-Mike 8600 operating manuals. When performing calibration with disk targets, it is important to make sure that the target is properly lined up with respect to the probe tip. If the target is misaligned during calibration, measurements will be inaccurate. When making measurements, the probe will usually be placed on the outside of the air bag cover and the target disk on the inside to permit free movement of the probe (see Figures 2 and 3). The operator should monitor the position of the target disk to make sure that it sits securely in the bottom of the tear seam groove. For accurate measurement, it is important that the disk remains aligned straight with respect to the probe tip. If the probe/disk alignment is twisted, or if the disk is tilted within the seam, readings will be inaccurate. Remember that as with any other Magna-Mike 8600 application, the instrument is measuring the distance between the probe tip and the target. If either the probe tip or the target is not securely in contact with the surfaces of the tear seam, the displayed thickness will be erroneously high. Similarly, if the target disk is misaligned with respect to the probe tip, it will appear to the instrument to be farther away than it actually is, and readings will be too high. With proper calibration and target disk orientation, a measurement accuracy of +/- 3% or better may be expected.
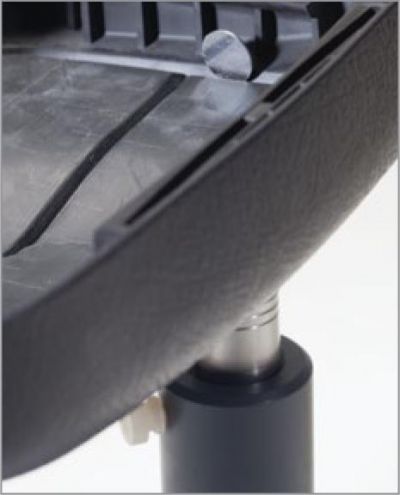
Figure 2. Probe placement on the outside of an air bag cover.
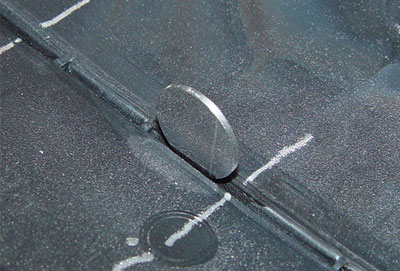
Figure 3. Target disk placement inside a tear seam. |
Resources
Application Notes
Back to Resources
Measuring the Thickness of Automotive Air Bag Cover Tear Seams


Sorry, this page is not available in your country
Sorry, this page is not available in your country
Let us know what you're looking for by filling out the form below.


