Introduction
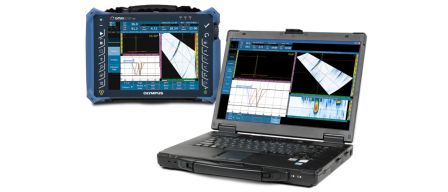
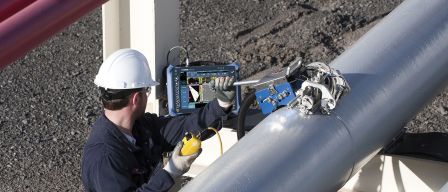
Performing ultrasonic phased array inspections on high-temperature parts and components poses certain challenges. Piezoelectric elements and internal connections in typical phased array probes are sensitive to heat and can be damaged by high temperatures. To help mitigate this problem, Olympus developed a new tool that enables manual phased array inspection at temperatures up to 150 °C.
Challenges
As phased array probes heat up, the piezoelectric elements and their electrical connections can be damaged. Our testing demonstrates that typical phased array probes completely fail if they reach 80 °C. To be used safely, the probes should not exceed a temperature of 60 °C.
Insulation, heat dissipation, and cooling are three important factors in wedge design to prevent excessive heat from reaching the probe elements. The probe’s cable also has to be protected from the hot component being inspected.
The sound velocity in the wedge and components also varies with temperature, and this can affect focal law calculations and index point displacements, leading to positioning errors when locating indications. Ultrasonic signal attenuation and frequency shift must also be taken into account.
Solution
Olympus has developed a new wedge series that enables inspections on hot components up to 150 °C. In order to characterize and validate the efficiency of these wedges, laboratory testing was performed using the OmniScan MX2 flaw detector configured to perform a sector scan from 40° to 70° SW, which is typical for a weld inspection with phased array probes.
The wedges are manufactured with an amorphous thermoplastic polyetherimide resin called ULTEM™. This material features elevated thermal resistance, strength, and stiffness due to its close to 200 °C high glass transition temperature.
Two wedge models were designed with this specific application in mind; both wedges are currently available for purchase—SA31C-ULT-N55S-IHC and SA32C-ULT-N55S-IHC. These wedges include mounting holes for Olympus’ Mini-Wheel encoder, enabling encoded inspection. Relatively easy to machine, other Olympus wedge series could be manufactured with ULTEM material. However, as heat dissipation is also dependent on the geometry of the wedge, proper care needs to be taken and users should consult with an Olympus representative to validate their request.
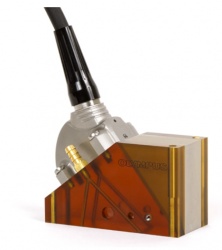 |
| An Olympus probe mounted on a ULTEM wedge. |
Lab tests were performed on components that were heated to 150 °C. The OmniScan MX2 flaw detector was used to perform a typical sector scan from 40° to 70° SW with a resolution of 1 degree. Glycerine was used to couple the probe to the wedge, and high-temperature couplant was used to couple the wedge to the component.
Part numbers for equipment used for high-temperature inspection.
| U8 number | Description |
| Q7200423 | SA31C-ULT-N55S-IHC: High-temperature wedge for angle beam phased array probe A31, normal scan, 55-degree shear wave, from ULTEM to steel, with IHC option (irrigation, holes, and carbides). Includes 5 ft of protective sleeve (Q7750078). |
| Q7200422 | SA32C-ULT-N55S-IHC: High-temperature wedge for angle beam phased array probe A32, normal scan, 55-degree shear wave, from ULTEM to steel, with IHC option (irrigation, holes, and carbides). Includes 5 ft of protective sleeve (Q7750078). |
| Q3300178 | 5L32-19.2X10-A31-P-2.5-OM: Phased array probe. |
| Q3300179 | 5L64-32X10-A32-P-2.5-OM: Phased array probe. |
| Q3300180 | 5L32-32X10-A32-P-2.5-OM: Phased array probe. |
| Q7700002 | H-2 Couplant: Temperature range 0 °F (-18 °C) to 750 °F (400 °C) in many open environment applications when used per manufacturer's recommended procedure.* |
| U8770023 | B2 Couplant: Glycerin 2 oz. Squeeze Bottle (.06 liters), up to 200 °F (90 °C). |
| Q7750078 | 0.3 m (1 ft) of protective sleeve to protect the probe and encoder cables. Nominal diameter of 0.5 in., resists temperatures up to 150 °C. |
Note: The custom PA wedges listed above have been designed with specific application variables in mind. Should the application setup vary significantly from the expectation, these wedges may no longer be suitable and design changes may be recommended. For additional information, please contact eto@olympus-ossa.com.
*Typical UT flaw and thickness applications use thin couplant films in an open environment where the small amount of gas formed can dissipate quickly. However, if an unlikely couplant gas auto ignition flash is of major concern, this couplant should not be used above the auto ignition temperature.
Results
Probes with different frequencies were tested to evaluate the center frequency shift caused by the use of the ULTEM material. At room temperature, the center frequency of 2.25 MHz probes remains the same, but the center frequency of 5 MHz probes shifted down to 4 MHz. The most significant center frequency shift occurred with 7.5 MHz probes, which shifted down to 5 MHz. Consequently, probes with frequencies over 5 MHz should not be used with ULTEM wedges. Testing done with 5 MHz probes on a surface at 150 °C showed an increased center frequency shift down to 3 MHz.
While ULTEM’s insulating properties are used to protect the probe from heat, heat dissipation is also important to enable a longer inspection period. When the ambient temperature is 25 °C, the wedge can by kept in contact with a 150 °C surface for a maximum of 10 minutes. It takes an additional 10 minutes for the probe and wedge to cool. After this period, no structural damage to the wedges or probes was observed.
There is no significant attenuation of the ultrasonic signal when the part reaches 150 °C as long as the quality of the coupling between the wedge and the part is maintained. Users must pay attention to ensure reliable coupling. With a 5 MHz probe used with ULTEM wedges, a signal attenuation of 4 dB was observed, which is typically considered acceptable.
As the temperature increases from 24 °C to 150 °C, the ultrasonic velocity of the ULTEM wedge material drops from 2470 m/s to 2270 m/s, while the shear wave velocity in steel drops from 3240 m/s to 3103 m/s. Consequently, when using focal laws calculated with room temperature velocities, we observed small beam index movements and a few degrees of refraction angle shift when the part reaches 150 °C. Even if these movements/shifts were minimal, these errors may need to be considered to more precisely position indications at high temperature depending on the inspection qualification requirements. Calculating focal laws with known velocities at working temperature eliminates this error. In order to further minimize potential error due to velocity changes, Olympus has defined the wedge angle to obtain the targeted nominal refracted angle in steel at 100 °C with the ULTEM velocity set a 2340 m/s.
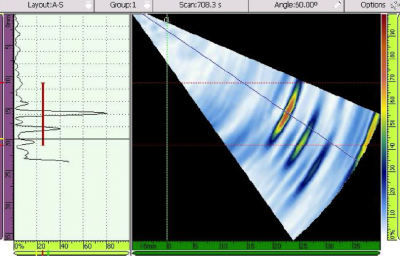 |
| At room temperature, the detection peaked at 60 SW with a gain of 45 dB. |
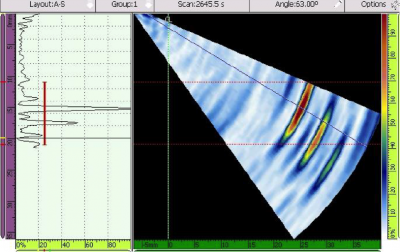 |
| At 150 °C, detection peaked at 63 SW with a gain of 49 dB and 33.6 mm soundpath. |
Important note:
To help ensure the structural integrity of the probe and wedges, the equipment should be used for no more than 10 minutes at a time and not used again until they have had at least 10 minutes to cool down. This work cycle is set based on a maximum ambient temperature of 25 °C. Users must be careful to define the proper duty cycle corresponding to their working conditions if the ambient temperature exceeds 25 °C.
Conclusion
Olympus’ high-temperature wedges enable simple and affordable manual encoded phased array inspection on components up to 150 °C as long as users keep in mind the maximum probe frequency of 5 MHz, the small negative frequency shift, small signal attenuation, and small positive refracting angle change.

