This application note provides a general overview of ultrasonic nondestructive testing applications in the foundry industry, including thickness gauging, flaw detection, and nodularity testing.
Evaluating the Quality of Castings
The art of casting metal into specific shapes has been practiced for thousands of years. Only in recent decades have modern ultrasonic NDT tools been available to help ensure product integrity. In the past, a foundry worker would estimate the quality of a casting by tapping it with a hammer to evaluate the sound of the ring. Today, microprocessor-based instruments using ultrasonic sound waves can accurately provide much more information about the hidden internal structure of both ferrous and nonferrous castings.
Ultrasonic thickness gauges can be used to measure the wall dimensions of hollow castings. Ultrasonic flaw detectors can also be used to identify discontinuities like hidden porosity, inclusions, voids, and cracks. Velocity-based ultrasonic testing using either thickness gauges or flaw detectors can also be used to quantify graphite nodularity in cast iron.
Ultrasonic thickness gauging is commonly used to measure hollow castings with complex shapes, such as automobile engine blocks. Core shifts during the casting process can result in a part that is too thin on one side and too thick on the other. An ultrasonic thickness gauge can measure wall thickness from one side, with no need to cut the part for access.
Voids, porosity, inclusions, and cracks in the metal can occur during the casting process. These conditions produce ultrasonic indications that can be identified by a trained operator using an ultrasonic flaw detector with appropriate transducers.
The size and distribution of graphite inclusions (nodularity) have a major impact on the mechanical strength of cast iron. Testing for nodularity is especially important in the automotive industry and other fields where the safe operation of cast iron components is a major concern. Ultrasonic techniques offer a nondestructive alternative to microscopic cross-sectional examination and tensile strength tests for determining the degree of nodularity, because nodularity can be correlated to sound velocity.
Ultrasonic Thickness Gauging of Castings
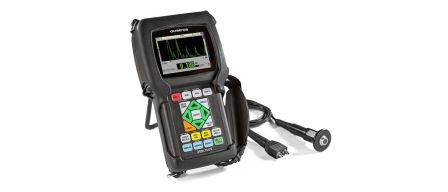
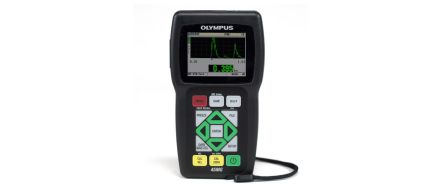
Wall thickness tests of castings can be performed with the 39DL PLUS™ or 45MG thickness gauge with Single Element software. If metal thickness exceeds approximately 12.7 mm (0.5 in.), High Penetration software should be used. Transducer selection depends on the range of thickness to be measured and the acoustic properties of the specific cast metal. Commonly used transducers are the M106, M1036 (both 2.25 MHz), M109, and M110 (both 5 MHz). For castings thicker than approximately 50 mm (2 in.), a large diameter, low-frequency transducer, such as the 500 kHz M101, is often recommended.
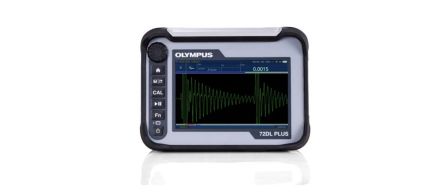
Another option for wall thickness tests of castings is the 72DL PLUS™ gauge. This high-speed thickness gauge offers measurement speeds up to 2 kHz along with a velocity mode and through-transmission capability. The 72DL PLUS gauge can also be integrated into systems designed to monitor the sound velocity of castings.
Ultrasonic Gauging Procedure to Measure Wall Thickness of Castings
Detailed gauge setup and calibration procedures can be found in the operating manual for each instrument. In addition, couplant selection, surface condition, casting geometry, gauge calibration, and scatter noise can affect the accurate measurement of castings.
Couplant: The rough surfaces typically found on sand castings will impair transducer coupling, so a high-viscosity couplant such as gel (Couplant D) or glycerin (Couplant B) should always be used.
Surface Condition: When the coupling surface is very rough, the minimum thickness that can be measured with a given transducer is increased because of sound reverberations in the couplant layer. These reverberations must be blanked out. Likewise, the maximum measurable thickness is reduced because of inefficient sound coupling between the transducer and the casting. In most cases, thickness measurements can be made on as-cast surfaces, but for challenging applications, surface preparation improves performance.
Geometry: The inside and outside surfaces of a casting must be approximately parallel or concentric to permit ultrasonic gauging. When the walls are severely misaligned with respect to one another, sound waves are reflected away from the transducer and no echo is displayed on the screen.
Gauge Calibration: Any ultrasonic thickness measurement will be accurate only to the degree that material sound velocity is consistent with gauge calibration. Sound velocity can vary in both ferrous and nonferrous cast iron because of changes in hardness and grain structure and changes in graphite nodularity. In large castings where different areas cool at different rates, velocity may change within a single part because of an irregular grain structure. For optimal measurement accuracy, always perform a gauge velocity calibration on a reference standard of known thickness that shares a metallurgical similarity to the parts being tested.
Scatter Noise: The coarse-grained structure of some cast metals produces internal scatter noise preceding the back wall echo. The scatter noise can cause a thickness gauge software to hang on false readings, especially when using default gauge settings rather than customized settings. This condition can be readily diagnosed by observing the waveform. Internal scatter noise can usually be eliminated by switching to a lower frequency transducer or by simple adjustments to instrument gain and/or blanking (see the 39DL PLUS waveforms in Figure 1 and Figure 2).
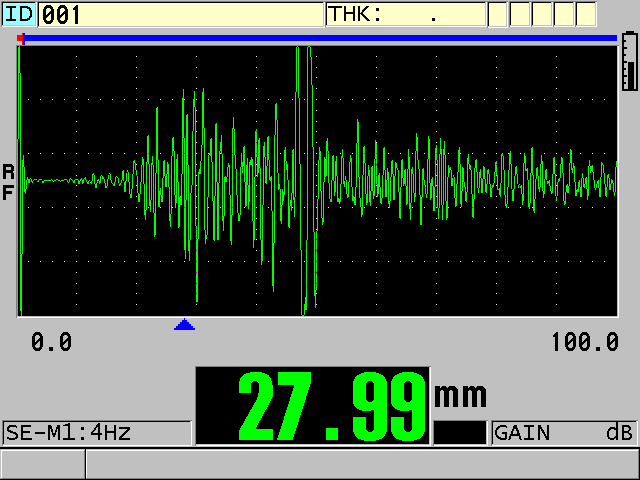
Figure 1. Scatter noise causes a false reading (back wall echo is near the center of the display).
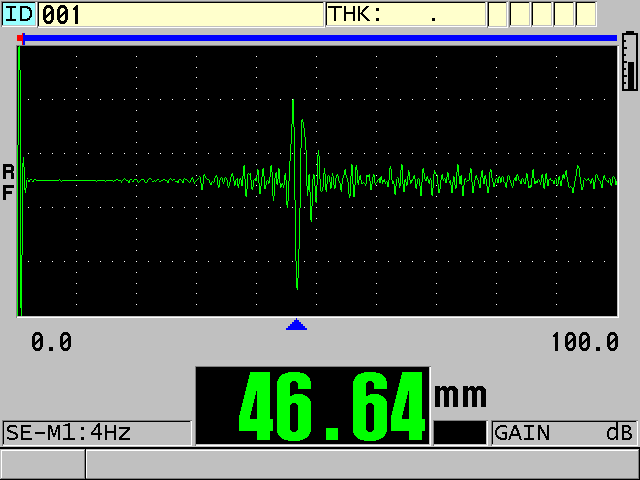
Figure 2. Correct reading after gain and TDG slope adjustment (back wall echo is clearly displayed).
Ultrasonic Flaw Detection for Casting Inspection
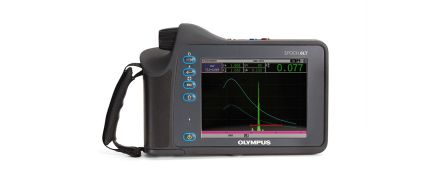
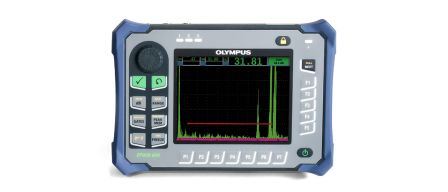
Any EPOCH™ series flaw detectors (EPOCH 650 and EPOCH 6LT instruments) can be used for casting inspection. Dual element transducers such as the DHC series, with frequencies between 1 MHz and 5 MHz, are commonly used when testing castings, both to reduce reflections from couplant trapped in rough cast surfaces and to optimize reflections from irregularly shaped discontinuities. In some cases, angle beam transducers can be used for crack detection. Specialized test systems that perform automated scanning will use immersion transducers in the same frequency range.
Ultrasonic Flaw Detection Procedure for Castings
The granular nature of both ferrous and nonferrous castings presents a challenge to ultrasonic flaw detection because of the reflections generated by grain boundaries, with the amount of grain scatter noise increasing as grain size increases. As in thickness gauging applications, the rough surface typically found on sand castings impairs sound coupling and reduces echo amplitude. These factors determine the minimum detectable defect size in any given test. For this reason, it is important to pay careful attention to transducer selection and instrument setup.
The recommended procedure is to optimize transducer selection and setup. This is done with the aid of reference standards representing samples of the parts to be inspected that contain known defects identified by destructive testing, radiography, or other non-ultrasonic techniques. The indications from these known defects can then be stored and compared with indications from test pieces. Bandpass filtering, as found in the EPOCH 650 and EPOCH 6LT flaw detectors, is helpful for reducing grain scatter noise.
Figures 3 and 4 show a typical test for porosity in a 40 mm (1.6 in.) iron casting using an EPOCH 650 flaw detector with a DHC709-RM (5 MHz, 12.7 mm [0.5 in.] diameter) dual element transducer. Figure 3 shows the back wall echo from the casting at the right side of the screen, along with typical low-level surface noise and grain noise along the baseline. Figure 4 shows an indication from a void defect, which is readily identifiable against the background noise.
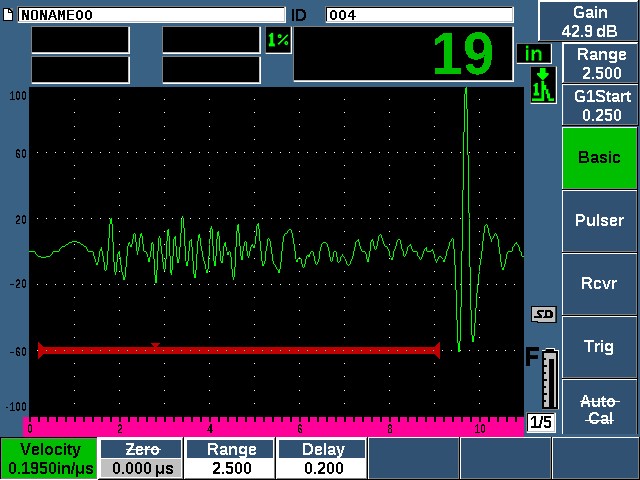
Figure 3. Good area of casting.
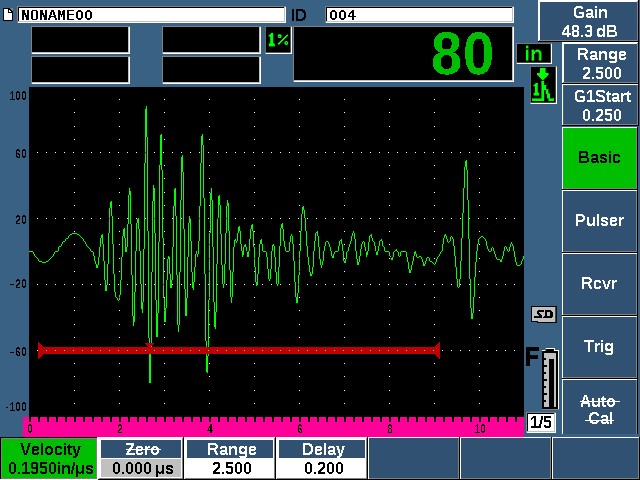
Figure 4. Porosity indication.
While the most common flaw detection application in castings involves voids, porosity, and inclusions, some users also need to check for cracks or fractures. Crack tests must always be developed with respect to the specific geometry of the casting, as well as the location, size, and orientation of suspected cracks. Also, crack tests must use appropriate reference standards containing known or artificially induced defects. Straight beam transducers are used when the crack face is parallel to the transducer coupling surface. Angle beams are used when the crack is perpendicular or tilted with respect to the coupling surface. Note that due to the lower sound velocity in cast iron and nonferrous castings, the actual refracted angles of wedges designed for use on steel will be lower. These angles should be recalculated by means of Snell’s law whenever conventional steel wedges are used on other materials.
Nodularity Testing of Castings
Our precision thickness gauges are recommended for nodularity testing as they can provide a direct readout of sound velocity based on an entered part thickness. These instruments include the 72DL PLUS, 39DL PLUS, and 45MG thickness gauge with Single Element software. The High Penetration software options for the 39DL PLUS and 45MG gauges are recommended if the metal thickness exceeds about 12.5 mm (0.5 in.) It is also possible to use any EPOCH series flaw detector and obtain velocity information by performing a velocity calibration procedure. Read more about nodularity testing in our application note, Measuring Nodularity in Cast Iron.

