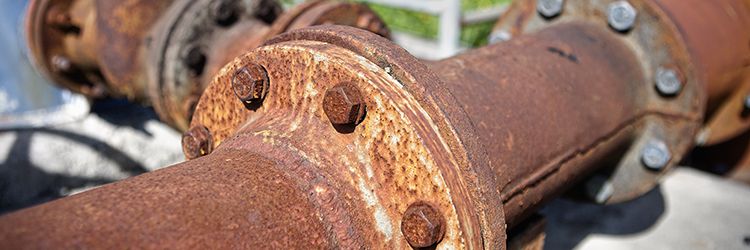
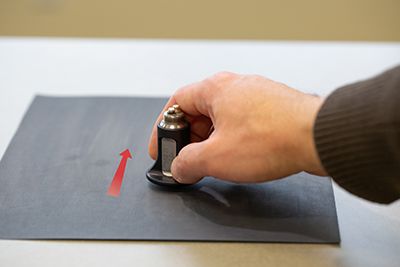
Dual element transducers need to be tough. They’re routinely used on many types of surfaces, ranging from rough to reasonably smooth, painted to corroded, and freezing to very hot. Even though they’re tough, they’re still subject to wear.
You can prolong the life of your transducer by making sure that you’re applying the least amount of pressure possible when making measurements. For example, if the surface is so rough that it’s difficult to obtain a reading, grinding the transducer into the surface probably won’t improve the results, but it will wear away the transducer. Similarly, if the application requires you to scan over an area to detect a minimum thickness, scan with the lightest pressure possible. If the surface is very rough, try to smooth the surface roughness to reduce transducer abrasion while scanning.
Even if you’re careful, the transducer will still wear. When it wears down to the point that the gage is having trouble making measurements, you can sometimes resurface it to extend its useful life.
Problems with worn transducers
When a transducer is pressed onto a rough surface, its delays will wear at a faster rate than the metal ring that surrounds them. As the transducer’s surface wears away, its efficiency will diminish because the couplant layer required to fill the gap between the transducer face and the object being measured becomes thicker. If the couplant layer becomes too thick, too little sound energy will be transmitted into the test object, and the transducer will appear to lose sensitivity. Another side effect is that your thickness gage may have difficulty performing a “Do ZERO”. If either of these occur, it’s time to try resurfacing the transducer.
Resurfacing your transducer
Resurfacing can bring your transducer back to a ‘like new’ condition. The resurfacing process consists of abrading or “sanding” back the metal ring to a point where the entire contact surface of the transducer is flat. Just follow these 3 simple steps.
Step 1: Choose an abrasive sheet with the correct grit
The first step is to place a silicon carbide (or equivalent) abrasive sheet with the proper grit on a flat plate. Note that some types of transducers sand best when dry and others sand best when wet (water). The chart below is a handy reference.
| Transducer | Grit | Sanding Type |
| D790, D791, and D799 | 400 | Dry |
| D7912 and D7913 | 600 | Wet |
| D794 | 600 | Wet |
| D797 | 400 | Wet |
| D798 and D7226 | 400 | Dry |
| D7906 and D7908 | 400 | Wet |
| MTD705 | 400 | Wet |
| Finger Tip Duals D7xx | 400 | Wet |
| Extended Range Dual D7xxx | 400 | Wet |
| Flush Case Duals DHC7xx | 400 | Wet |
| Atlas DL2 Series | 400 | Wet |
| Atlas DL4 Series | 400 | Wet |
Step 2: Carefully sand the transducer’s face
It’s important that the transducer’s face is sanded both flat and perpendicular to the longitudinal axis. If the transducer is allowed to rock and produce a “rounded” face, or if the face is sanded at an angle, it may be very difficult or impossible to correct.
Most thickness gage dual element transducers have a wear ring around the transducer tip. This wear ring is a reference line that indicates the maximum amount of material that can be removed when resurfacing. When the contact face of the transducer reaches the wear line, the transducer must be replaced. This line can also be used as a reference when resurfacing—the contact face of the transducer should always be parallel to the wear line. | 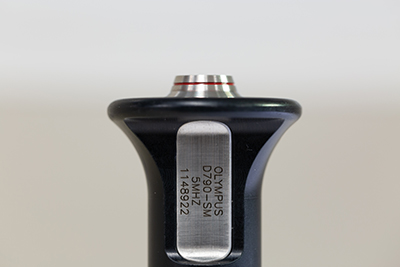 The red line on the transducer is the wear ring. Once your transducer wears to this point, it can’t be resurfaced and must be replaced. |
Step 3: Test your resurfaced transducer
After resurfacing a thickness gage dual element transducer, connect it to your thickness gage and check that the “Do ZERO” function works reliably. You’ll also want check that the transducer measures properly on test blocks or known test standards. If the transducer doesn’t function correctly, return it to Olympus for evaluation. Olympus is not responsible for transducers that are damaged due to improper resurfacing.
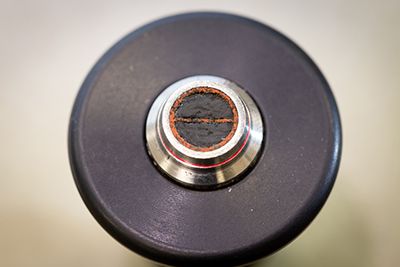 Before resurfacing. Notice the delay is recessed and pitted. | 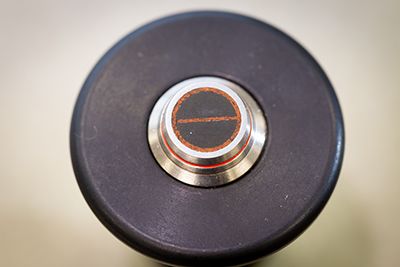 After resurfacing. The delay is flush with the case and smooth. |
Related Content
Video: D7912 and D7913 Dual Element Transducers
An Introduction to Ultrasonic Transducers for Nondestructive Testing
Frequently Asked Transducer Questions
Get In Touch
