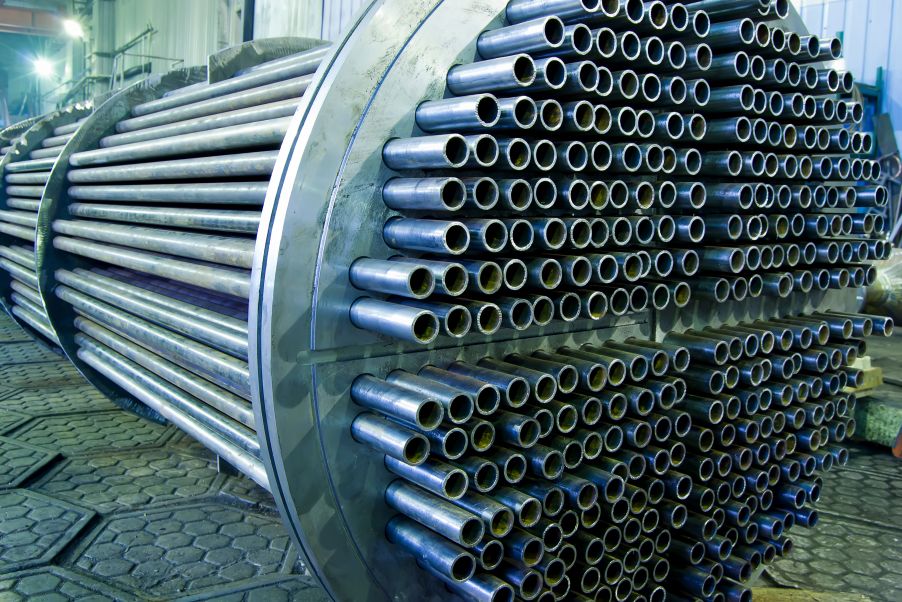
In the heat of summer, many of us are thankful to have an air conditioner to cool down. At the heart of many large-scale air conditioning systems is a heat exchanger that’s full of hundreds of tubes used to regulate temperature. As you might imagine, inspecting all these tubes for corrosion can be a difficult task.
Heat exchangers are common; they’re used in both heating and cooling in power plants, chemical plants, refineries, sewage treatment plants, and many other places. The tubes inside the heat exchanger are regularly inspected to look for wall loss or other types of corrosion that could cause the exchanger to fail, potentially causing expensive damage.
Heat Exchanger Tube Inspection
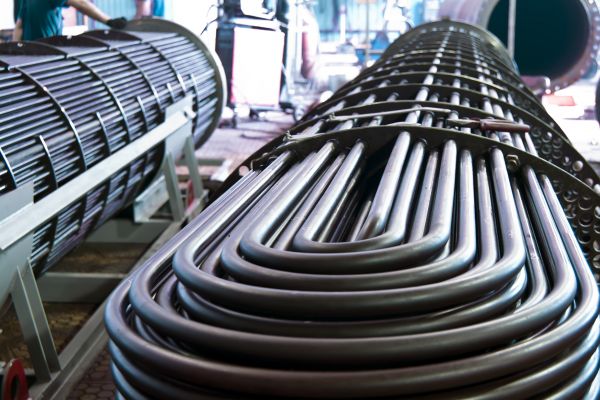
A multi-tube heat exchanger consists of a bundle containing hundreds of tubes. Depending on the conditions, all the tubes can be 100% inspected or partially inspected. Defective tubes are either replaced or sealed off with plugs, effectively eliminating them from use. Since so many tubes need to be inspected, speed and accuracy are critical.
There are 3 methods used to inspect heat exchanger tubes—eddy current testing, internal rotary inspection, and visual inspection with a videoscope—and each have their own advantages.
Method 1: Eddy Current Testing
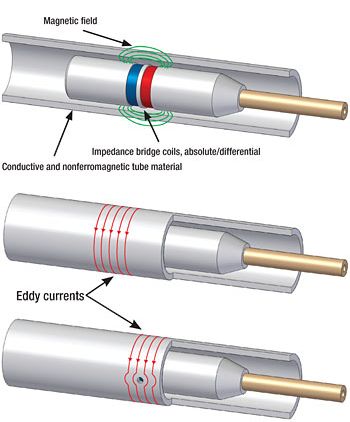
Eddy current testing (ECT) is a noncontact method used to detect and size metal discontinuities, such as corrosion, erosion, wear, pitting, baffle cuts, wall loss, and cracks in nonferromagnetic tubing made from austenitic stainless steel (such as SS304/SS316), brass, copper-nickel, titanium, copper-fin, and Monel. In this technique, a probe is excited with an alternating current, inducing eddy currents in the tube. Any discontinuities or material property variations that change the eddy current flow are detected as potential defects.
An eddy current flaw detector takes these signals and displays them as an impedance plane and strip chart representation. A trained inspector uses the calibration curves to identify the onscreen defects. A major advantage of ECT is speed—an inspector can pull the through the tube probe up to 2m/s (6.6 ft/s).
Method 2: Internal Rotary Inspection System (IRIS)
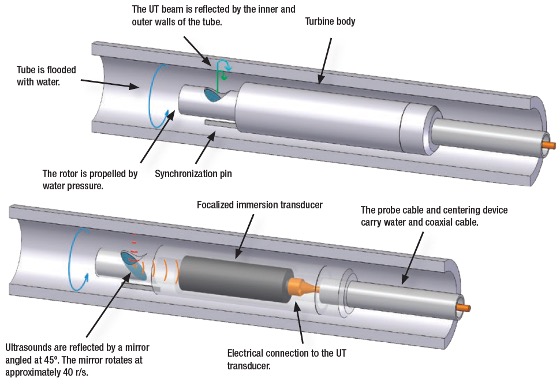
The internal rotary inspection system (IRIS) is an ultrasonic technique often used in petrochemical and balance-of-plant (BOP) tube inspections. IRIS operates in pulse-echo mode where ultrasonic pulses are transmitted and received by the probe to measure wall thickness, material loss, and defect orientation within the range of 0.5 in. to 3 in. ID.
The IRIS probe consists of an ultrasonic transducer firing in the tube’s axial direction. A mirror mounted on a water-propelled turbine deflects the ultrasonic beam to obtain a normal incidence wave on the tube’s internal wall. Because the mirror revolves around the axis, the tube’s entire circumference is examined. A complete IRIS probe includes the cable, a centering unit, a turbine, and a transducer. IRIS scanning speed is limited to 50 mm/s (2 in./s).

An IRIS probe
Method 3: Visual Inspection Using a Videoscope
Remote visual inspection (RVI) is ideal when you need to view inside difficult-to-access areas. Videoscopes have a small sensor chip in the tip of their insertion tubes that enables them to capture video and still images. The sensor sends these images to an LCD screen where they are viewed by an inspector.
With a videoscope, an inspector can view inside the heat exchanger tubes to see what a defect looks like. No special technique is required to operate a videoscope, and setup and cleanup are quick and easy. All you need to do is turn the videoscope on, and you’re ready to perform the inspection.
IPLEX™ series videoscopes offer advanced features that enable inspectors to measure the height and depth of corrosion inside the tubes. Some instruments—like the IPLEX NX videoscope—support 3D modeling to give inspectors an even better understanding of corrosions’ shape and size. Color-mapped 3D images are another advantage, especially for reporting since they clearly communicate a pipe’s condition to the asset owner. Capturing measurement data and creating 3D models is fast and efficient, and no time-consuming calibration is required.
As every inspection method has unique features, you can choose which method best suits your inspection demands.
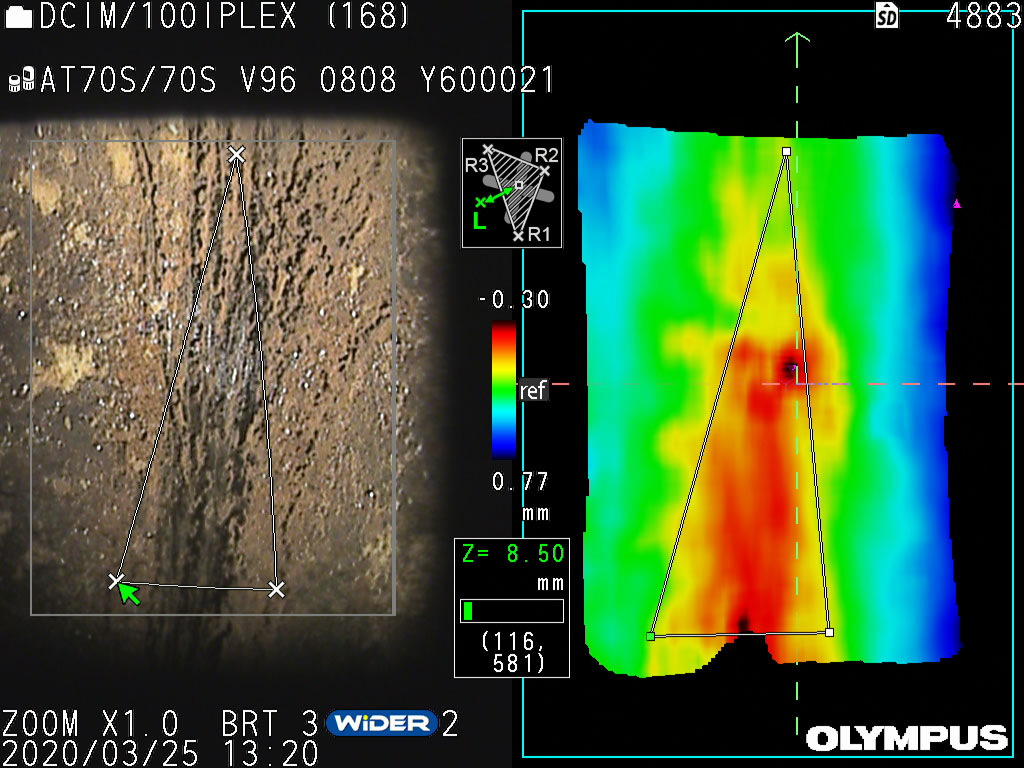
A 3D modeling image
Comparing Heat Exchanger Tube Inspection Technologies
| Technology | Applicable tube size | Features |
|---|---|---|
| Eddy current testing | Approx. internal diameter: 7 mm–105 mm (0.28 in.–4.1 in.) Approx. thickness: 0.56–3.4 mm (0.02 in.–0.13 in.) | Estimate the location of corrosion in a tube Fast The tube’s U-shaped section can be inspected Works on nonferromagnetic materials. |
| Internal rotary inspection system (IRIS) | Approx. internal diameter: 11.4 mm–76.2 mm (0.45 in.–3 in.) Approx. thickness: 1.7–6.1 mm (0.07 in.–0.24 in.) | Precise inspection of a whole tube Inspectors can identify the locations, shapes, and depths of defects Special preparation and cleanup using water are required |
| Remote visual inspection | Approx. internal diameter: 6 mm (0.24 in.) Approx. thickness: None | Corrosion condition inside a tube can be visually observed The outside of a tube cannot be inspected The tube’s U-shaped section can be inspected Defects can be measured Easy to use with no special techniques required |
Tube Inspection Technology Guide
| Eddy current testing | Internal rotary inspection system (IRIS) | Remote visual inspection | ||
|---|---|---|---|---|
| Tube section and material | Outside | ★★ | ★★ | - |
| Inside | ★★ | ★★ | ★★ | |
| Ferromagnetic | - | ★★ | ★★ | |
| U-shaped area | ★★ | - | ★★ | |
| Advantages | Quick defect screening | ★★ | - |
★
To check the visual appearance |
| Detailed inspection and measurement | ★ | ★★ |
★
For identified defects | |
| Fast preparation and cleanup | ★★ | - | ★★ | |
| Easy-to-understand data for clients | - | ★ | ★★ |
Maintaining the safety of critical systems is important, and inspectors need a range of tools to get the job done. We offer all these solutions, so you can choose what you need based on the type of heat exchanger and the goals of your inspection.
Related Content
Corrosion Detection and Measurement using Eddy Current Methods
How to Confirm Videoscope Measurement Points with Confidence
Video: HVAC and Heat Exchanger Tubing Kit using the NORTEC 600D Flaw Detector
Videoscope Inspection of Heat Exchangers
Get In Touch
