Summary
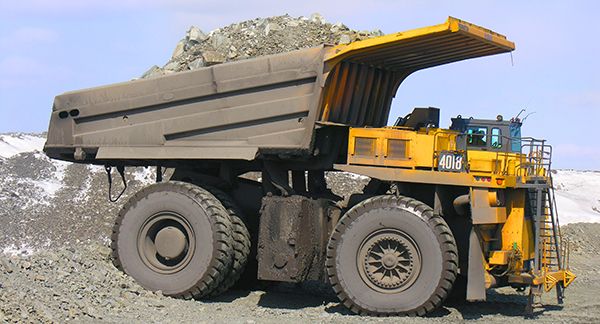
The haul trucks that move copper, coal and other mined resources must be maintained for proper operation and also safety. They often can carry payloads of up to 400 tons and operate for long hours before major service is undertaken. The wheels themselves are under constant strain during operation. The wheel hub holds the wheel to the vehicle making it a critical part of the haul truck itself. A failure of a wheel assembly is costly and could also cause an accident. Wheel hubs are often made of ductile cast steel. Irregularities like voids or inclusions can exist from the casting process manufacturing stage. If these voids are not detected they can become areas that produce cracks or failures when stressed. Cracks can also be formed during the manufacturing stage if some part of the process is not perfected, commonly at radii and thickness transition changes. Cracks can also form in the field due to the daily stresses on these parts or some irregular stress outside of normal rated operation. Inspection can be difficult due to the geometry of the component. Surface nondestructive techniques like dye penetrant can often be utilized to find surface breaking defects but the detection of internal voids, inclusions or cracking can be more difficult.
Dye Penetrant Difficulties
- Only provides inspection of cracks and voids that break the surface
- Requires heavy pre and post cleaning and other preparation including paint removal
- Using chemicals that must be managed
- No saved record besides pictures of crack
Conventional Ultrasound Difficulties
- Deciphering geometry versus crack single A-scan
- Access to areas that need inspection with a single angle
- Single angle means less sensitivity to defects not oriented perpendicular to that angle, typically cracks can occur in many potential directions, sound may not reflect back to sensor to be able to detect, or be blocked by geometry of component
- Data not saved and interpretation left only to inspector and single A-scan
Phased Array Approach
With a manual phased array flaw detector, areas of interest can be inspected from the best surface available depending on the suspected problem area found by other faulty parts or by engineering data. Having a flexible and programmable phase array probe aids in inspecting more areas of the cast part than conventional ultrasound by utilizing the multiple sound beam angles. This allows for detecting volumetric defects not able to found with dye penetrant. Multiple angles help in detecting cracks that may be oriented away from the only access point to inspect from and also increases chance of properly positioning and characterizing the indication correctly. Imaging across the angles helps decipher geometry over defect.
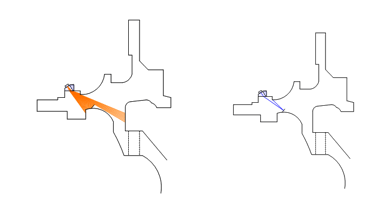
Cross section of Wheel Hub and Access Areas with Conventional Ultrasonics and Phased Array to Inspect Radius
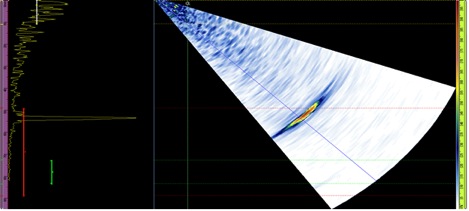
Surface Breaking Crack in Radius of Wheel Hub

Volumetric (Internal) inclusion or void found in Wheel Hub
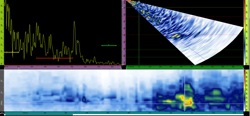 | 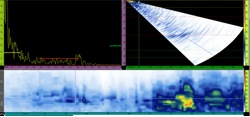 |
Area of Larger Grain and Area of Smaller Grain Structure found in Cast Wheel Hub
Summary of the Benefits of the Phased Array Method
- Time savings, it can inspect from fewer surfaces and setups and detect both internal and external defect over other methods
- Increased probability of detection due to multiple angles
- Less false calls due to geometry with aid of imaging
- Data files of indications (S-scans) can be saved with all raw data for aid in reviewing and discussing indications for proper disposition
- More areas of the cast can be inspected
- Material properties like grain size can be investigated along with process or stress induced defects
- No harsh chemicals to be managed
- Minimum surface prep compared to dye penetrant, tightly adhered paint can remain
Equipment Used
- OmniScan flaw detector (OmniScan MX2 or OmniScan SX most common)
- 16 element or greater phased array probe
- Shear Wave Phased Array Wedge
- Couplant
Conclusion
Wheel hubs are critical components in heavy haul trucks and other heavy machinery. Failure at the mine site or while transporting can be costly or a safety hazard. Phased Array ultrasound offers a good tool to be able to investigate these cast steel components at the manufacturing stage or in service. Manual portable units can be quickly programmed to best inspect critical areas without equipment change and small phased array probes do not require a large area to inspect from but offer large inspection coverage areas.
