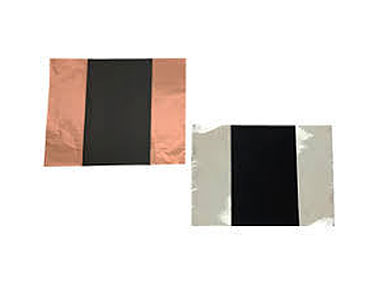
Positive electrode(Left) Negative electrode(Right)
Application—Surface Roughness Checks of Electrode
Lithium-ion batteries charge and discharge because their lithium ions can move in both directions between positive and negative electrodes. Until recently, they had been mainly used in compact form in PCs, mobile phones, and digital cameras, but the demand is increasing for lithium-ion batteries with an electric capacity that is large enough for electric vehicles (EVs).
The basic process for manufacturing an electrode for lithium-ion batteries is as follows:
- Apply an electrode slurry material to a metal foil sheet called a collector.
- After the electrode slurry is dry, press the sheet.
- Using a slitter or cutter, cut the sheet into pieces of a specified size.
The electrode material on the sheet needs to have proper surface roughness to securely adhere to the separator. For this reason, surface roughness measurement using a roughness measuring instrument is necessary.
There are various types of surface roughness measuring instruments, but to accurately measure the surface roughness of electrodes, the options are limited. With contact-type roughness gages there is a risk of damaging the electrode surface, while interferometers are unreliable because the black electrodes absorb the light they use for measurement.
Olympus’ Solution Using the LEXT OLS5100 Microscope
The noncontact measurement of the LEXT OLS5100 3D laser scanning microscope is well-suited for measuring surface roughness of large electrodes for several reasons:
- The noncontact measurement method eliminates the risk of damaging the electrodes as well as collateral data errors.
- Even though electrodes are black and have a very low light reflectivity, only a minute amount of reflected light needs to be captured to acquire the required data.
- Using an optical system exclusive to laser microscopes, the LEXT OLS5100 microscope enables you to acquire data that is accurate to the center of the field of view as well as the area around it.
- Various kinds of data can be stitched horizontally, enabling acquisition of surface roughness data for a wide area.
- Roughness measurement using Olympus’ LEXT OLS5100 microscope system enables simultaneous observation of the pseudo color, 3D images, and height information of a laser microscope and real color images of an optical microscope. Inspectors are able to obtain a numerical value for the roughness and combine that data with their observation of images of the actual texture of the electrode for a better understanding of the state of the electrode’s surface.
Images

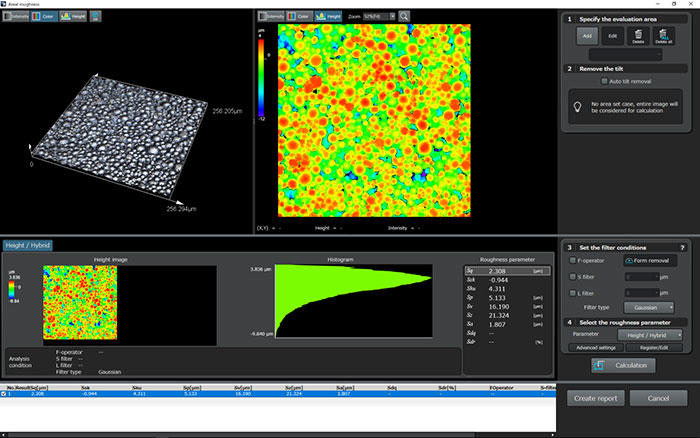
Example of roughness measurement of a positive electrode

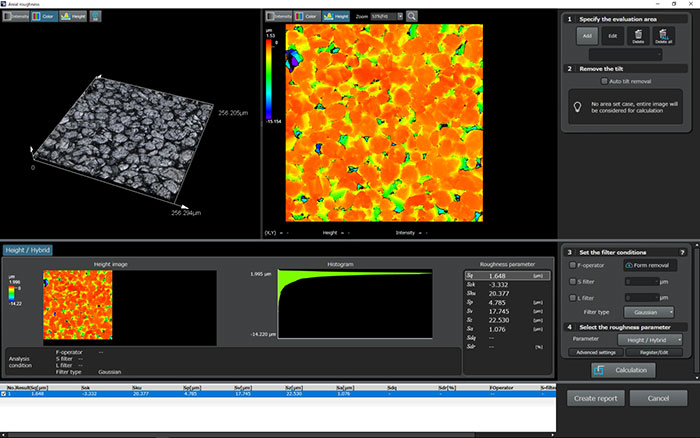
Example of roughness measurement of a negative electrode

