When discussing material quality, the hardness of a material is an important parameter for quality control, development of new alloys, and materials-related tasks.
In this post, we answer several key questions about material hardness and explore how it’s measured using macrohardness and microhardness tests. Plus, read on to explore a simple software workflow to make microhardness testing easier according to the methods of Vickers and Knoop.
What Is Hardness?
Hardness tells you how well a sample resists deformation—its change of size or shape due to physical forces. The ability to measure and compare the hardness of materials objectively is key to selecting the right one for a suitable application.
How Is Hardness Tested?
Hardness is measured through a test where an indenter is pressed into the surface of the material under a specific force for a standardized amount of time. This test can be applied to a wide range of materials, including metals and alloys, ceramics, polymers, and films.
Macrohardness vs. Microhardness Testing: What’s the Difference?
In general, larger samples are tested through macrohardness testing, while smaller parts are measured through microhardness testing. Both are performed according to international standards, such as the International Organization for Standardization (ISO) and American Society for Testing and Materials (ASTM).
Here’s an overview of the two methods:
1. Macrohardness testing
Macrohardness testing measures the hardness of a material on a larger scale under heavy loads, typically over 1 kg or about 10 newtons (N). Inspectors use this test for materials and samples that are large and robust enough to withstand the heavy loads applied during the testing process.
Examples include materials and equipment used in the automotive, aerospace, construction, manufacturing, and metalworking industries.
2. Microhardness testing
Microhardness testing measures the hardness of a material on a microscopic scale under smaller loads, typically under 10 N. Inspectors use this test for materials and samples that are small, thin, require precise measurements at the microscale, or cannot withstand macrohardness testing.
Examples include thin films and coatings, small components, and plated surfaces. This method provides critical insights into the microstructural features within a material, so it’s often used for failure analysis, materials science research, and quality control in manufacturing.
Comparing Microhardness Tests: Vickers vs. Knoop
During a microhardness test, a diamond indenter is pressed into a sample's surface with a defined force for a specific duration. This test is performed according to the method of Vickers or Knoop. Here are some key differences between these two tests:
1. Vickers microhardness testing
For microhardness testing according to Vickers, the indenter is a diamond in the form of a square-based pyramid with an angle of 136 degrees. This square shape makes the Vickers hardness test more suitable for small, round samples.
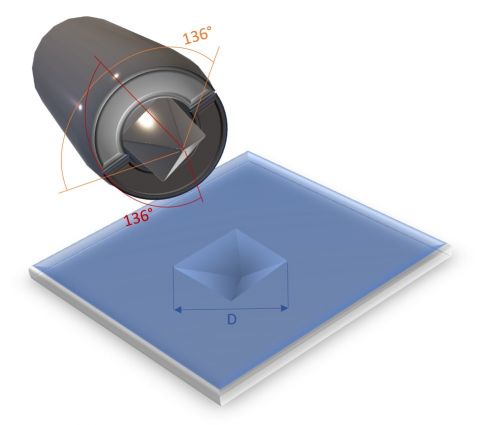
Microhardness testing according to Vickers
2. Knoop microhardness testing
For microhardness testing according to Knoop, the indenter has the shape of an extended pyramid. It has a length to width ratio of 7 to 1 and angles of 172 degrees for the long edge and 130 degrees for the short edge. This rectangular shape makes the Knoop method a better fit for small, long samples.
The Knoop method also creates a small, shallow indentation, making it preferrable for thin samples such as foils, closely spaced indents, or indents near the sample’s edge. The loads are also typically lighter than Vickers for testing brittle samples.
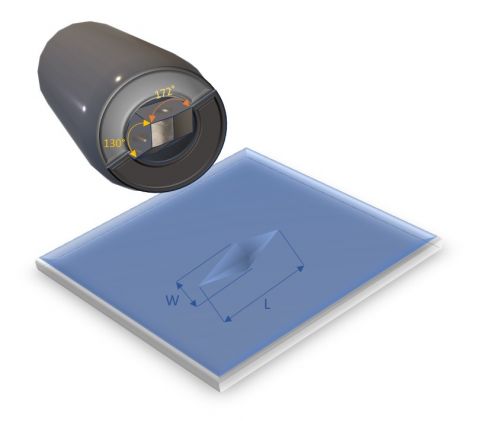
Microhardness testing according to Knoop
Observing and Measuring the Indent Using a Microscope
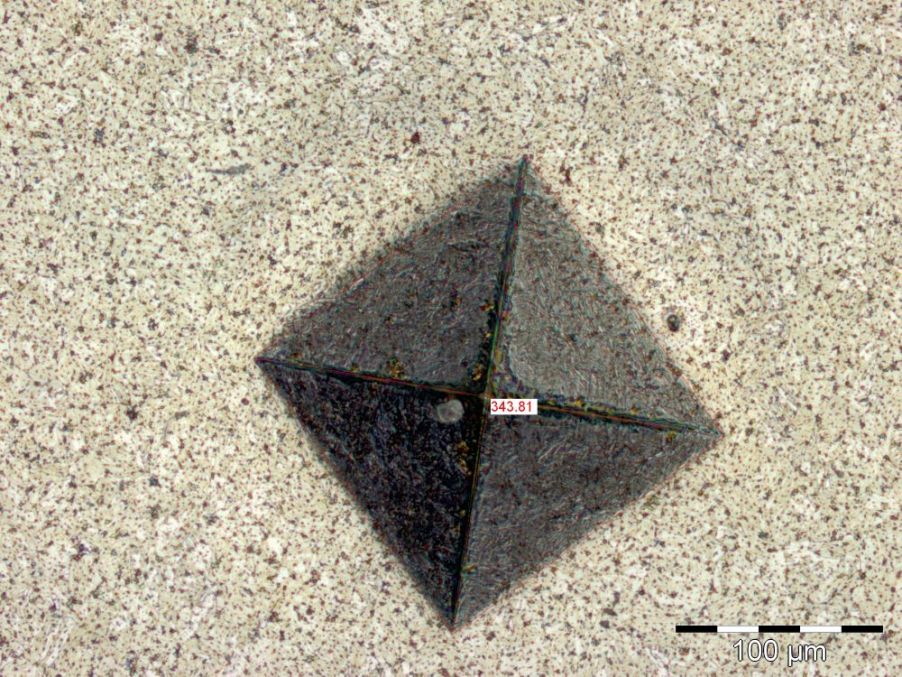
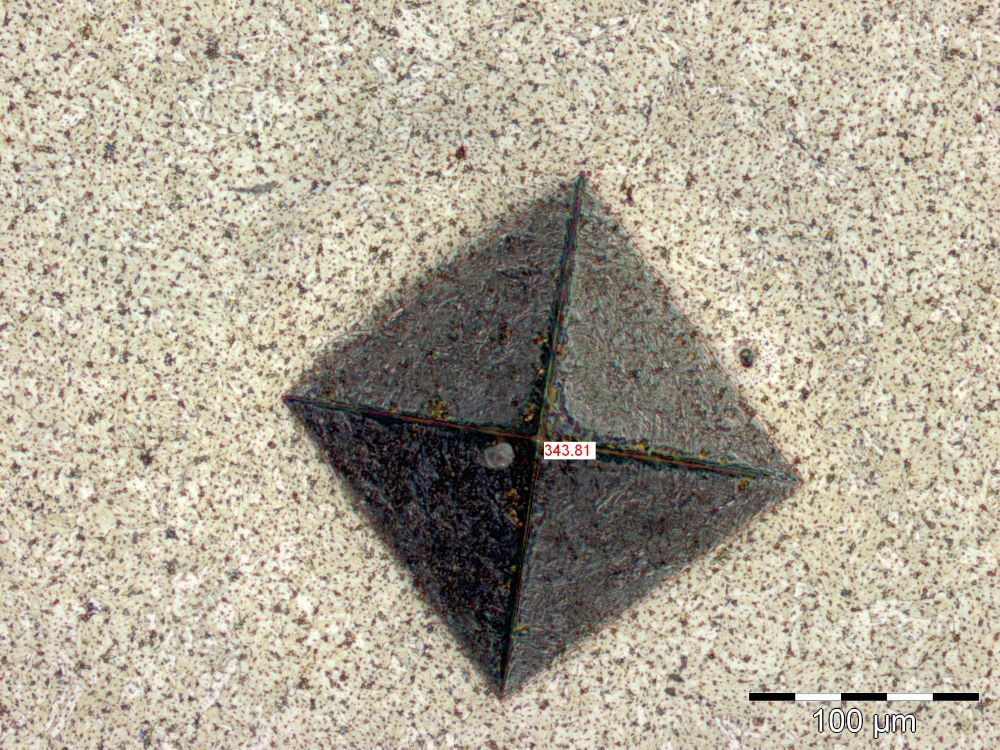
After the indent is made during a microhardness test, an inspector observes and measures it under a microscope. These measurements provide a hardness number that determines the resistance of the sample to material deformation from a constant compression load.
The hardness number is based on the measurements made on the indent formed in the surface of the sample, in which the applied force is divided by the surface area of the indent, giving the hardness unit as kilogram-force per square millimeter (kgf/mm²).
- For the Vickers test, both the diagonals of the indent are measured, and the average value is used to compute the Vickers hardness number.
- For the Knoop test, the length of the indentation along its long axis is used to compute the hardness number.
A Customized Software Workflow for Microhardness Testing
To simplify this measurement process, we created a special software workflow. Our PRECiV™ customized solution for microhardness testing determines the hardness number according to Vickers or Knoop.
To select the microhardness testing solution, use the materials solution workflow in the right tool window of PRECiV software. The workflow area guides you through the measurement procedure according to your selected method of Vickers or Knoop.
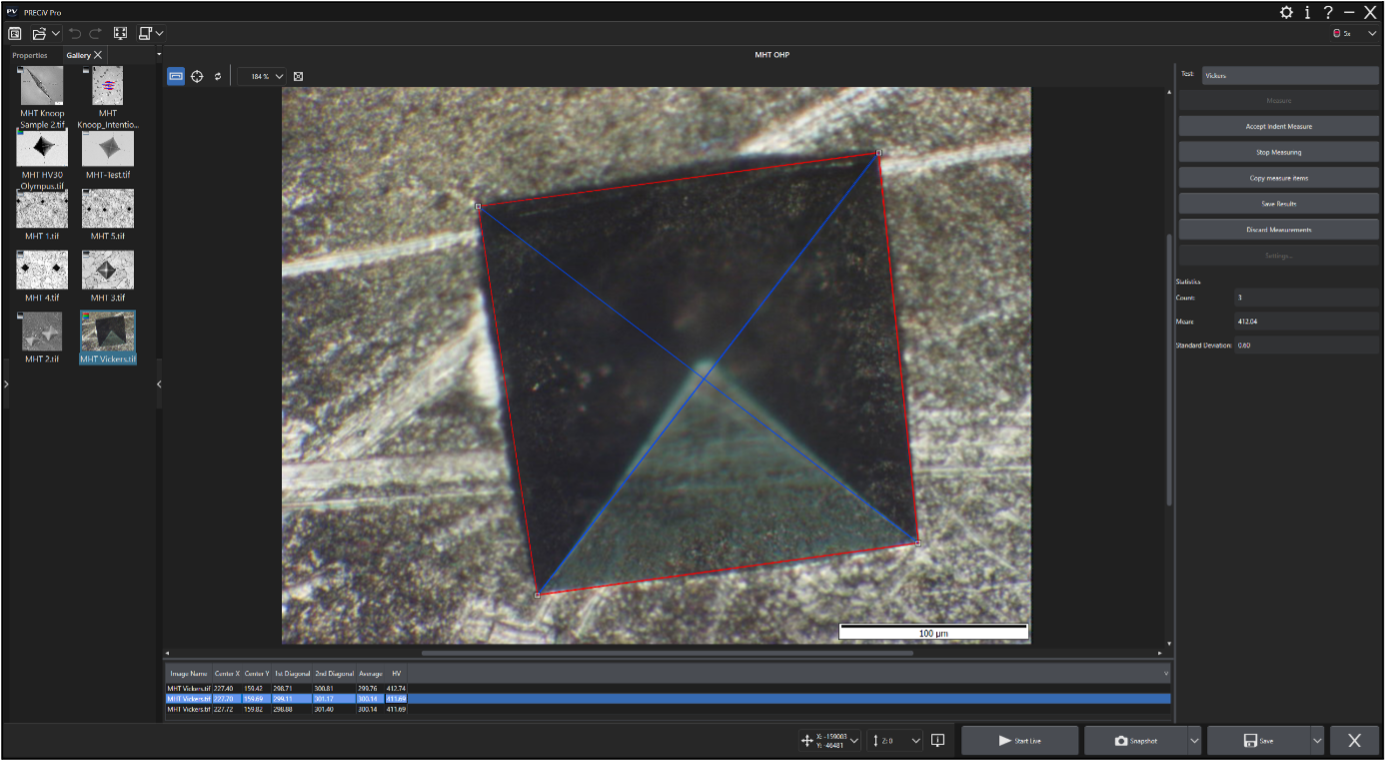
Calculate of the hardness of a sample and the depth of the indentations using the customized solution for microhardness testing in PRECiV software.
Once the measurement is done, the results are displayed in the sheet area of the tool window. Here you can find the hardness number, length of the diagonals, and coordinates of the intersection. Also, a statistic of the measurement is displayed in the workflow area on the right.
The save results button exports the data and the sample-specific parameters either as an Excel workbook or Excel-compatible file.
See the full process in the following video! Feel free to reach out to our team with questions or to set up a demo of this measurement workflow.
Related Content
Video: Introducing PRECiV 2.1: Revolutionize Your Image Analysis
