WeldROVER

Overview
Weld Inspection—Motorized One-Axis Scanner
The WeldROVER™ scanner is designed for customers that require a more stable inspection than what can be provided by manual scanners but need an instrument that’s more economical than the high-production zone-discrimination systems typically used in offshore pipeline construction.
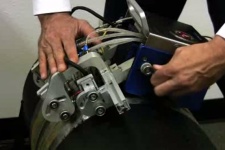
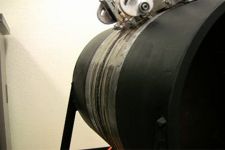
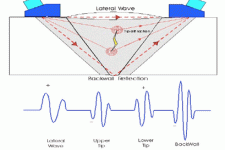
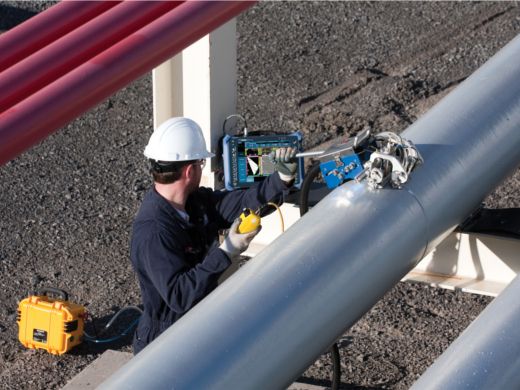
The WeldROVER scanner is a simple, industrial-strength, one-axis encoded scanner that provides fully mechanized automated data acquisition. It is designed to make fast, efficient phased array inspections on ferromagnetic piping or vessel girth welds and long seams with minimal training and setup time. The scanner can be configured with up to six probes for phased array, TOFD, and conventional UT inspection.
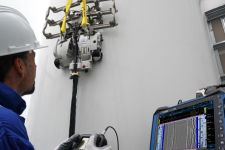
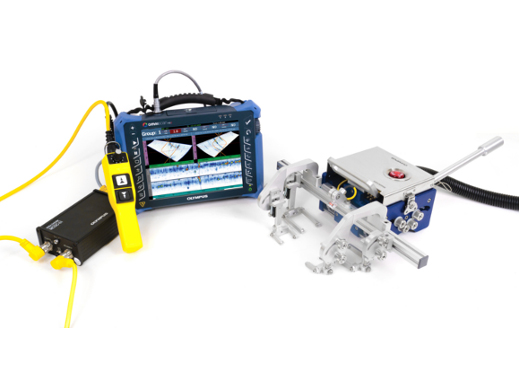
Easy to use, the WeldROVER scanner is operated by a simple two-button remote control with variable speeds. The scanner directly interfaces with OmniScan® and FOCUS series flaw detectors without the need for complex software, motion controller electronics, or configuration. A laser-guide indicator helps you manually adjust the scanner direction using the steering lever. This makes it easier to acquire precision data without the need for guide bands, complex tracking systems, or motorized steering capabilities. It is the perfect fit for a company offering fully mechanized, automated phased array (AUT) inspection services. Less than one hour of training is required for customers that have completed the basic OmniScan course.
Features
- Can support up to six probes for TOFD, phased array, or pulse-echo inspections
- Constant scanning speed control for smooth data acquisition at any speeds
- Compact motion controller allowing 10 different scan speeds from 5 mm/s to 50 mm/s
- Simple two-button remote control for jog or constant encoded motion either in backwards or forward direction
- Data acquisition using OmniScan or FOCUS instrumentation with less than 5 minutes configuration time
- The four industrial-strength magnetic wheels are driven for use on ferromagnetic surface
- Integrated water manifold for simple and efficient couplant delivery
- Emergency-stop button located on the scanner
- Laser guide indicator helps the operator to follow the weld centerline or any other inspection reference
- Room to integrate a remote pulser/preamplifier for improved TOFD-P/E inspections
- Divisible cable conduit umbilical offers cable protection and configuration flexibility. Minimal time needed for probe reconfiguration.
- Waterproof (IP65)
Specifications
Specifications
Scanner speed: 5 mm to 50 mm per second
Encoder resolution: 2100 steps/mm (typical)
Power consumption: 90 W
Maximum input current: 4 A
Voltage: 24 VDC
Power supply input voltage: 100 VAC or 240 VAC, autoswitching
| Component | Length (mm) | Width (mm) | Height (mm) | Weight (kg) |
| Scanner with long bar and 6 probes | 430 | 340 | 175 | 12.0 |
| Scanner with small bars and 4 probes | 380 | 200 | 175 | 11.0 |
| MCDC-01 motion controller | 175 | 110 | 60 | 1.5 |
| Power supply | 200 | 85 | 50 | 1.0 |
| Remote control | 230 | 50 | 90 | 0.8 |
Standard inclusions
- Motorized scanner with rotating probe-holder arms at the front and back of the scanner
- 2 frame bars for probe-holder fixation of 200 mm (8 in.) and one of 340 mm (13.4 in.)
- Remote control with 5 m cable
- MCDC-01: one-axis DC motion controller
- Encoder cables linking MCDC-01 to the OmniScan®
- 6 spring-loaded arms (SLA) pivoting probe holders and all brackets needed for the different configurations
- 4 TOFD-P/E 31.75 mm yokes
- 2 PA 40 mm x 55 mm yokes
- 2 PA 40 mm x 65 mm yokes for PWZ1 probes
- Irrigation tubing and fittings
- Laser guide and holder
- Two steering lever
- 5 m divisible conduit for cable protection and attachment to the scanner.
- Power supply
- Scanner and accessories hard carrying case
Note: All cables for scanner operation are 5 m.
Probes and wedges are not included with the scanner.
Configurations
A typical configuration is two PA probes and one or two pairs of TOFD probes to comply with the ASME codes.
Circumferential scan:
- Supports two probes at the back and two at the front of the scanner on pipes from 4 in. OD and up
- Supports up to four probes at the front of the scanner on pipes from 12 in. OD and up
- Supports up to six probes at the front of the scanner on pipes from 16 in. OD and up
Longitudinal scan:
- Supports up to six probes at the front of the scanner on pipes from 30 in. OD and up
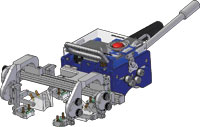 Supports up to 6 probes at the front of the scanner on pipes from 16 in. OD and up for circumferential scans and from 30 in. OD and up for longitudinal scans. | 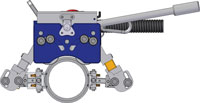 Supports two probes at the back and two probes at the front of the scanner on pipes from 4 in. OD and up. |
Options
- Electrical water pump (P/N: CFU03)
- Manual water pump (P/N: WTR-SPRAYER-8L)
- TomoScan Focus LT encoder cable adaptor (P/N: C1-DE15F-BXM-0.30M)
- Extra 5 m divisible cable conduit (P/N: OPTX0719)
- Extra spring-loaded probe holder (P/N: WELDROVER-A-SLA)
- Extra laser guide (P/N: WELDROVER-A-LASER)
- Modular instrument and accessories hard-carrying case. The modules can be used to transform the scanner case into a workstation. (P/N: WELDROVER-A-ICASE)
- Spare parts kit (P/N: WELDROVER-A-SPKIT)
For TOFD inspection:
- TRPP-5810 2-channel pulser/preamplifier (P/N: TRPP-5810)
- 5682 1-channel preamplifier (P/N: 5682)
- TOFD probes and wedges (see ordering information table)
- Extra TOFD/PE 31.75 mm yokes (P/N: ADIX689)
- UT probe cables
- 5 m UT RG174 coaxial cable with LEMO-00 to LEMO-00 connectors (P/N: C174-LM-LM-5M)
- 5 m UT RG174 coaxial cable with LEMO-00 to Microdot connectors (P/N: C174-LM-UDOT-5M)
- 0.45 m UT RG174 coaxial cable with LEMO-00 to Microdot connectors (P/N: C174-LM-UDOT-0.45M)
For Phased Array inspection:
- PA probes and wedges (see ordering information table)
- 0.5 m PA extension cable with four UT connections
(P/N: E128P0-0202-OM) - PA probe splitter (P/N: OMNI-A-ADP05)
- Extra PA 40 mm x 55 mm yoke (P/N: ADIX655)
- Extra PA 40 mm x 65 mm yoke for PWZ1 probes (P/N: ADIX1082)
