What Is an Ammonia Scrubber?
Ammonia scrubbers are used by the chemical processing industry to remove hazardous ammonia fumes from the exhaust air stream of processing plants. To clean the ammonia gas from the air, ammonia scrubbers use a chemical agent such as dilute sulfuric acid.
Because they are subjected to highly corrosive conditions, ammonia scrubbers are made of corrosion-resistant material, such as fiberglass reinforced plastic (FRP). Chlorine is another corrosive gas used in chemical manufacturing, and chlorine service pipes and tanks are also mostly made of FRP. This material has the advantages of being lightweight and more corrosion resistant than most 300 series metals. FRP is also less costly than corrosion-resistant metals such as nickel alloys or titanium.

Figure 1. Exhaust tower of a chemical processing plant that produces ammonia-based fertilizer
Challenges of Inspecting FRP Using Ultrasound
An ammonia scrubber’s FRP components wear and degrade over time, so it’s critical for chemical processors to inspect them on a regular basis to avoid a system failure. It’s a challenge to inspect FRP components such as flanges using conventional ultrasonic testing (UT) because the material attenuates sound, and the flange is irregularly shaped.
Solution Using an OmniScan X3 Series Flaw Detector and a DMA Probe
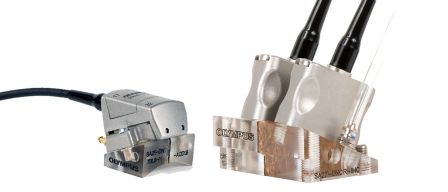
Our solution involves a Dual Matrix Array™ (DMA) probe to perform a phased array (PA) transmit-receiver-longitudinal (TRL) technique using the OmniScan™ X3 flaw detector. Using this configuration and a setup that pulses low-frequency longitudinal wave ultrasound beams over a wide range of angles, it is possible to fully inspect between the flange’s sealing face and the tapered area, which are susceptible to corrosion and cracking.
Testing the Dual Matrix Array Angle Beam PA Solution
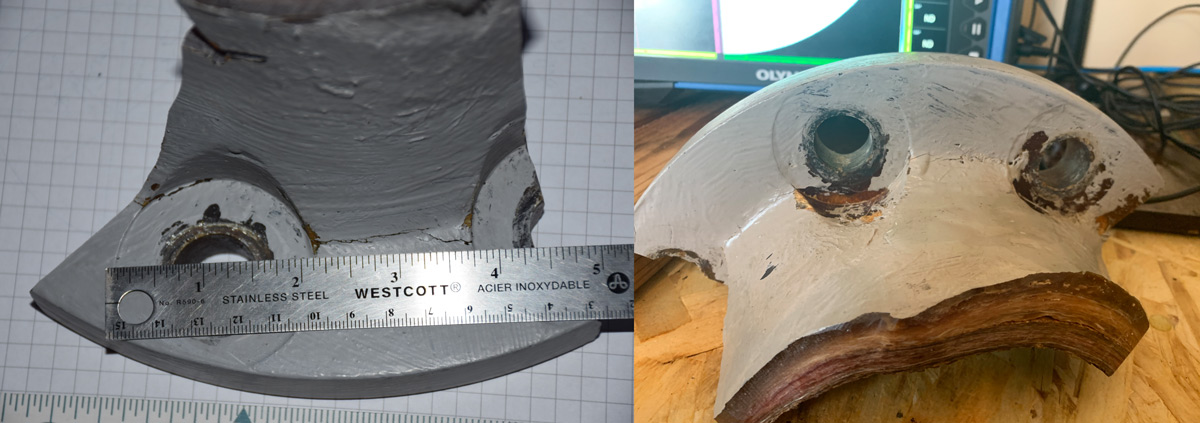
Figure 2. Cracking between bolt holes in a sample cut from an FRP flange
To test the efficacy of our solution, sections of FRP flange containing cracking and internal corrosion (samples provided by engineering consultant firm Consultco) were used as specimens (Figure 2– Figure 4).
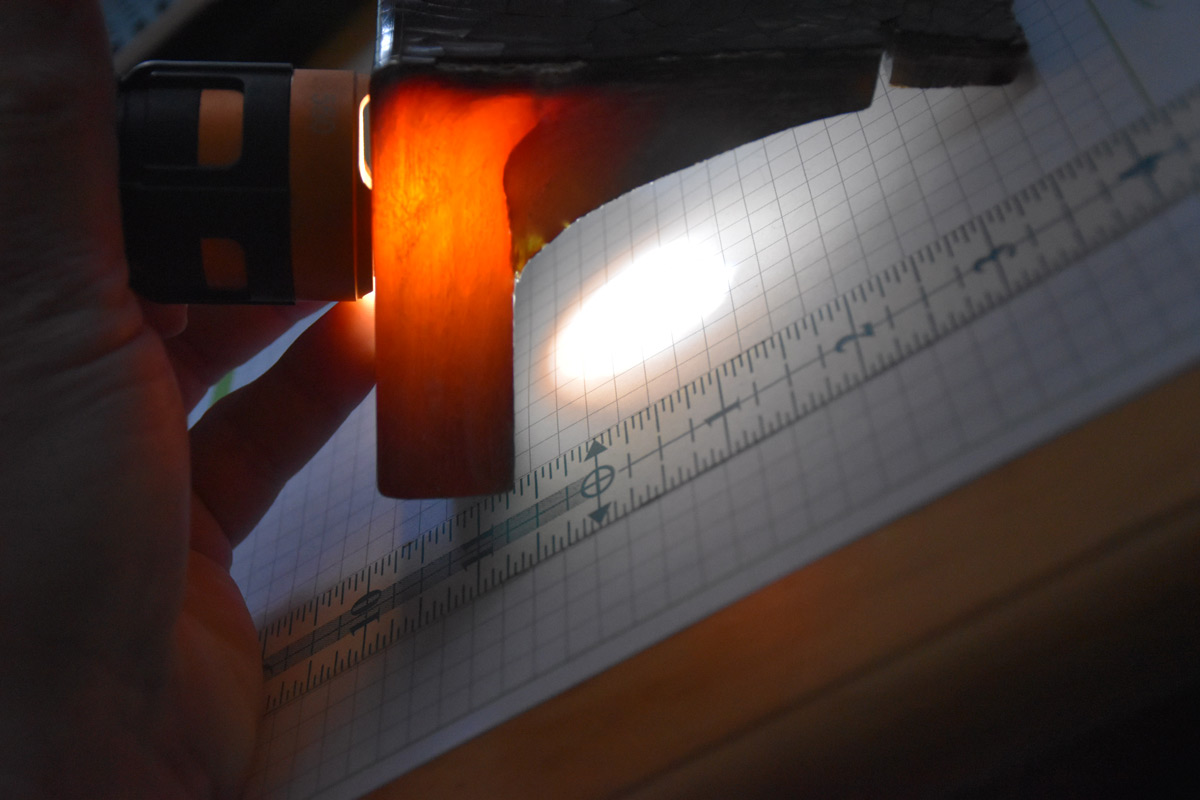
Figure 3. Extent of the cracking made visible using a light source in contact with the sample
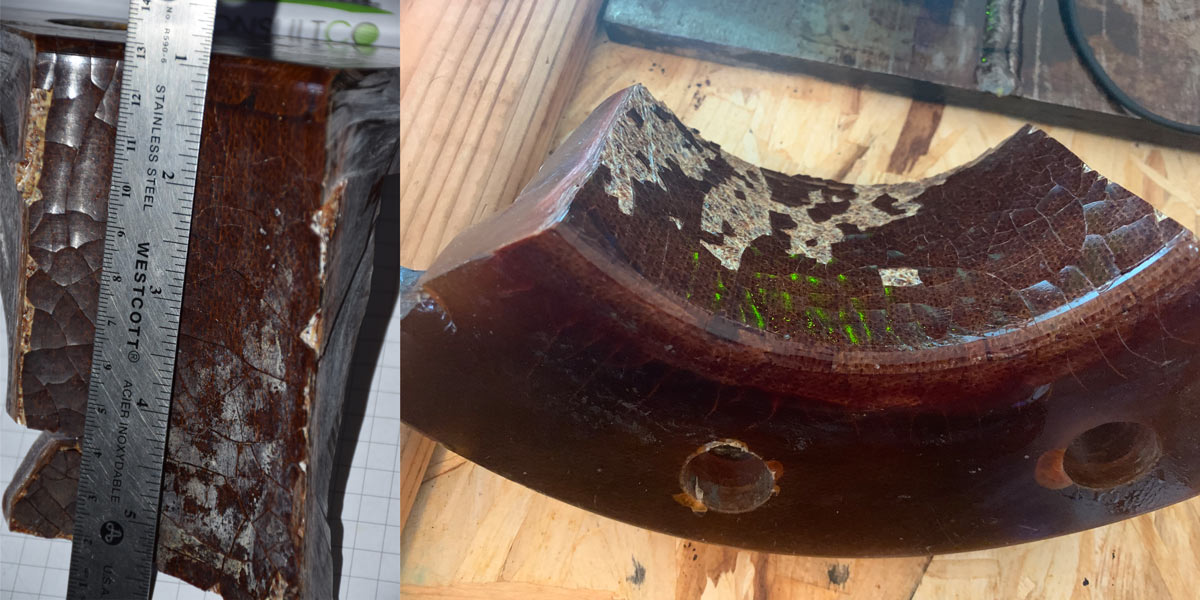
Figure 4. Inside surface condition and corrosion of the FRP
Our preliminary tests showed that although detection of the inside corrosion is possible using the pulse-echo (P/E) phased array technique, the signal-to-noise ratio (SNR) was too poor to conduct a thorough inspection of the part. The material is too attenuative and the inside surface condition too damaged (Figure 4) and skipping ultrasound off the back wall to detect the outside surface-connected crack was impossible using the P/E technique.
The TRL technique, also known as a pitch-catch technique, uses probes with distinct transmitter and receiver sets of arrays, such as our DMA probe. With DMA probes, the collected signals originate only from the area where the beams cross each other. The acoustically separated pulser and receiver arrays enable the size of the wedge to be reduced as no dampening material is required. This means that the probe is closer to the surface and therefore the region of interest, supporting higher sensitivity and avoiding the attenuation caused by long sound paths in the wedge.
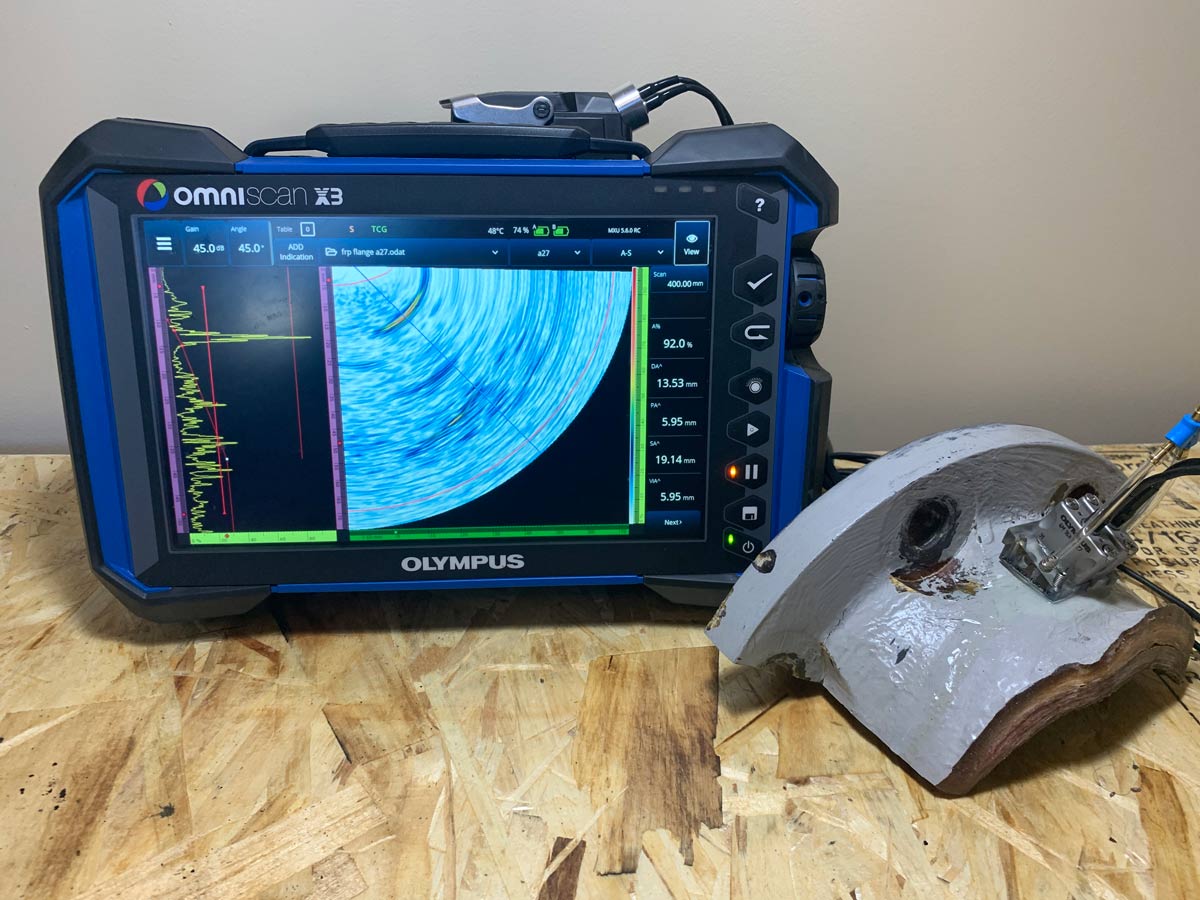
Figure 5. Inspection configuration showing the equipment and sample
Using longitudinal waves instead of shear waves with the DMA probe offered lower interference and better penetration. This resulted in a received signal with a lower noise level, which is key when inspecting noisy, coarse-grained material such as FRP.
Details on the probe and wedge we used:
Probe model: A27 DMA probe
Probe frequency: 4 MHz
Element configuration: 16×2 each (transmitter and receiver arrays)
Wedge’s nominal refracted beam angle: 55° longitudinal wave (LW)
Focusing Strategy
For the surface inspection and detection of the crack, the DMA probe was used (Figure 5) to perform a high-angle, first-leg inspection. The phased array sectorial scan was setup to include angles that reached as high as 89 degrees. Above approximately 78 degrees, all A-scan beams essentially propagated parallel to the surface at a longitudinal velocity. Using this focusing technique, we were able to detect a shallow notch, cracks, and other flaws.
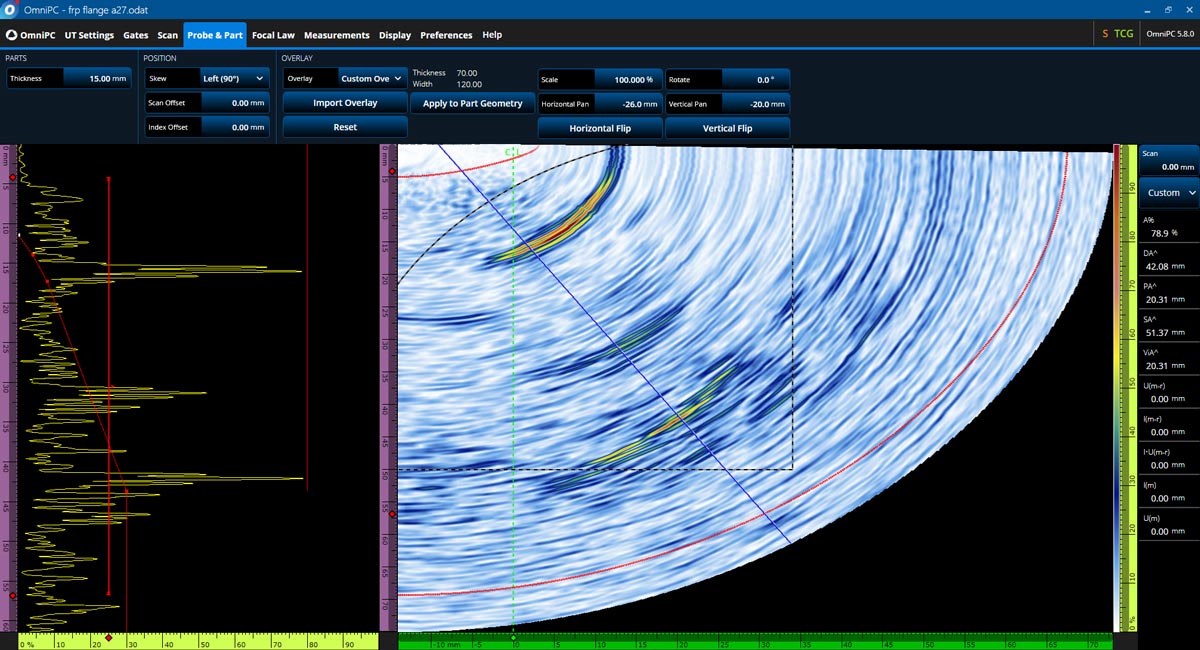
Figure 6. Detection of the crack and inside the corner corrosion
Conclusion: Requirements for Successful PA Inspection of FRP Flanges
Using the DMA probe and OmniScan X3 configuration along with the right probe frequency and focusing strategy, we were able to successfully detect cracks and corrosion in FRP flanges. To facilitate the analysis, the data display (shown in Figure 6) has a custom overlay designed to match the flange sample. Based on the scan results, we were able to detect and assess corrosion damage to the inside corner of the flange as well as the surface-connected crack in the FRP component.

